


How Much Does It Cost To Ski In Europe?
When having conversations with friends, cost is always the biggest factor in preventing them from taking the plunge on their first ski holiday. People often remark about how expensive a skiing holiday can be but does it have to be this way? I have always been good at searching for a deal and as long as you are open minded your ski holiday could cost less than you thing.

More complex than the average beach or city break, the additional costs of; lift passes, ski carriage or equipment hire and ski lessons can soon add up. This is enough to put some people off a trip to the snow, but with some forward planning these additional costs can be reduced and integrated into an affordable ski trip package.

Transport
Flights
Transport to your ski destination can be one of the first things to hit your pocket. With over 1 million brits heading on ski holidays every winter, travel at peak times can mean peak prices!
Looking into flight prices for a ski trip during the school Christmas holiday saw flights on the popular London to Geneva route with British Airways rise from £74pp to £133ppm. This shows the importance of flexibility if you want to get value for your ski holiday this winter.
Cheaper flights were available with budget airlines however these were not inclusive of baggage fees. This is especially important if you are travelling with your own ski gear as with British Airways you ski bag can count in your luggage allowance.
Booking flights early will reduce costs significantly so plan ahead. You can check the latest flight prices here.
Transfers
If you are planning to fly to resort then it is likely you will require either car hire or an airport transport on arrival. For a week car hire for a mid sized vehicle could cost between £350-£400, not so bad when split between a group of you. But when you factor in the cost of petrol and the risk of damaging the car and being hit with exorbitant excess fees a airport transfer can work out as a better option.
There are so many companies operating Airport-transfers in Europe that prices are very competitive. Obviously consider getting a group mini bus to save costs but be aware this may lead to you waiting around at the airport for other passengers to arrive. The last time I took a airport transfer was with GoMassif from Geneva. They were great and cost was around €80 for the round trip.
Train
Not just good for the environment but also friendlier on your wallet, have you considered taking a train to a ski resort? There are many advantages to taking the train, especially if you are travelling with your own ski gear! No luggage weight allowances mean you can pack that bag as full as you like without the risk of incurring excess luggage fees. Not only this but travel by train usually works out cheaper than equivalent flights to Europe. Consider taking the Eurostar from London to Bourg St Maurice where you will be able to ski at the resorts of; La Rosière, Les Arcs, La Plagne, Tignes and Val d’Isère. Check the latest train times and prices here.
Driving
Driving holidays have always been great fun, although now there is certainly a wider appeal. Driving to a ski resort is not only a great way to save money and help the environment but in this modern post Covid world it’s also a great way to avoid contact with lots of other people. Self-drive ski holidays can also offer you the flexibility to travel when you want but also offer freedom of movement when in resort. If you fancy skiing at a different resort, just jump in your car and go! There are also a few negatives with more time spent travelling and less room to move than on a train, but all things considered a self-drive ski trip will suit many.
Be aware that if driving you will need to ensure your car is road legal in Europe for winter driving and this can incur extra costs.
Accommodation
Accommodation costs in ski resorts are not cheap, and this will contribute to a large cost of your holiday. Luckily over the past few years Airbnb and Flipkey have broadened the options available to skiers and snowboarders through private apartment rentals. In turn, this added competition has had a knock on effect on Hotel owners who have had to reduce prices to compete.
Accommodation costs can vary greatly depending on the resort you choose to ski in and your accommodation preferences. It is possible to stay in Samöens in the Grand Massif for between £430 and £1000 based on two people sharing for one week. For same week in January, it is possible to stay in Borovets, Bulgaria for £157pp based on two people sharing. If you are unsure about snowboarding in Bulgaria you can check the Bulgaria snowboarding guide here.
I guess with accommodation it is up to you to decide where you want to save the money.

Ski or Snowboard Rental
If you own your own gear feel free to skip this bit, although you may want to consider the cost of Ski Carriage! Ski Rental can sometimes be combined in some package holidays, which can be cost effective and hassle free. If you are needing to add ski or snowboard rental to your costing then at least there is a degree of flexibility.
Ski rental companies often offer three tiers of packages, Bronze, Silver and Gold. Some will wow you with the exciting Platinum offering but in reality if you are renting skis you probably won’t tell the difference - no judgement.
Depending on your level and the type of skiing you will be doing, you should be able to come to a conclusion as to which package to get. If you are a beginner, stick to bronze, there is little point in investing extra money in a more versatile ski as you will most likely be staying on-piste.
An example Silver package of Boots, Ski’s and Helmet rental will cost €119 for one week in Morzine.
My advice, if you catch the bug and can see yourself skiing or snowboarding year after year then invest in your own gear. Even if you don’t want/need a full ski set up investing in decent boots will lead to a happier time on the mountain.
If you are looking into purchasing your own gear be sure to check my Gear Buying Guides for some advice.

Ski Lessons
Learning to ski or snowboard can contribute to the cost of your ski trip sky rocketing. There are always new things to learn so taking a lesson can be of real benefit, even to experienced skiers and snowboarders. You can save money on lessons by taking half day sessions which give you free time to put your new skills to the test on the mountain. Taking your lesson in the afternoon is often more affordable.
Deciding an appropriate resort to learn in can also make a huge difference to the cost of your ski lessons. Lets compare the cost of ski lessons in Morzine versus Bankso. New Generation ski school Morzine offer a six day 3 hour lesson package for €430 per person. Alternatively, a similar package in Bansko will cost only €115.
If you are a beginner it is unlikely you will make the most of all the terrain surrounding Morzine in the Port Du Soleil so it may be financially more viable to head to Bulgaria or Andorra, where lessons are cheaper.
As you progress you may benefit more from more intense private lessons over shorter time periods. This will allow you to work on your skiing technique and then test yourself around the mountain.
Ski Pass
Ski passes can either be amazing value or a right rip-off. I ALWAYS look for a ski pass that will help me make the most of my whole season. Next year that will be the Magic Pass. If purchased early the Magic Pass offers summer and winter access to some of the best Swiss ski resorts for 399CHF (€365). For someone who skis more than one week a year this is well worth the investment especially when compared to large French ski areas.
A 6 day Adult Port Du Soleil lift pass costs €295, whereas a 6 day Three Valleys Pass costs €321! Both great ski areas but also harder on the wallet! As with most things, booking early can help you secure discounts so plan ahead.
Beginners should keep an eye out for resorts where there is no charge for the beginners areas. Flaine is a great example of a resort that allows beginners to use their magic carpet and beginners slope at no cost!
Food and Drink
General life in a ski resort isn’t cheap! If you stop for lunch on the mountain you will soon see that the price of food and drink can be extortionate. If you are looking to pinch the penny’s then consider taking your lunch onto the mountain. Preparing a sandwich can save you €15-€50 on the mountain.
Similarly, drinks on the mountain are not cheap. Look to take part in the popular Happy Hours to save some money in the bars.
You will find that food and drink is more affordable outside of France and Switzerland. Italy can offer good food at exceptional value, so it is worth considering this when opting for your destination.

How Much Will A Ski Holiday Cost?
Well hopefully you can see that there are compromises and choices to be made which could help reduce the cost of your next ski holiday in Europe. The total cost of a European ski holiday can vary significantly depending on destination and choices.
Bulgaria
If you are a beginner or looking to save some cash, considering a ski trip to Bulgaria could be perfect. With cheap flights and accommodation in addition to reduced prices on; ski lessons, lift passes and ski rental it is possible to ski in Bansko or Borovets on the cheap. Packages including flights and accommodation are available for as little as £440. With the addition of lift passes, rentals and lessons you could be all in for well under £1000!
France
As a premium destination, French ski resorts charge the highest prices. Considering a trip to Morzine a 3* Hotel within a short walk of the centre of Morzine will cost around £839 in January. When you consider the addition of lift pass, rental and lessons you could be breaking the £2000 barrier.
Andorra
Andorra could be an interesting alternative to the French Alps with package deals from Crystal Ski offering 7 days Half Board accommodation and flights for under £500
What Represents Value For You?
I’d love to hear from you on the following… Can ski holidays can be good value for money? What compromises are you prepared to make to reduce the price of your next ski trip? Would you rather pay more to ski in France or are you happy to try alternative destinations? Let me know below in the comments.
Night Skiing At Coronet Peak In Queenstown
Queenstown is often referred to as the adventure capital of the world. With two world class ski resorts situated just a few kms from the town centre, in addition to regular buses to the resorts in Wanaka, you could say that Queenstown locals are spoilt for choice. When it comes to night skiing though, only Coronet Peak illuminates its slopes for skiing and snowboarding after dark. This makes Coronet Peak the place to be if you want to continue your ski day well after Apres.
What Is Night Skiing?
Night Skiing refers to skiing or snowboarding after the regular hours of the ski resort. Normally the lifts stop turning at 4pm and that is when people will hit the bars or head back to their accommodation. Night skiing allows you to keep the fun going with an extra 5 hours of lift accessible skiing and snowboarding. At Coronet Peak this is made even more awesome by the ski resorts epic location. Coronet Peak has panoramic views of Lake Wakatipu that become even more special as the sun begins to set. When the sunlight has gone, Coronet Peak illuminates the pistes by using floodlights. Riding on floodlit pistes is an brilliant experience that every skier or snowboarder should try.
Night Skiing At Coronet Peak
Coronet Peak is open between 4PM and 9PM for night skiing and offers this on a Wednesday, Friday and Saturday. The Fridays and Saturdays can be quite lively with large party’s and live music, but if that’s not your thing head up on a Wednesday or the Saturday after a Friday show. This way you will find it much quieter. If you like live music then be sure to stop in at the main lodge in between laps, where you will find bands, DJ sets and other activities.
Coronet Peak Night Skiing Trails
Coronet Peak opens up the majority of it’s terrain for night skiing which is really cool. Unlike previous night skiing resorts I had tried you can reach the summit on the Coronet Express Chair. This essentially opens all 460M of Coronet’s vertical drop. Although the GreenGates Express is open at 4PM it closes as Night Skiing gets into full swing, leaving skiers right of the GreenGates inaccessible after 5PM. This still leaves access to; Green, Blue and Black runs from the summit, meaning that everybody at night skiing can make the most of the whole mountain. Coronet Peak also leaves its Meadows beginners area open throughout night skiing meaning that you can take lessons and practice your turns ready for a full day on the slopes tomorrow.
Coronet Peak Night Skiing Costs
If you have been paying attention to my previous videos and blogs on New Zealand you may have decided to purchase the NZ Ski Pass. If so great decision, especially if you grabbed the early bird deal. With the NZ Ski Pass you will be able to ski or snowboard at Coronet Peak, Mt Hutt and The Remarkables unlimited for the season, and YES!! That includes night skiing at Coronet Peak. If you missed it, you can check out the video below for more information.
If you don’t think that the NZ Ski Pass would represent value for your trip, then you can pay as you go with prices below.
Adults Night Skiing Pass $65 NZD
Child or Senior Night Skiing Pass $45NZD
Valid from 4-9PM.
Prices accurate as of 2019 season, for latest prices click here
Why Go Night Skiing?
Queenstown is an incredible place to explore and during the daylight hours you will find plenty of activities to keep you occupied. You might want to take the day off the snow to go on the famous Shotover Jet Boat or to take a stroll along the Routeburn Track. Like me, you may arrive in Queenstown late after driving back from Milford Sound but still fancy your snow fix. If this is the case, then night skiing offers the perfect opportunity for you to have your FergBurger and eat it too!
More than anything though, night skiing at Coronet Peaks offers the chance to be elevated to one of the most picturesque view points in Queenstown. From here you will be able to watch the sun set over Lake Wakitipu and the Remarkables mountain range, whilst enjoying the crisp evening air.
Final Thoughts
I was apprehensive about night skiing at Coronet Peak as my last experience of after hours snowboarding was a bit of a let down. This really was the opposite, with plenty of terrain and some awesome events happening. I was always keen to head back to Coronet for more night skiing. Although night skiing proper doesn’t start until after 5pm, I would urge you to get on snow from 4pm. By doing so, you will be able to watch the sun set over Queenstown and beat the crowds to the often busy car parks.

Loadpot Hill | Wainwright's Far Eastern Fells
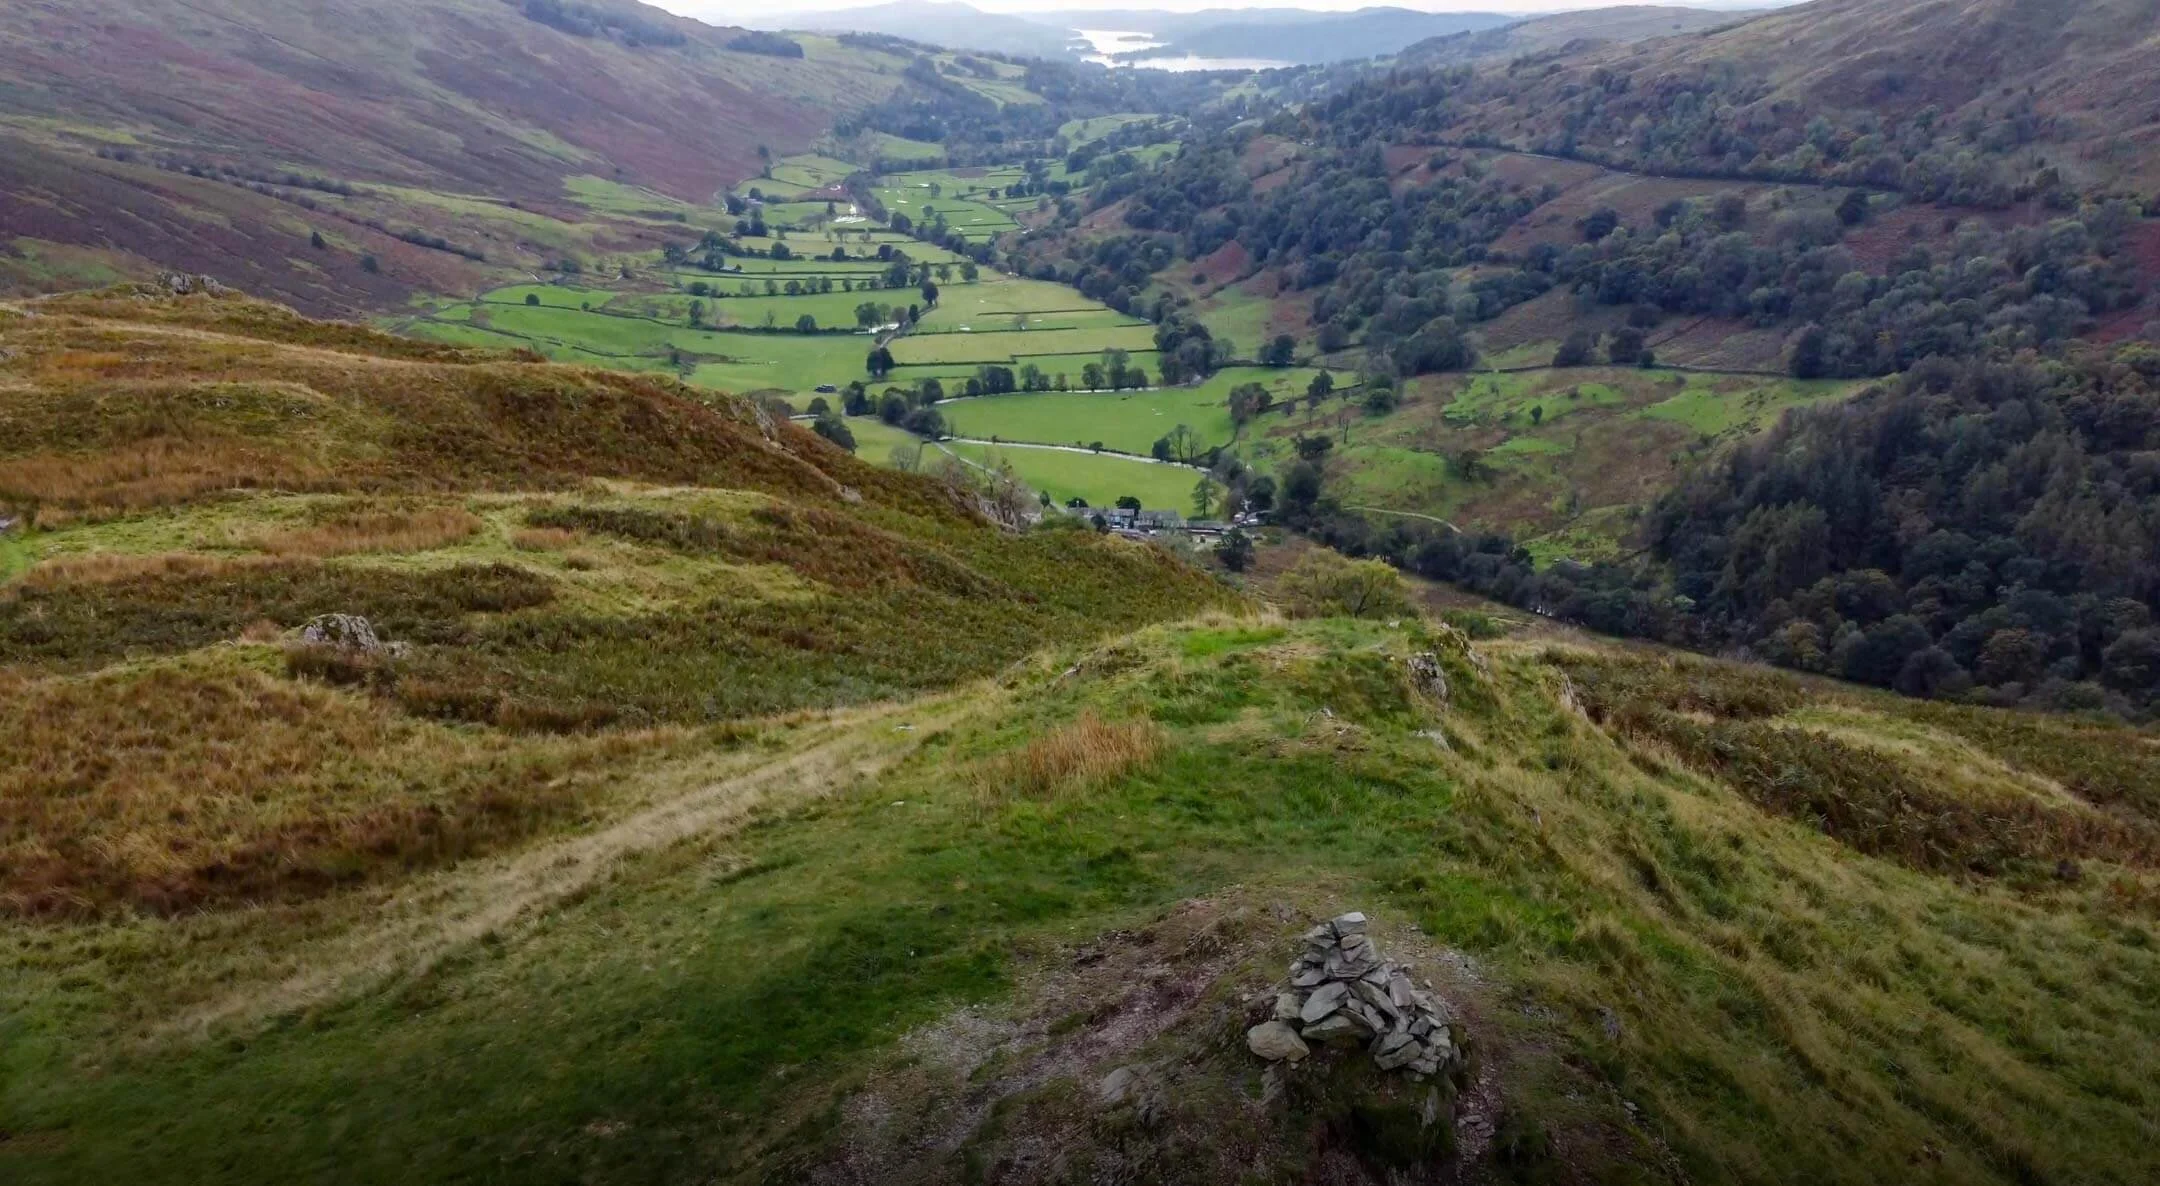
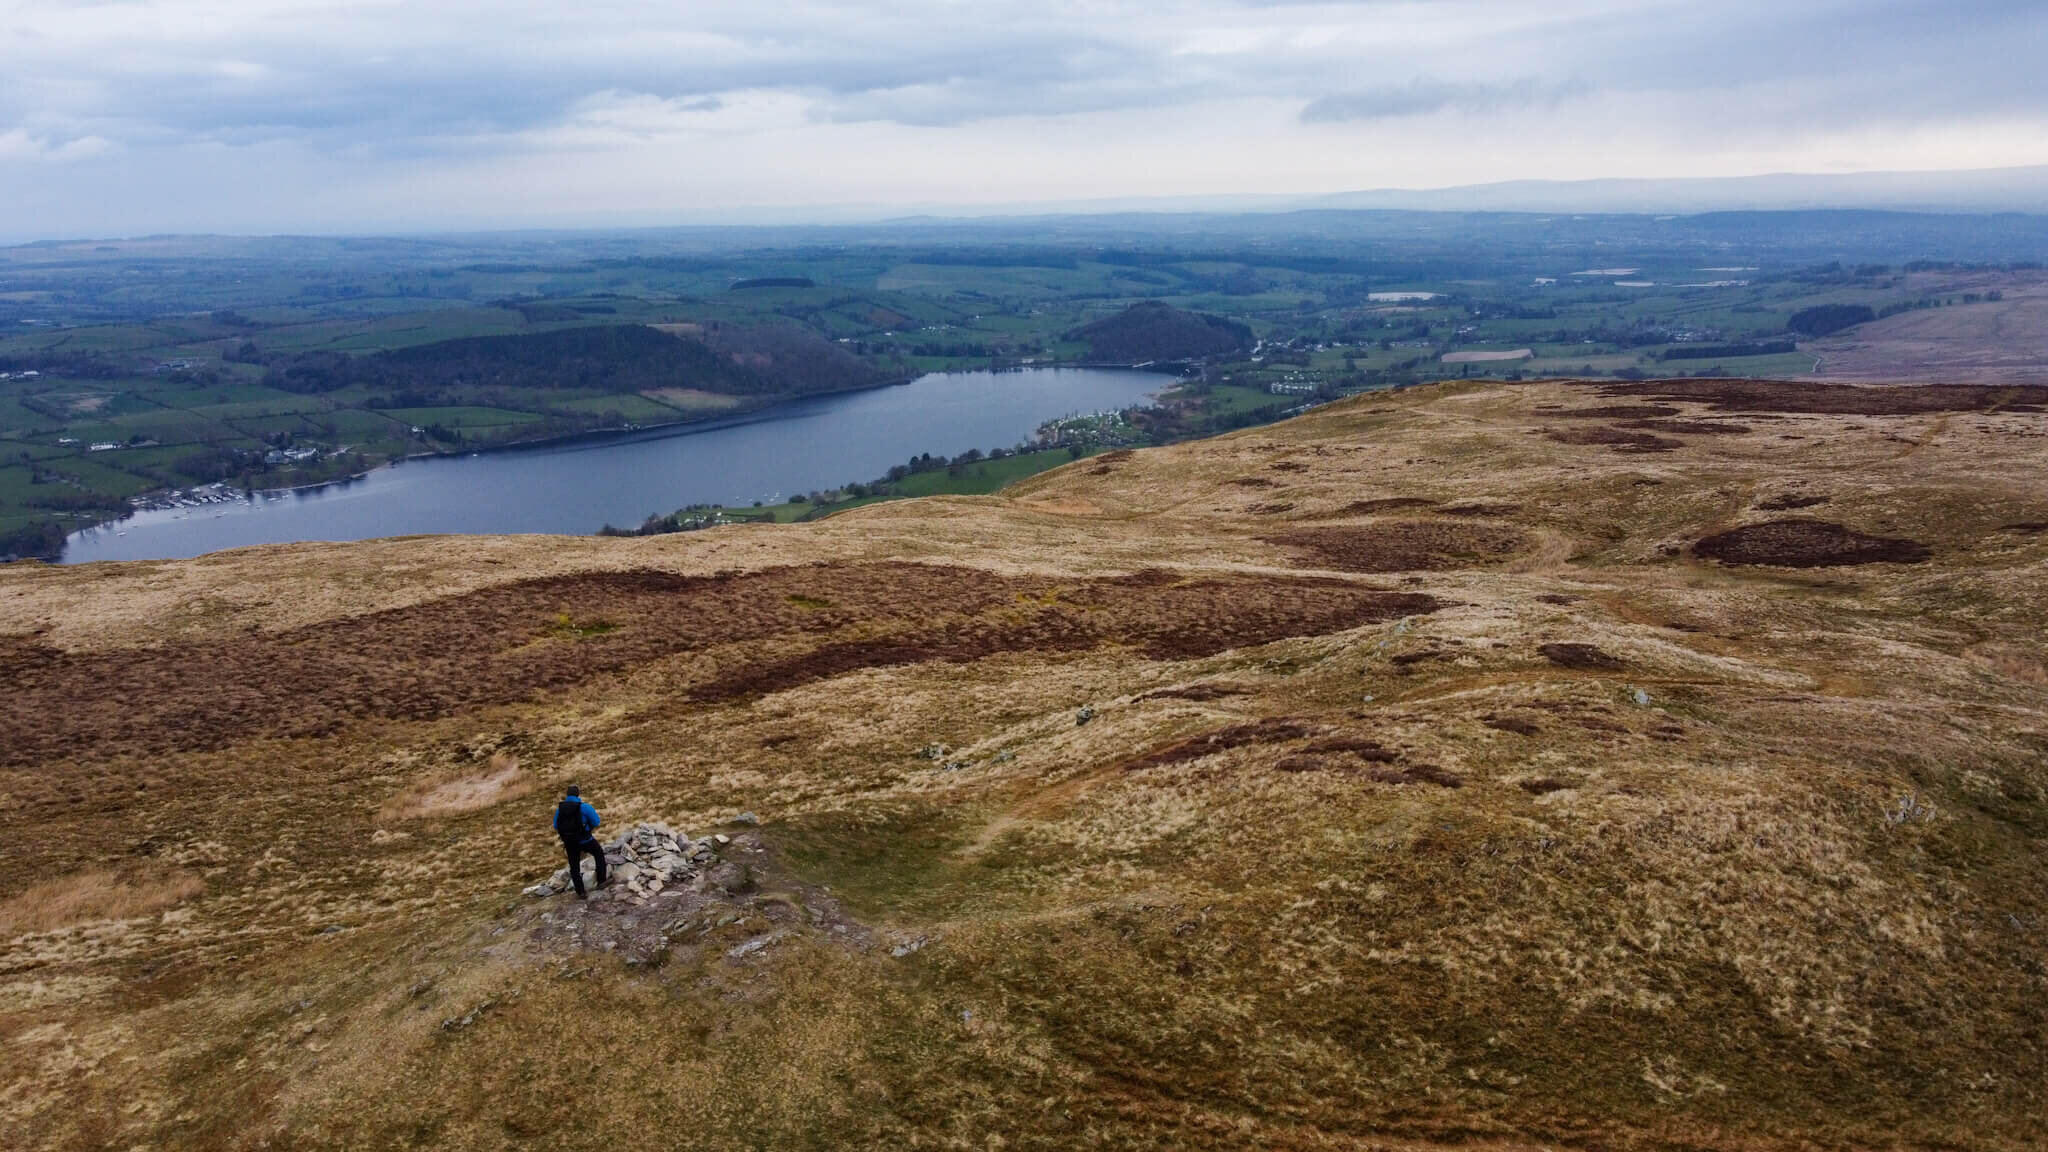
Loadpot Hill

Loadpot Hill in the Far Eastern Fells stands at 672 metres high. The Far Eastern Fells encompasses Alfred Wainwright’s second book with 35 fells to walk in this area. Wainwright remarked that although Loadpot Hill did not offer exceptional views, it did offer a home to much wildlife. Obviously, Loadpot Hill is home to roaming sheep as is the norm in this area, but more interesting is the amount of birdlife. There is a Trig point at the top of Loadpot Hill to mark the summit. Lots of people combine a walk to Loadpot Hill with nearby Wether Hill, , Bonscale Pike and Arthur’s Pike, for views over Ullswater.
Wether Hill Information
HEIGHT IN METRES 672m
HEIGHT IN FEET 2205ft
RANGE Far Eastern Fells
GRID REFERENCE NY 456 174
Have you walked Loadpot Hill? Let me know below…
Loadpot Hill Related Posts

APPROPIATE MAP


WAINWRIGHT’S GUIDES

Wether Hill Video
Loadpot Hill Map
Loadpot Hill Gallery
Similar Pinterest Post

Far Eastern Fells Posts


What Is Merino Wool? And Should You Use It?
Finding the appropriate material for your outdoor clothing is really important. The use of cotton in high output activities has been thought of as archaic for a while now. Cotton holds moisture and odour meaning you can feel wet and smelly pretty soon into a hike. Another option has been synthetic clothing that has improved the wicking performance of garments but odour has still be an issue. Step in Merino wool. Merino wool garments can offer exceptional performance in the mountains and below I outline why.
WHAT IS MERINO WOOL?
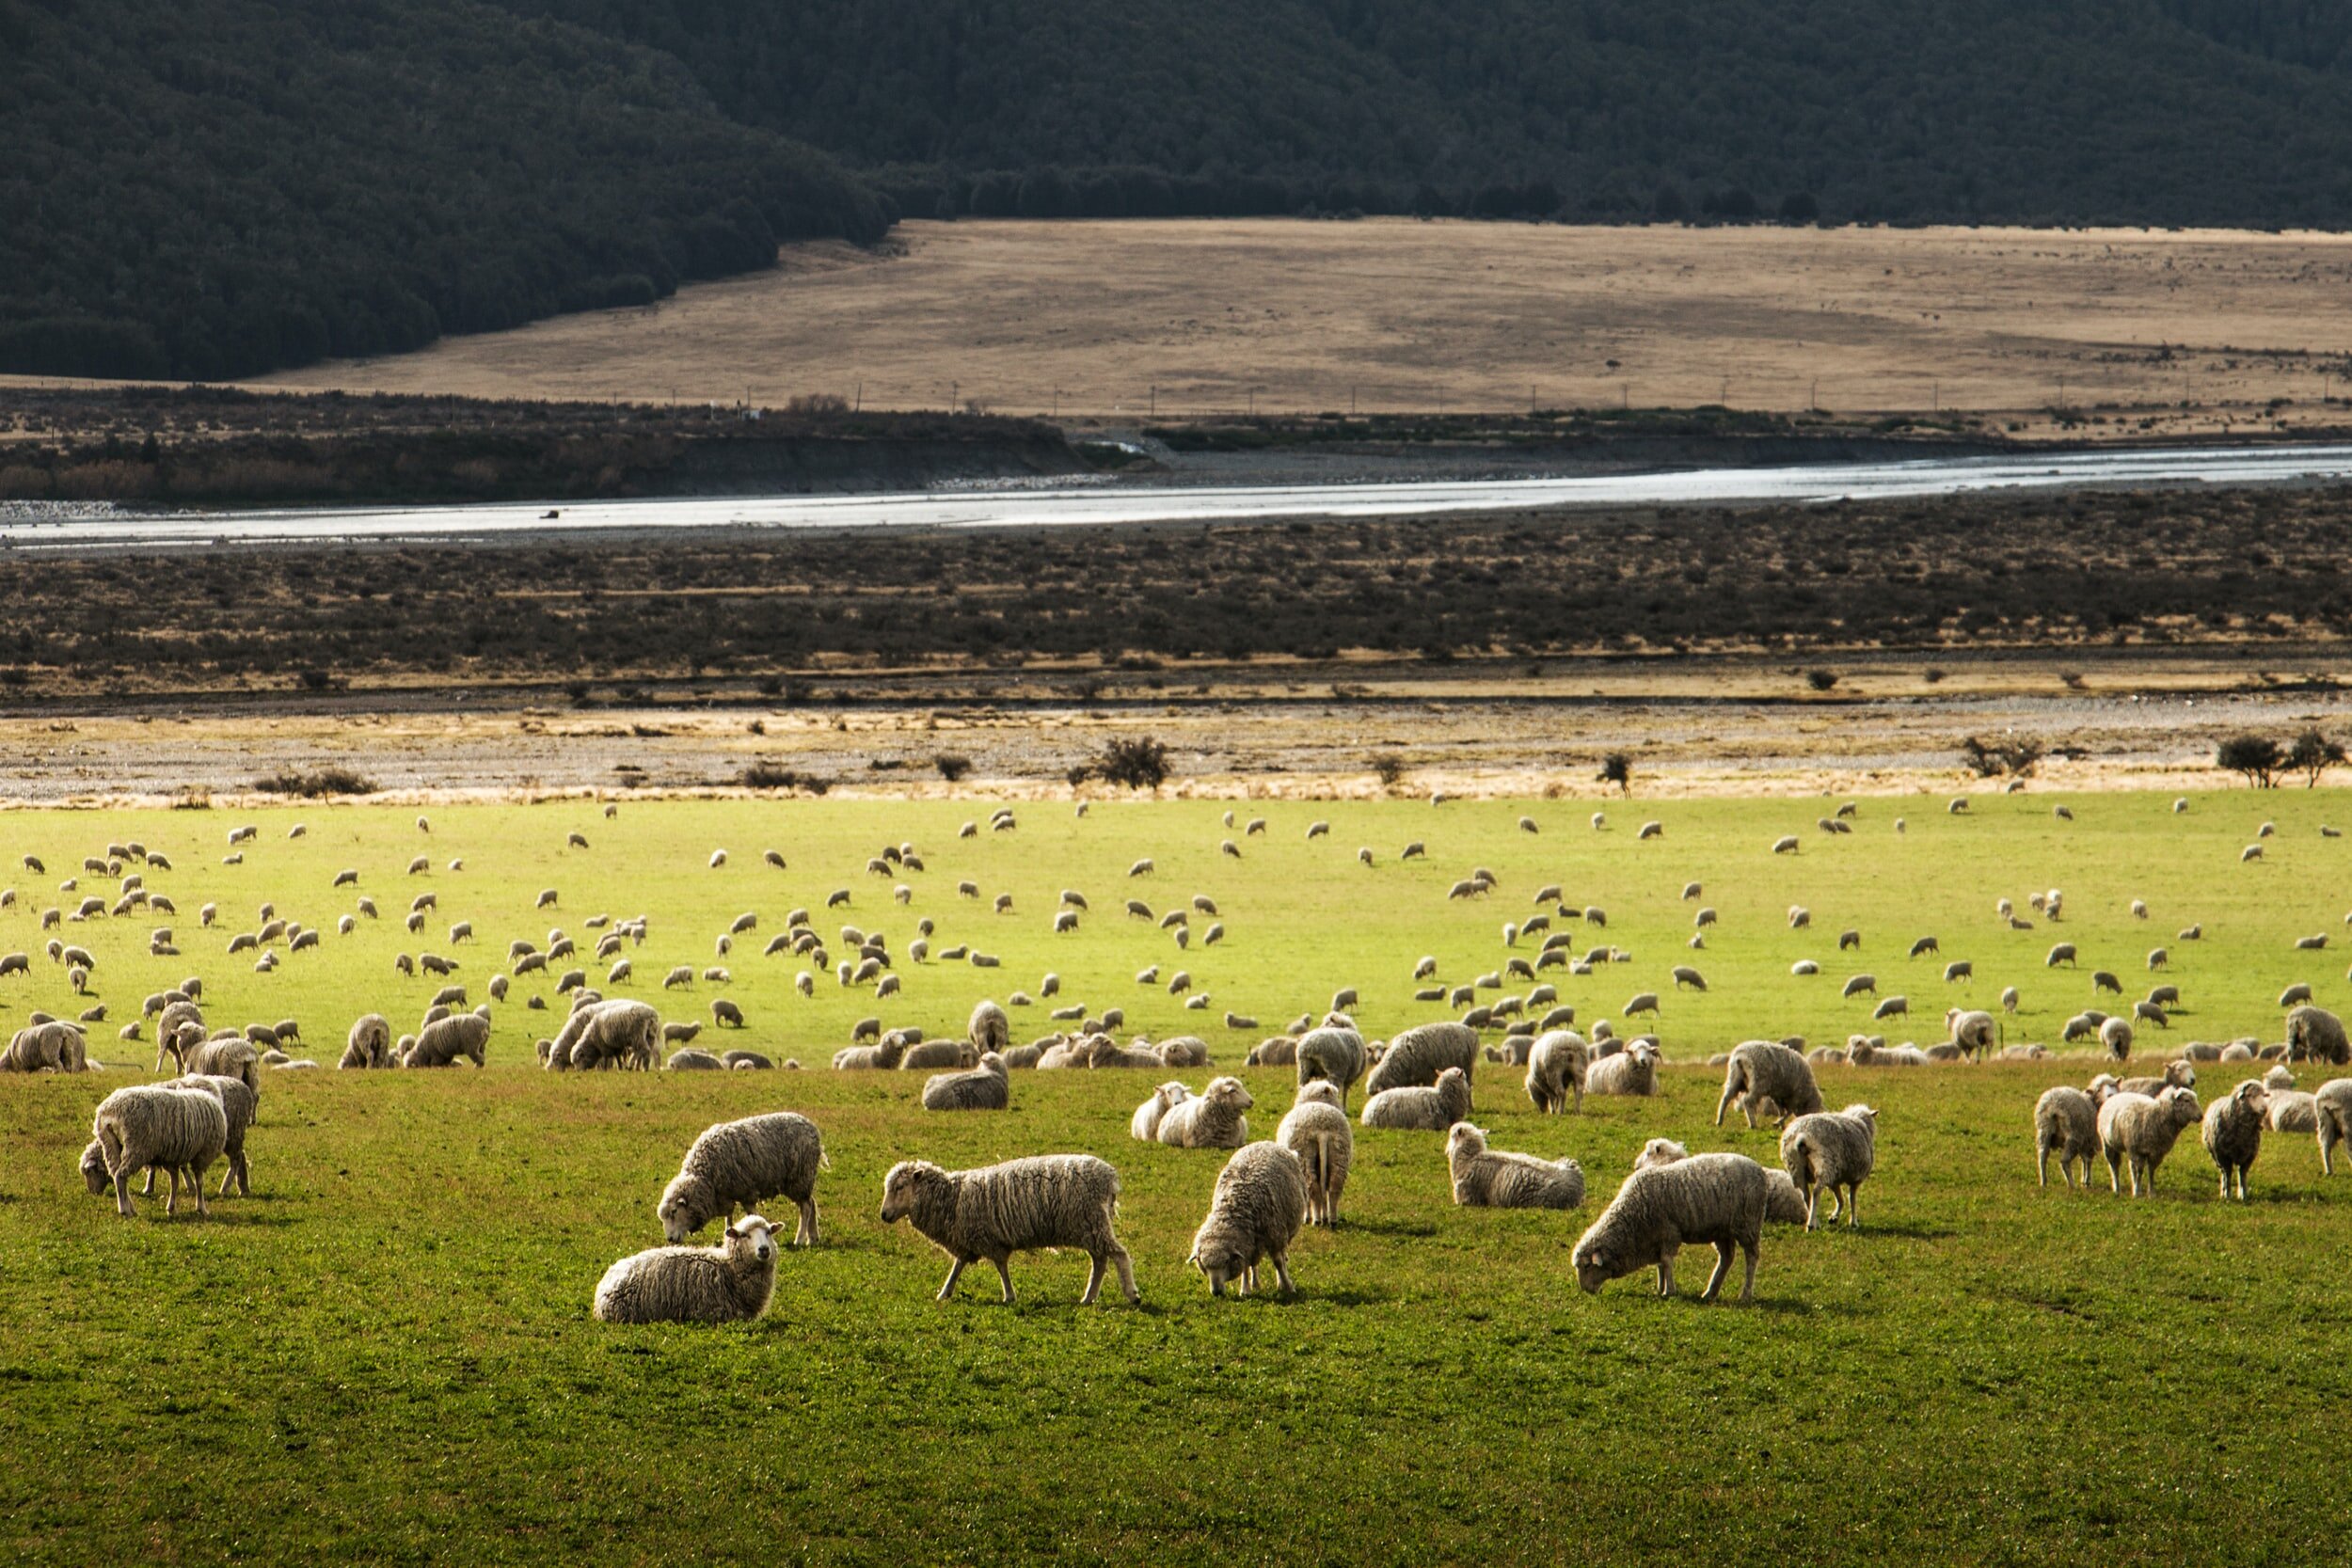
Merino Wool is a natural fibre that is grown on Merino sheep from New Zealand and Australia. Merino fibre benefits from being incredibly fine, making it softer than other types of wool. What makes Merino sheep, and in essence their wool, special is their ability to live in varying temperatures. Merino sheep are used to dealing with fluctuations from -20ºC upwards of 30ºC. This makes Merino a versatile material to use in the construction of outdoor garments as they can be utilised in many different environments.
WHY USE MERINO WOOL CLOTHES?
Do you enjoy getting outside? Do you like to get outside regardless of the weather? Do you take part in a range of winter and summer sports? Well if that sounds like you then merino could be the material you are looking for, as Merino wool lends itself to every adventure in every season. Naturally regulating your body temperature and wicking pesky moisture away from your skin, you can feel comfortable in Merino wool clothing from the first minute to the last. Even better, Merino wool is naturally odour resistant! Yes, you will sweat but smell less! Finally, and not to be forgotten, Merino wool is soft and incredibly comfortable against the skin.
ADVANTAGES OF MERINO WOOL
RENEWABLE
Merino wool is a natural fibre grown on sheep so it is also renewable. Merino sheep can group up to five lbs of wool per year and what’s even better? Merino sheep have lived in harsh environments and their wool is well naturally adapted to handle these climates.
Comparing Merino to synthetic or cotton equivalents shows that these alternatives need large amounts of processing before they are used in garments. Merino is a natural fibre and as such has less impact on the environment.
MERINO WOOL ODOUR RESISTANCE
A massive selling point for me is the odour resistance of Merino wool. I first came across Merino wool before a trekking trip in India, where I wanted to only pack a finite amount of clothing. Taking two t-shirts for a one month trip may seem daunting to many, especially in a hot country like India, but it worked a treat. Merino garments are capable of absorbing odour, preventing them from developing into that awful post-hike stench.
Dubious at first, years later I am still amazed at how Merino clothing remains odour resistant for way longer than synthetic equivalents.
TEMPERATURE REGULATION
Merino sheep need to survive in both hot and cold temperatures, meaning their wool is well adapted to both situations. A Merino garment will trap air for insulation in the cold but when it’s hot wick moisture away from the skin. This prevents that awful feeling when a cotton t-shirt gets wet due to excess sweat. A Merino t-shirt moves this moisture away from the skin and releases it as vapour. Synthetic fabrics also wick moisture away from the skin but they require an extra stage to do so, this can mean that synthetic garments are not as effective in cold climates.
MAKE A MERINO LAYERING SYSTEM
Layering systems are great for ensuring that you are just the right temperature at all stages of an activity. With the success of merino companies like Icebreaker and Smartwool more Merino clothing is finding its way into the market. What is great is now these companies are not just focused on base layers but full outfits. Layering a Merino jumper and jacket over a Merino t-shirt ensures that vapour can be wicked away efficiently.
MERINO WOOL IS COMFORTABLE
One reason many people avoid wool clothing is that they say it is itchy or uncomfortable. Well, Merino could just be the answer here as well. Merino wool is much finer than other wools meaning it is softer against the skin. In my experience, Merino doesn’t itch and I regularly use Merino t-shirts, hoodies and socks.
MERINO IS BIODEGRADABLE
It has already been mentioned the Merino has renewable qualities… well here is another reason that Merino is great for the environment. Being a natural fibre, Merino will decompose when put in a landfill. This means you can dispose of any old Merino garments without worrying about the future impact on the environment.

MERINO OFFERS UV PROTECTION
Those Merino sheep really have done all the hard work for us. Another benefit of Merino sheep’s evolution whilst living in hot temperatures is that Merino wool offers a natural UV barrier. This barrier to UV radiation protects the skin meaning you have less to worry about on those sunny days.
MERINO WOOL WARMTH TO WEIGHT
Merino wool offers an impressive warmth to weight ratio. Similar to down, Merino traps air between its fibres which helps create warmth. Merino’s natural loft ensures that it offers a very efficient temperature regulation.
MERINO WOOL IS STRONGER THAN COTTON
Merino wool fibres are stronger than cotton fibres. That’s right not only does your Merino t-shirt benefit from all of the above but it also is more durable than cotton.
DISADVANTAGES OF MERINO
There aren’t many… but here we go.
MERINO WOOL IS EXPENSIVE
Merino garments are more expensive than their cotton or synthetic equivalents, in the same way that a Ferrari is more expensive than a Fiat. Luckily there are companies trying to make Merino more affordable, check out ISOBAA who regularly have offers on SportPursuit.
DURABILITY ISSUES
Merino comes in different grades and the lighter garments (180 or lower) can be subject to holes. With lighter Merino garments pay particular attention to how you wash them. Avoid using fabric softener and do not overwash as this can leads to holes forming in the material. Remember Merino garments require less washing as they are naturally odour resistant.
IS MERINO FOR YOU?
Merino isn’t going to be worth the investment for everyone and that is ok. If however, you are a regular in the outdoors and you want the best performance from your garments then you should consider buying Merino wool clothing. I use a lot of my Merino garments in both summer and winter making the outlay worth it for me. I still search for deals and you can always pick up items in the sale making Merino more affordable.
IS MERINO ETHICAL?
Ethical concerns are becoming more prevalent across society and the outdoor community is no exception. It is worth noting that if you choose your Merino wool provider carefully, they will have sustainability and care for their animals at the core of what they do.
Merino is a natural fibre that has evolved over years of Merino sheep living in the harshest environments. The benefits of Merino in the outdoors are substantial and the effect on the environment little. Merino is a natural resource, it grows on sheep! No sooner have farmers sheered their sheep than the next coat of Merino wool begins to develop. Furthermore, Merino’s biodegradable properties ensure its environmental impact is negligible when discarded.
QUESTIONS ABOUT MERINO WOOL
WHAT’S SO SPECIAL ABOUT MERINO?
Merino wool is an amazing natural material that has many benefits. From odour resistance to temperature regulation, Merino wool can be beneficial in a range of activities.
WHY IS MERINO WOOL CONSIDERED SOFT?
Merino wool has elastic properties that ensure the fibres can retain their shape over time. This is one of the reasons that Merino garments do not need to be ironed… just hang them after washing. This natural resistance to wrinkling ensures that the garment remains smooth and soft against the skin with no itchiness.
IS CASHMERE BETTER THAN MERINO WOOL?
Cashmere has a higher loft than Merino ensuring it is softer. Durability wise, Merino is stronger so makes a better fabric for use in the outdoors.
WHY IS MERINO WOOL EXPENSIVE?
There are a number of reasons why Merino wool garments are expensive. Firstly, wool is a natural product and therefore requires time to grow. The process of farming Merino sheep is one that costs time and money. So sadly that price needs to be passed onto the consumer. Merino is super fine and therefore more merino wool is needed to complete one item in comparison to other wool products. More wool means a higher cost.
PIN THIS POST

MERINO PRODUCTS


Steel Knotts | Wainwright's Far Eastern Fells
Steel Knotts
Steel Knotts is one of the quieter, more compact fells tucked into the Far Eastern Fells of the English Lake District, sitting between Ullswater and Haweswater. At 432 metres (1,417 ft), it lacks the drama of the higher summits, but rewards walkers with unexpectedly fine ridge walking, interesting rocky features and clear views over Ullswater, Martindale and the Helvellyn range. Its position makes it a useful addition to longer walks — commonly paired with Hallin Fell, Loadpot Hill or as part of a circuit from Patterdale — yet it also works well as a short, sharp outing from the Ullswater shores.

Steel Knotts Summit Views
STEEL KNOTTS INFORMATION
Steel Knotts sits on the eastern flank of the Far Eastern Fells. Although longer walks to Steel Knotts can be accessed by linking the Ullswater Way from Glenridding or Patterdale, I have always accessed this diminutive fell from Howtown or Martindale.
Steel Knotts is a compact, craggy fell with a distinctive northern face that drops steeply toward the valley. The summit area is rocky underfoot in places, interspersed with grassy sections and low, wind-sheared heather. The fell feels more intimate than the higher central Lake District peaks — its ridges and rock outcrops give strong character and provide good scrambling on steeper sections for those comfortable with hands-on moves. Paths are well trodden but can be narrow and muddy after rain.
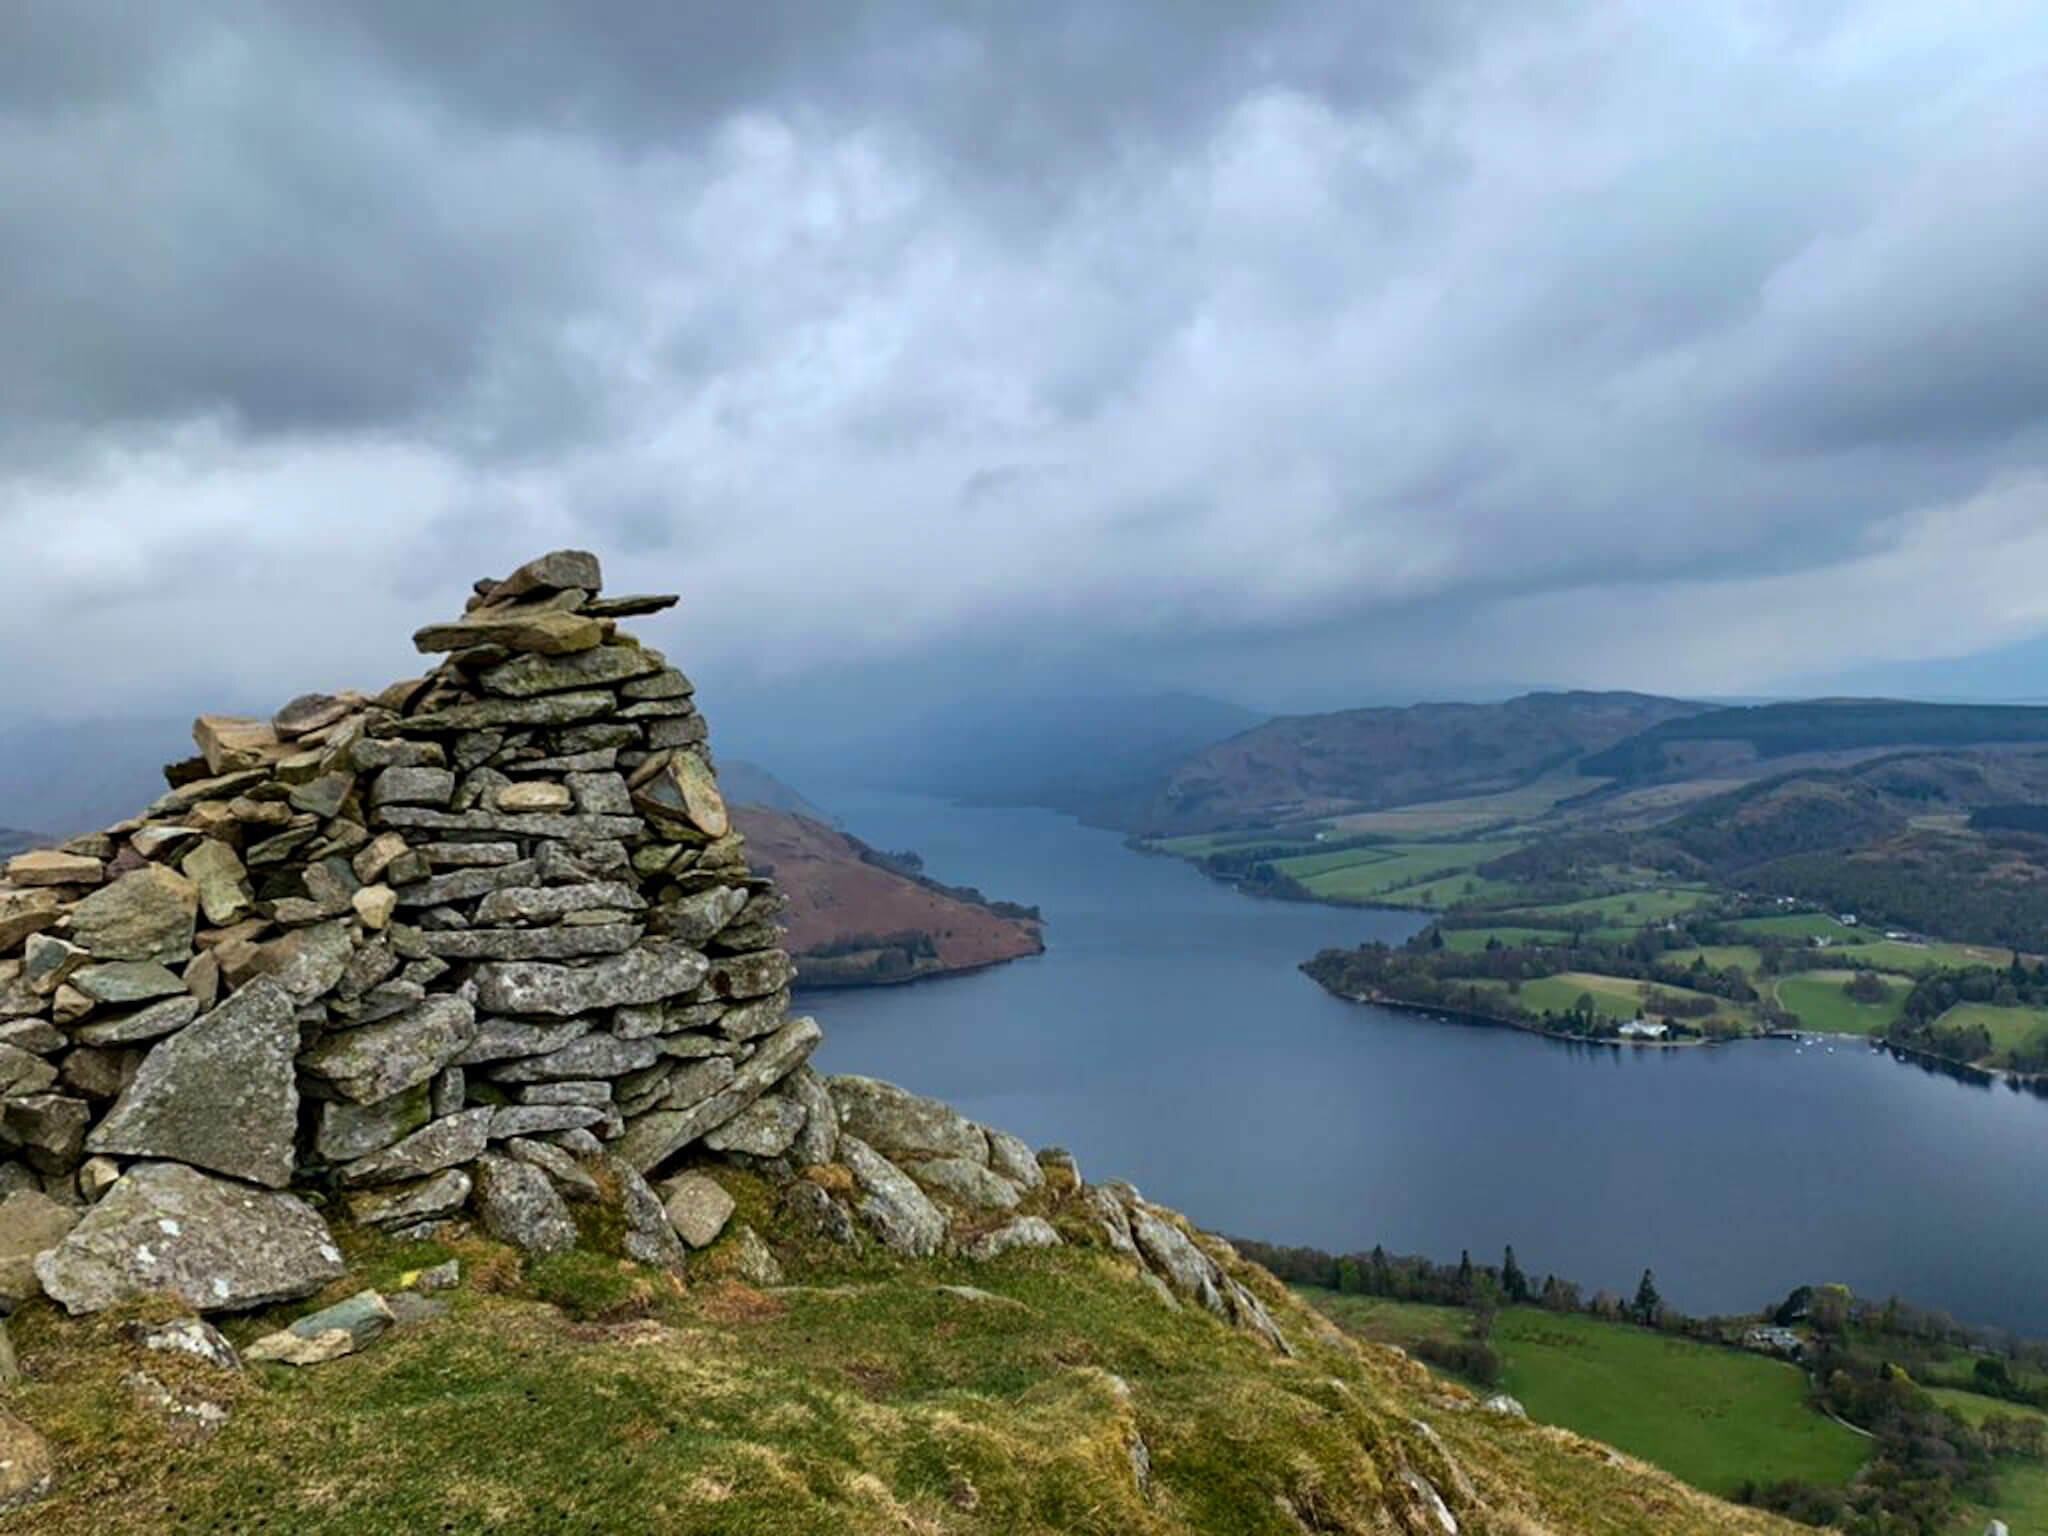
The summit is marked by a rocky outcrop that is distinctive and offers views which are excellent for the height. In one direction are views pictured above which take in the Nab and the Martindale Horseshoe. In the other direction is Ullswater and the nearby Hallin Fell.
Ullswater stretches out to the northeast with steep farmland and woods below, while the Helvellyn range towers to the west and south-west. To the east and north-east you get a clear sense of the Eden valley and the Pennine foothills beyond. On fine days the water-glass sheen of Ullswater framed by surrounding fells makes Steel Knotts a rewarding, compact viewpoint.
Steel Knotts works year-round. Spring and autumn give good colour and fewer crowds; summer brings longer daylight but more walkers. Winter conditions can make the crags icy.
For a relatively small fell, Steel Knotts offers dramatic local scenery, sweeping views over Ullswater and a satisfying, varied walk that can be short and sharp or part of a longer, more challenging day on the Far Eastern Fells. It’s ideal if you want mountain character without the sustained commitment of higher summits.
HEIGHT IN METRES 432m
HEIGHT IN FEET 1417ft
RANGE Far Eastern Fells
GRID REFERENCE NY 440 181
Have you walked Steel Knotts? Let me know below
STEEL KNOTTS VIDEO
STEEL KNOTTS MAP
STEEL KNOTTS GALLERY


RELATED POSTS


Arthur's Pike | Wainwright's Far Eastern Fells
ARTHURS PIKE
Arthur's Pike is a delightful summit that offers an excellent introduction to the Far Eastern Fells. The ascent is relatively gentle, making it suitable for hikers of all levels. Starting from Pooley Bridge, the route takes you through lush pastures and open moorland. As you climb higher, the views expand dramatically, revealing the shimmering waters of Ullswater below. Arthur’s Pike is a less frequented gem, providing a peaceful escape from the busier fells. The summit itself is marked by a modest cairn, but the true reward lies in the expansive vistas. On a clear day, you can see across the Eden Valley to the Pennines, with the dramatic Helvellyn range forming a stunning backdrop. Arthur's Pike may not be the highest fell, but its charm lies in its accessibility and the sense of tranquility it offers. It's an ideal spot for a relaxing hike with rewarding views.

Arthur’s Pike summit overlooks Ullswater in the Far Eastern Fells of the English Lake District. At 533m Arthur’s Pike is not tall enough to be recognised as a Nuttall however, it does make Arthur Wainwright’s list of 214 Lakeland Fells. The views from Arthur’s Pike are stunning on a clear day, with views across the lake and of surrounding Fells. Arthur’s Pike is a child summit of High Street. Arthur’s Pike is both a Wainwright and a Birkett.
ARTHUR’S PIKE INFORMATION
HEIGHT IN METRES 533m
HEIGHT IN FEET 1749ft
RANGE Far Eastern Fells
GRID REFERENCE NY 461 204
Have you walked Arthur’s Pike? Let me know below…
ARTHUR’S PIKE VIDEO
ARTHUR’S PIKE MAP
FREQUENTLY ASKED QUESTIONS
Frequently Asked Questions about Arthur's Pike in the Far Eastern Fells
What is Arthur's Pike?
Arthur's Pike is a captivating fell located in the Far Eastern Fells of the Lake District National Park in Cumbria, England. It stands at a modest height of 533 meters (1,749 feet) and offers stunning panoramic views of the surrounding countryside.
How do I reach Arthur's Pike?
The most popular starting point to access Arthur's Pike is from the village of Pooley Bridge. There are several walking routes available, all offering different levels of difficulty. One of the most commonly used paths starts from Roehead car park, situated a short distance from Pooley Bridge.
How long does it take to hike Arthur's Pike?
The duration of the hike largely depends on your fitness level and the route you choose. On average, it takes between 2 to 3 hours to reach the summit from Pooley Bridge. This estimate includes time for breaks and enjoying the panoramic view from the top.
What can I expect to see from Arthur's Pike?
The summit of Arthur's Pike rewards hikers with magnificent views over Ullswater, one of England's most beautiful lakes. On a clear day, you can also catch sight of the surrounding Fells, including Helvellyn and the Eastern Fells. The incredible scenery makes it an ideal spot for photography.
Are there any noteworthy landmarks near Arthur's Pike?
Yes, there are a few notable landmarks in the vicinity of Arthur's Pike. Nearby, you will find Bonscale Tower, an intriguing fortified tower dating back to the 15th century. Additionally, Heughscar Hill Fort, a well-preserved Iron Age fort, is located a short distance away.
Is Arthur's Pike suitable for beginners?
Yes, Arthur's Pike is a great choice for beginners and families looking to enjoy a scenic hike in the Lake District. The ascent is generally gentle, and there are no technical difficulties involved. However, it is always advisable to wear appropriate footwear and carry essentials like water, snacks, and a map.
Can I bring my dog along on the hike to Arthur's Pike?
Absolutely! Arthur's Pike is dog-friendly, so you are more than welcome to bring your furry friend along for the adventure. It is important to keep your dog under control and clean up after them to maintain the park's cleanliness and respect other.
Is Arthur’s Pike a Wainwright?
Yes, Arthur’s Pike is a Wainwright. Alfred Wainwright documented Arthur’s Pike in his second volume of The Pictorial Guides To The Lakeland Fells, The Far Eastern Fells.
RELATED POSTS

Anon M4 | Ski Goggle Review
The opinions expressed in this review are my own and I am not paid by the brand. If this review helps you decide that the Anon M4 is the goggle for you, consider using the affiliate links to support the website. These links will provide a small commission to me at no extra cost to you.
Burton owned, Anon have been making quality ski and snowboard goggles for a number of years now. Their factory in Burlington Vermont is clearly a home of innovation and the M4 is the pinnacle of that process. The M4 is the top of the line goggle from Anon featuring, all the tech but still remaining good value.

ANON M4 OVERVIEW
Ok, you read it, I said that the Anon M4 remains good value. It is hard to justify that sentence for a £260 goggle but let me try. In the box you get; one goggle frame, two Perceive lenses and an MFI facemask, which is life-changing! The Anon M4 has everything you would expect from a top-end goggle.
The Anon M4 is unique in that the frame fits two lens shapes; Toric and Cylindrical. Anon M4 Toric lenses offer the widest field of view with that wrap around look that has become so popular. The Anon M4 Cylindrical lenses still offer a great field of view but with a more classic throwback style. The great thing about the Anon M4 ski goggles design is that you can mix and match the lens styles and swap out both Toric and Cylindrical lenses.
As you’d expect from a top end goggle, the Anon M4 has been designed to fit well with helmets. Anon make helmets as well, however I feel this goggle has fitted well with my Giro Combyn helmet over the last few seasons. The large frame design may not be to everyones taste, but if you like big frames the Anon M4 is a solid choice.
The key selling point for the Anon M4 goggle has to revolve around the intuitive MAGNA-TECH technology. Anon use magnets in both the lenses and their facemasks to ensure a seamless integration with the goggle frame. Changing the lens on an Anon M4 is this simple.
ANON M4 KEY FEATURES
Unisex frame
Thinner face foam used to ensure a close fit and optimising the field of view.
Triple-layer face foam incorporates a fleece layer that acts to wick moisture away from the skin and provide comfort, whilst adding two layers of foam for a snug seal and comfortable fit.
Light yet sturdy frame holds shape well ensuring a consistent and comfortable fit. There is some play in the frame allowing for slight movements and added comfort.
Ideally suited to medium and large face shapes.
Compatible with helmets (Best to try with yours before you buy).
MFI allows for facemasks to seamlessly attach to the goggle creating a full barrier to the elements. MFI is quick and easy with one hand movement.
Included MFI facemasks allow for ventilation and I have had no fogging issues.
The large frame is OTG compatible, so glasses wearers should be able to wear their frames underneath without discomfort. (Side note: I wear an insert with my prescription inside the goggle and this works great).
Price is all inclusive of MFI face mask, two lenses, goggle bag, and lens protective case.
MAGNA-TECH utilises 9 magnets to hold the lens in place. Strong enough to hold the lens in but still easy to change!
SONAR or PERCEIVE Lenses provide high-contrast and clarity.
ANON M4 goggle comes with hydrophobic and oleophobic coatings. These help the lenses avoid scratches and finger prints.
ANON Warranty - I have used the Warranty system in the past and they resolved my issue quickly and effectively. I have had no issues with my M4 goggles.
ANON M4 FIRST IMPRESSIONS
From initial look the Anon M4 is a great goggle. The first thing I normally check on goggles is the lens change. I want this to be easy so that I don’t have to faff on a mountain. Remember, that if its taking you time to do it indoors it will probably take you longer on the hill. Fair to say that the M4 has the best lens change out of any goggle I have previously tried.
Looking at the frame it is sturdy with a little bit of give. The foam closest to your face is fleece lined which adds another level of comfort. Sticking with the foam theme, there is what Anon call the ‘Full perimeter vent channel’ which allows air to circulate through the goggle preventing fogging. As expected the strap is backed with silicone to stop slip off helmets.
Another nice touch is the spare lens comes in a sturdy case to give you a bit more confidence if you are riding around with your spare lens in your pocket.
HOW GOOD ARE THE ANON M4 SKI GOGGLES
I have ridden with the Anon M4 ski goggle for a number of seasons now and it’s fair to say it’s my favourite goggle. There are plenty of reasons to like the Anon M4 but i’ll break down some of my favourites below.
ANON M4 FIELD OF VISION
The wide field of view on the Anon M4 gives you plenty of peripheral vision. The close to face design of the goggle frame ensures their are no blind spots or obstructions. The larger design does help in this regard and the Toric lenses will offer a greater field of view than the Cylindrical lenses.
ANON M4 LENSES
A while back I compared the Anon M4 Sonar lenses to Prism and Chromapop in this video. I was impressed by how the Sonar lenses performed in low light conditions, although I did say the Chromapop Lenses used on the Smith IO MAG outperformed Sonar, Anon have since upgraded their lenses.
Anon introduced PERCEIVE LENSES which has stepped up the performance in contrast lenses. Whereas contrast lenses traditionally target the Blue section of the colour spectrum (enhancing snow definition) Anon argued that although making the appearance of snow clearer, this approach compromised the natural appearance of the rest of the picture (trees, sky, buildings etc). PERCEIVE Lenses reduce the effect of 3 sections of the visual light spectrum resulting in a more neutral appearance, whilst still enhancing snow definition.

PERCEIVE LENSES ANON
Looking at the above chart the areas where you see a depression represent colour enhancement. This picture shows that PERCEIVE LENSES not only target the blue light but also green and red light.
PERCEIVE lenses also have the following protective coatings:
Hydrophobic - The hydrophobic coating works to repel moisture from the surface of the lens allowing it to run off and be channeled away easily.
Orleophobic - The Orleophobic coating prevents finger prints or smudges from forming on the lens.
HOW EASY IS THE LENS TO CHANGE
The easiest on the market. Nothing more really needs to be said.
ANON M4 FOGGING
I was initially worried that the integrated face mask would cause fogging, it doesn’t. The whole system works really well and aided by the full perimeter ventilation you can be sure of fog free days.
ANON M4 COMFORT
The Anon M4 has a larger nose bridge which for me makes a more comfortable goggle. Despite having a larger bridge there are no gaps in the goggle with foam preventing unnecessary wind access. Added fleece makes for a comfortable layer against your skin with a firmer foam keeping the goggles shape. One of the best comfort features on the Anon M4 is the MFI face mask. Whether its a; neck tube, balaclava or a hood, the MFI ensures a seamless fit and a complete barrier to the elements.
ANON M4 DURABILITY
I have ridden with the Anon ski goggle regularly since 2019. In that time, they have been well looked after but accidents do happen. Having crashed or fallen on many an occasion whilst wearing the Anon M4 goggle I can attest that they have stood the test of time. The frame is firm enough to prevent it from being easily damaged and the strap is in good condition having been worn under a helmet.
The main concern that people seem to have with magnetic lens ski goggles is whether they hold the lens when you fall. I can honestly say that the lens has not come out of my Anon M4 on impact. Furthermore, if it were to come out I am pretty sure you may have bigger worries. With that in mind, the lenses have also proved durable taking impact whilst resisting any major scratches.
ANON M4 STYLE
There is plenty of choice with the Anon M4 ski goggle. Available not just in a range of colourways but also with a choice of lenses. Like the alien from another planet look then opt for M4 Toric Lenses. Alternatively, choose the M4 Cylindrical Lenses for that old school look. Can’t make up your mind, well no worries, just mix and match the lenses as they will both fit the same frame.
I like the larger frame goggle look so these are perfect for me.
If you wear the Anon M4, let me know what you think below in the comments.
WHAT I LOVE ABOUT THE ANON M4
Magna-tech lens changes are by far the fastest and easiest I have ever tried. I would struggle to go back to another system.
MFI face mask is also a game-changer. Seamless integration with the goggle to create a barrier to the elements.
The Anon M4 comes with two lenses as standard. This means you should be sorted for all conditions.
The lens case that comes with the Anon M4 ski goggle is a nice touch.
WHAT I DISLIKE ABOUT THE ANON M4
The price. This is a top-end goggle and as such you are looking a spending a few pennies to pay for them. Now they have been out a few years, it is possible to find old colourways for slightly cheaper.
FINAL THOUGHTS
The Anon M4 is a fantastic goggle that firmly sits as my favourite out of the goggles I have tried. Having previously been disappointed with the performance of the Anon M3 goggle this is certainly a step up. The money is worth spending if you are a regular skier or snowboarder and will get use out of them. Otherwise there are cheaper alternatives like the Anon Sync that you could consider.
Affiliate Links
These are all retailers that I have used for a number of years and in the case of some have worked for. The service is great and they stock incredible products. Purchasing through these links provides a small commission to support the site at no extra cost to you.
Ellis Brigham: https://tinyurl.com/y5h5efam
The Snowboard Asylum: https://tinyurl.com/y429d29h
SHOP ANON M4 SKI GOGGLE


SHOP ALTERNATIVES


Raise Ski Resort Guide
When I first heard about Raise I thought it was a joke. Being from the south of England and growing up wishing for just one white Christmas I just hadn’t considered that further north the conditions would be in place to run a ski tow. Older and wiser Raise, now my local ski resort, is the home to the Lake District Ski Club who operate the tow at Raise.
RAISE FIRST IMPRESSIONS
The ski tow at Raise is a good one hour walk from the car park. I arrived on the Glennridding side and parked up by YHA Helvellyn. From the moment I parked up I began to get a feel for Raise. Welcomed by another enthusiastic skier, I was getting my first impressions of the community feel. We began the walk in the sun with snow a distant sight, but gradually ascended towards the snow line. It dawned on me that there will be no apres crowd here. Everyone at Raise is there for the skiing, this left me even more excited to meet other like minded souls.
As we reached the snow line, the members hut and the tow lift became visible and everything was feeling more real!
RAISE SKI AREA
The ski area at Raise is small but offers 9 ungroomed runs. Snow fences are used to trap the majority of the snow and ensure that the Cumbria’s windy conditions don’t spoil all the fun! The ski area offers opportunity to explore further with backcountry routes possible on The Dodds and Helvellyn. The longest run at Raise is nearly a mile long, which pails in comparison to the 16km offering at Bansko but I know where I had more fun.
Two runs of note are Savages Gully and Presidents Run. Savages Gully was the original run at Raise dating back to the use of a tractor tow whereas Presidents Run is the easy route back down to the base, named after a former ski club president who wasn’t very capable.
The views from the ski area are impressive with views across Ullswater and Thirlmere. From the top of Raise you can see across to Helvellyn which is impressive covered in snow.
LIFTS AT RAISE
There is one lift at Raise ski resort. A simple button tow lift that runs 360m up to the top of Raise. The Lake District Ski Club was founded in 1936 and has run a tow maintained by the club members ever since. The lift operates around 60 days during a good winter with maintenance meetings taking place during the summer to ensure everything is in working condition.
RAISE SNOW RECORD
Unlike skiing and snowboarding in the Alps the annual snowfall at Raise is unlikely to be massive. But a little bit of snow can offer up some fantastic conditions. Depending on the year the amount of days Raise is open can vary greatly but good years offer the potential for 40-60 days of lift assisted snowboarding in the Lakes!
SEASON DATES
Although never consistent it is possible for the season to start at Raise in November. There will be periods throughout the winter without enough snow to run but as the video above shows… good years can offer snow in May!
RAISE LIFT TICKETS
MEMBER LIFT TICKETS
Member season passes are £50 and allow for unlimited use of the lift tow on Raise.
DAY PASSES
A day of skiing at Raise will cost £30 for non members although depending on conditions and time of arrival discounts are offered.
TRAVEL TO RAISE
WHERE IS RAISE?
The easiest route up to Raise is from the village of Glenridding. There is a car park at the end of a long road between Glenridding and the YHA Helvellyn. This road is more gravel then road and when covered in snow would require winter tyres and snow chains for non 4x4 vehicles. The car park is reserved for hostel guests and ski club members so if you are neither of these things you will need to walk the track from Glenridding.
HOW TO GET TO RAISE
Getting to Raise will require a one hour walk up hill to the tow. The route follows a winding track up to raise. You should be well equipped with correct footwear and if you can carry your ski’s/board on a rucksack you will be happier. I walked up day one in snowboard boots which was fine, but day two I opted for walking shoes and was much more comfortable.
Depending on the amount of snow it is possible to skin up from the snow line. If you have touring gear this will make your ascent much quicker.
RAISE PROS
Ski resort in England
Really nice community run ski resort
Ski all winter as a member for £50
Spectacular setting with awesome views of the Lake District Fells
RAISE CONS
Unreliable snow.
GET IN TOUCH
Thanks for reading this Raise ski resort review and I hope it has answered many of your questions. I’ve given my opinion but I’d love to hear from you in the comments or via the socials. Have you been to Raise ski resort? What were your opinions? Are there better ski resorts in the UK?
CARE TO SHARE?
IF YOU FOUND THIS POST USEFUL AND YOU THINK IT MAY ALSO HELP OTHERS, PLEASE LIKE, SHARE AND COMMENT TO PROMOTE IT TO OTHERS
RELATED SNOWBOARDING POSTS


Mt Hutt Ski Area By Ability
Mt Hutt ski resort is consistently voted New Zealand’s best ski resort. Receiving more snow than other resorts and offering an incredible level of customer service, my trip to Mt Hutt was one to remember. Its location in the Southern Alps with scenic views across Canterbury is special and its rugged terrain makes it a fantastic resort to explore. Let’s look a little deeper into the terrain at Mt Hutt and have a look at what is available for each ability level.
Mt Hutt Ski Resort
MT HUTT OVERVIEW
Mt Hutt ski resort has a good range of terrain with interesting off-piste, terrain parks and well-maintained groomers. Mt Hutt is a large bowl with the majority of runs leading back down to the base lodge, although some do run lower. This makes it a great place for families or groups travelling with different ability levels. Mt Hutt receives around 4m of snow each winter and supplements this with extensive snow cannon coverage. When the conditions are good at Mt Hutt, everything is a go with chutes and steeps to keep the most hardened snowboarders entertained. In lean snow years, there may be a lack of coverage on the off-piste terrain but the resort does a great job of keeping the pistes covered and building terrain parks. There is a total of 40km of pistes at Mt Hutt with the majority of trails aimed towards intermediate riders. There are no trees at Mt Hutt which can leave you feeling exposed on those bad weather days.
BEGINNERS TERRAIN AT MT HUTT
Not known for its beginner terrain Mt Hutt may not be the first choice for New Zealand ski-lessons. Uniquely, Mt Hutt offers free skiing to anyone under 10 which makes it a fantastic option for families. In regards to terrain, there is a beginner area ‘Skiwiland’ at the base which is serviced by a slow magic carpet. This is a pretty decent gradient for those first-turns and not too intimidating. When the confidence is flowing beginners can head to the Quad Chair and enjoy two winding greens; Inside Leg and Highway 72 that lead back to the base. The more adventurous can head to the Summit Six where you will be met with stunning views and Morning Glory, a mellow blue that leads to Lower Fascination.
Mt Hutt has its own ski school that offers ski and snowboard lessons to groups and privates.
INTERMEDIATE TERRAIN AT MT HUTT
Mt Hutt is a mountain that can really grow confidence in intermediate riders. There really is nowhere inbounds that you couldn’t explore and there are plenty of runs to keep you interested. Mt Hutt has some great groomed terrain where it is possible to push those speeds and enjoy the views. Intermediates will want to head straight to the Summit Six chair where Upper Fascination is popular. Those with a sense of adventure will want to take Virgin Mile. Virgin Mile not only offers panoramic views across Canterbury but there are a number of opportunities to drop into interesting black runs; Platter Splatter, Hydro Slide and High and Low Dive.
If freestyle is more your thing then intermediates will enjoy the progression park and the features alongside Highway 72. Both parks have a nice flow and provide incremental difficulty that will have you shredding the large park in no time.
MT HUTT PISTE MAP
Mt Hutt Ski Resort Piste Map
ADVANCED TERRAIN MT HUTT
Mt Hutt has a high proportion of black graded terrain and its South Face area is home to some challenging Black Diamonds. This makes Mt Hutt a great resort to visit as an advanced skier or snowboarder. Some of the best terrain requires a hike or a long traverse but this is ok as it means these areas are less crowded. The Towers was our favourite area at Mt Hutt as there are a number of interesting chutes and routes back down into the resort. Advanced skiers and snowboarders may also like the terrain at The Bluffs and out of the resort down Rakaia Saddle Chutes.
Mt Hutt offers some great off-piste terrain but that isn’t all it has to offer. Mt Hutt has a pretty good terrain park set up with a really nice progression throughout the different parks. There is a large park under the quad chair that advanced freestyle snowboarders will enjoy.
GET IN TOUCH
As always, thanks for reading this post but now it is time to hear from you! Have you visited Mt Hutt? I would love to hear about your experiences in the comments… Which run was your favourite? Do you think the resort is best suited to advanced or intermediate skiers and snowboarders?
PIN IT FOR LATER


Everything You Need To Know About Heavenly Ski Resorts California Side | Video
Looking at the Heavenly ski resort map you will see that the resort is split across two US states; California and Nevada. It is possible to ski between the two sides however having an understanding about what each side has to offer can help save you time and potentially effort traversing. This post is all about Heavenly ski resorts California side but if you want to take a tour of the California side be sure to watch the video below.
HEAVENLY VILLAGE
Heavenly has a purpose-built resort village with; restaurants, accommodation and shops. For a full overview of the Heavenly Village Map look here. For visitors staying in the village, the Heavenly gondola is probably the route they will choose to access the mountain. The heavenly village provides the most direct route into the centre of Heavenly ski resort via the gondola. Unloading at Tamarack Lodge, the Heavenly gondola takes 15 minutes from the village to reach the top. The views from the gondola are worth the journey alone with an open panorama looking back at Lake Tahoe. If you need to park, then consider avoiding the gondola and instead head to California Lodge. Parking at the Heavenly gondola costs around $25 per day, whereas parking at California Lodge is free.
CALIFORNIA LODGE
A short drive from the Heavenly Village and you will be at California Lodge. California lodge offers two routes of uplifting onto the mountain, The Tram and Gunbarrel Express. The Heavenly Tram uplifts around 650 people per hour from the California Lodge car park to the top of Patsys run. The Tram is a popular method of getting onto the mountain but personally, I prefer the Gunbarrel Express chair. Gunbarrel Express runs parallel to the Heavenly Tram and uplifts to a very similar drop off point, the top of Paty’s run. A four-person quad chair, I prefer to ride Gunbarrel as you can ski off away from the lift with your gear already on. Just makes for a faster start to the day.
From the top of Gunbarrel or The Tram, you will find yourself at the top of Patsy’s run with two options… one take Patsy’s run or head down The Face, where you will find a number of Double Black Diamond graded trails and the perfectly groomed blue, World Cup.
Patsy’s is a mellow green and with its own chairlift, this is a popular place for people to learn. The area can get busy as it is an access point to the mountain but this clears outside of peak times. At the bottom of Patsy’s run, you will find two further chairlifts.
GROOVE CHAIR
The Groove runs parallel to Patsy’s chair and accesses the first of two terrain parks on the California side. The Groove Park is great with a beginners line that features small jumps and ride on box features. There is are also some larger jumps, two medium and two large, at the top of the Groove Park with a rail garden following both these lines. The rail garden allows for progression from the ride on boxes found in the small line. The Groove Park laps back down to the Groove Chair meaning you can just lap until your legs are done. The Groove chair is a slow 2 person chair but it gives a great view of the features as you ride back up.
POWDERBOWL EXPRESS
If you want to access further Heavenly ski resort terrain, you will want to take the Powderbowl Express chair. This fast 6 person lift takes you to the top of Powderbowl Woods. This area has a few Black Diamond graded trails, with bumps found on Powder Line and Waterfall. One of the most fun trails here is Mombo, a blue groomer that just feels great to bomb first thing in the morning.
If you want to head further into the resort, take the bottom of Ridge Run towards the Sky Deck.
SKY DECK
Sky Deck offers some really cool outside dining and access to two of the most popular chairs on the California side; Canyon Express and Sky Express. On the weekends this area can become hectic so potentially it is best to avoid it.
CANYON EXPRESS
Canyon Express Chair is one of my favourites on the California side. Shorter and less crowded than the Sky Express it accesses my favourite groomed run High Five. High Five is one of a few really nice groomed runs off the Canyon Express that are perfect to explore first thing in the morning.
SKY EXPRESS
Sky Express gives you some fantastic options with it possible to ride down Ridge Run back towards Canyon or Powderbowl Express chairs. My favourite option from here however is to take the Skyline trail and then find a spot to drop into the Ski Ways Glades or Pinnacles. These two areas have some really fun tree skiing and allow you to get away from the crowded groomers.
Skyline trail will also take you all the way over to Milky Way and the Nevada Side, but as this post is about California I’ll save that for another day.
Interested in Nevada Side Click Here.
From Skyline Trail you can take California Trail and Cascade, two fun Blues that will take you to the Tamarack Lodge and the top of Heavenly Gondola. Perfect if you want to head into the village for some lunch. Staying on the mountain? Well, the area around Tamarack Lodge is a base for ski school, with Easy Street and Big Easy perfect learner trails. There is also a Tubing Hill and Mountain Coaster found here in the Adventure Peak area.
The Tamarack Express is a fast 6 person chair that will give you access to California trail for the traverse back to California Lodge. The trails off the Tamarack Express are shorter than off Sky Express but are perfectly suited to intermediate skiers and snowboarders.
CALIFORNIA SIDE BEST FOR…
BEST FOR BEGINNERS
The ski school is based at Bear Cave near Tamarack Lodge with good access to Easy Street. This is a pretty good place to learn as the lodge is nearby if you need some rest. There is also progression close by with the opportunity to take the Tamarack Express to access some blue terrain.
Similarly, there is beginners terrain at California Lodge with Green runs Puma Trail and Enchanted Forest of the First Ride chairlift. There is another ski school base at California Lodge.
BEST FOR INTERMEDIATES
For me, its a choice of two places on the California side, either the Powderbowl Express or Canyon Express chairs. I am excluding the Tamarack Express as the runs there are quite short and could become boring very quickly. The runs off the Powderbowl Express chair are really fun having already mentioning Mombo. The Powderbowl Woods are a great place for intermediates to get their first experiences of glade skiing or snowboarding. Similarly, High Five and Ridge Run, accessed from the Canyon Express chair are great for intermediate skiers and snowboarders. Nice long groomed trails, leading back to the chairlift for another lap.
BEST FOR ADVANCED
It is hard to look past The Face for challenging terrain on the California side. The runs back down Gunbarrel and East Bowl are legendary and the moguls here are some of the largest on the mountain.
High Roller Park
High Roller Park has features much larger than I feel comfortable riding so would offer those with a freestyle focus more challenge than the Groove Park.
BEST FOOD WITH A VIEW
The best views from a restaurant on the California side at Heavenly has to be Booyah’s, Lakeview Lodge. The Lakeview Lodge has an outside terrace with uninterrupted views of Lake Tahoe. The Lodge can be found adjacent to the Heavenly Tram, near California Lodge.
BEST DRINK STOP
If you are looking for a place to celebrate your last run, or just have a cold one at lunchtime then Steins is a pretty good place to do it. Steins can be found next to Patsy’s and have lots of outdoor seating with deck chairs. If you have weary legs this is the best place to reboot.
BEST VIEW CALIFORNIA SIDE
At the top of Sky Express, there is a ski patrol station. Directly opposite, near the ski area boundary line, there is a scenic photo spot. Take off your ski’s and your board and head through the trees where it will open up to views across to Nevada. Stunning!
In terms of views from a run, the views from The Face or Gunbarrel looking back over Lake Tahoe are also pretty epic.
LOOKING FOR MORE HEAVENLY INSPIRATION? CHECK OUT THESE RELATED POSTS
GET IN TOUCH
You’ve heard from me, now it’s your turn to get involved! Have you visited Heavenly Ski Resort? What is your favourite run on the California side? Do you prefer skiing at Heavenly California or Heavenly Nevada? Let me know in the comments or via socials.
PIN IT FOR LATER


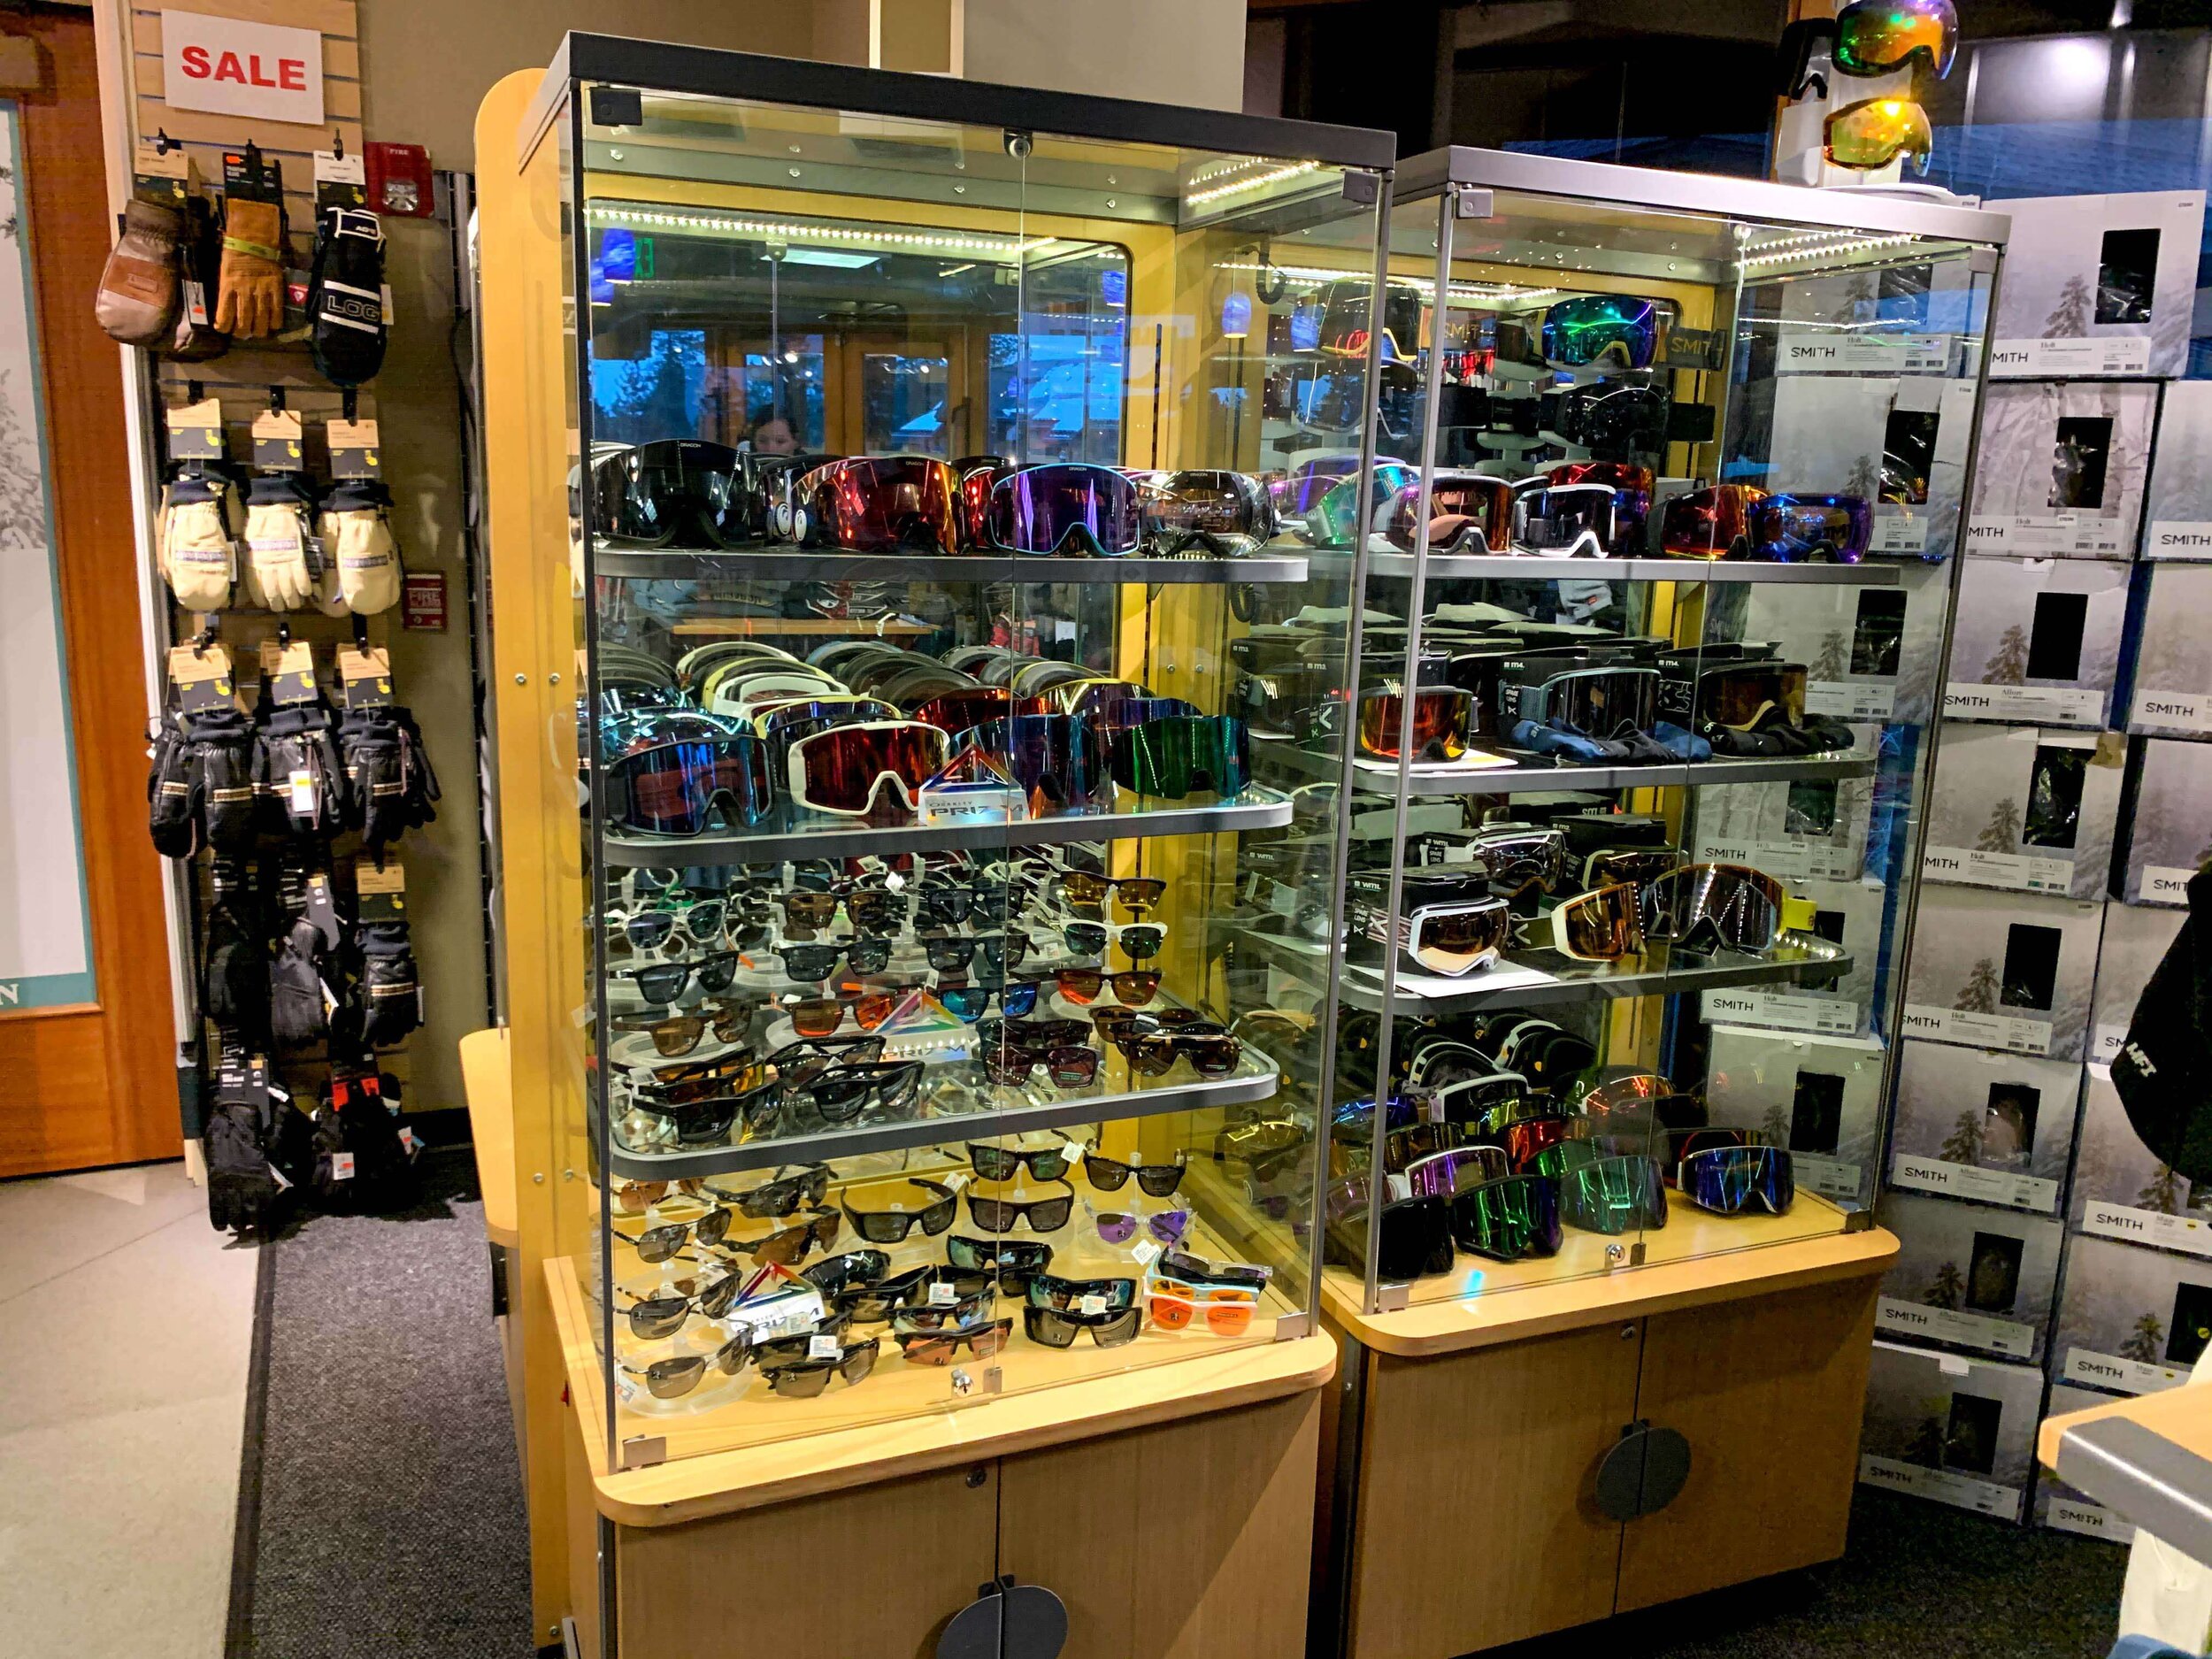
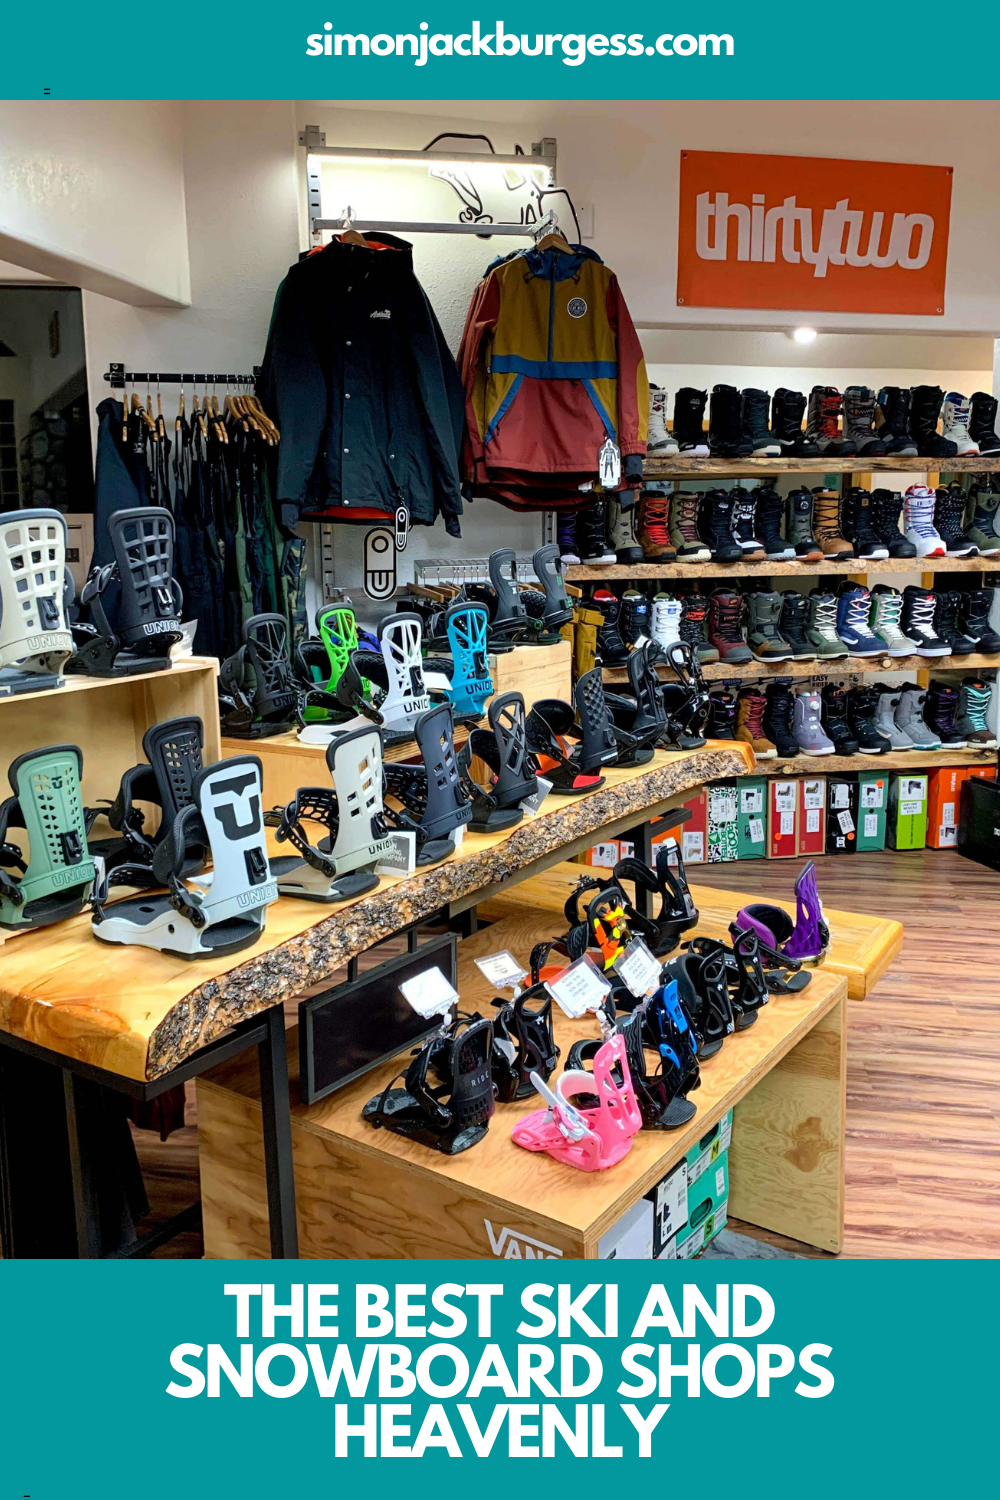
Best Snowboard Shops Heavenly
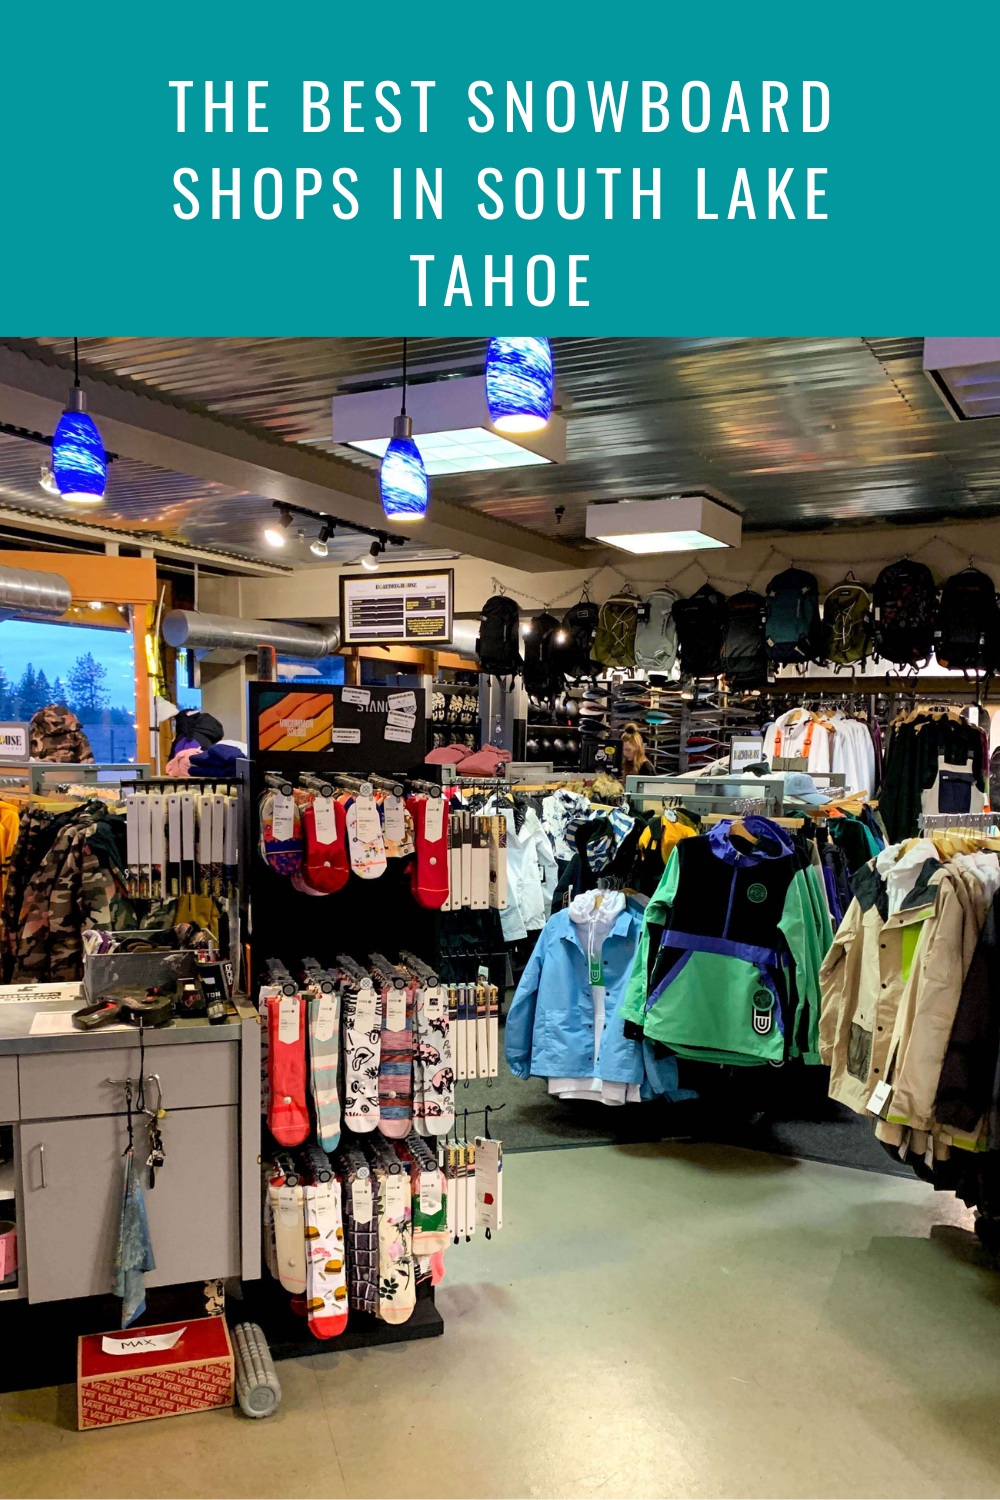
When heading out on your ski trip finding the right equipment or place to tune your gear can be really important. Regardless of age or ability, you will want to find the best equipment at the lowest prices but most importantly get top advice. Well, South Lake Tahoe has a ton of ski and snowboard shops and I visited them all before breaking them down into this list. The ski shops on this list will guarantee to have you heading out the door with high-quality gear so you can make the most of your day on the snow.
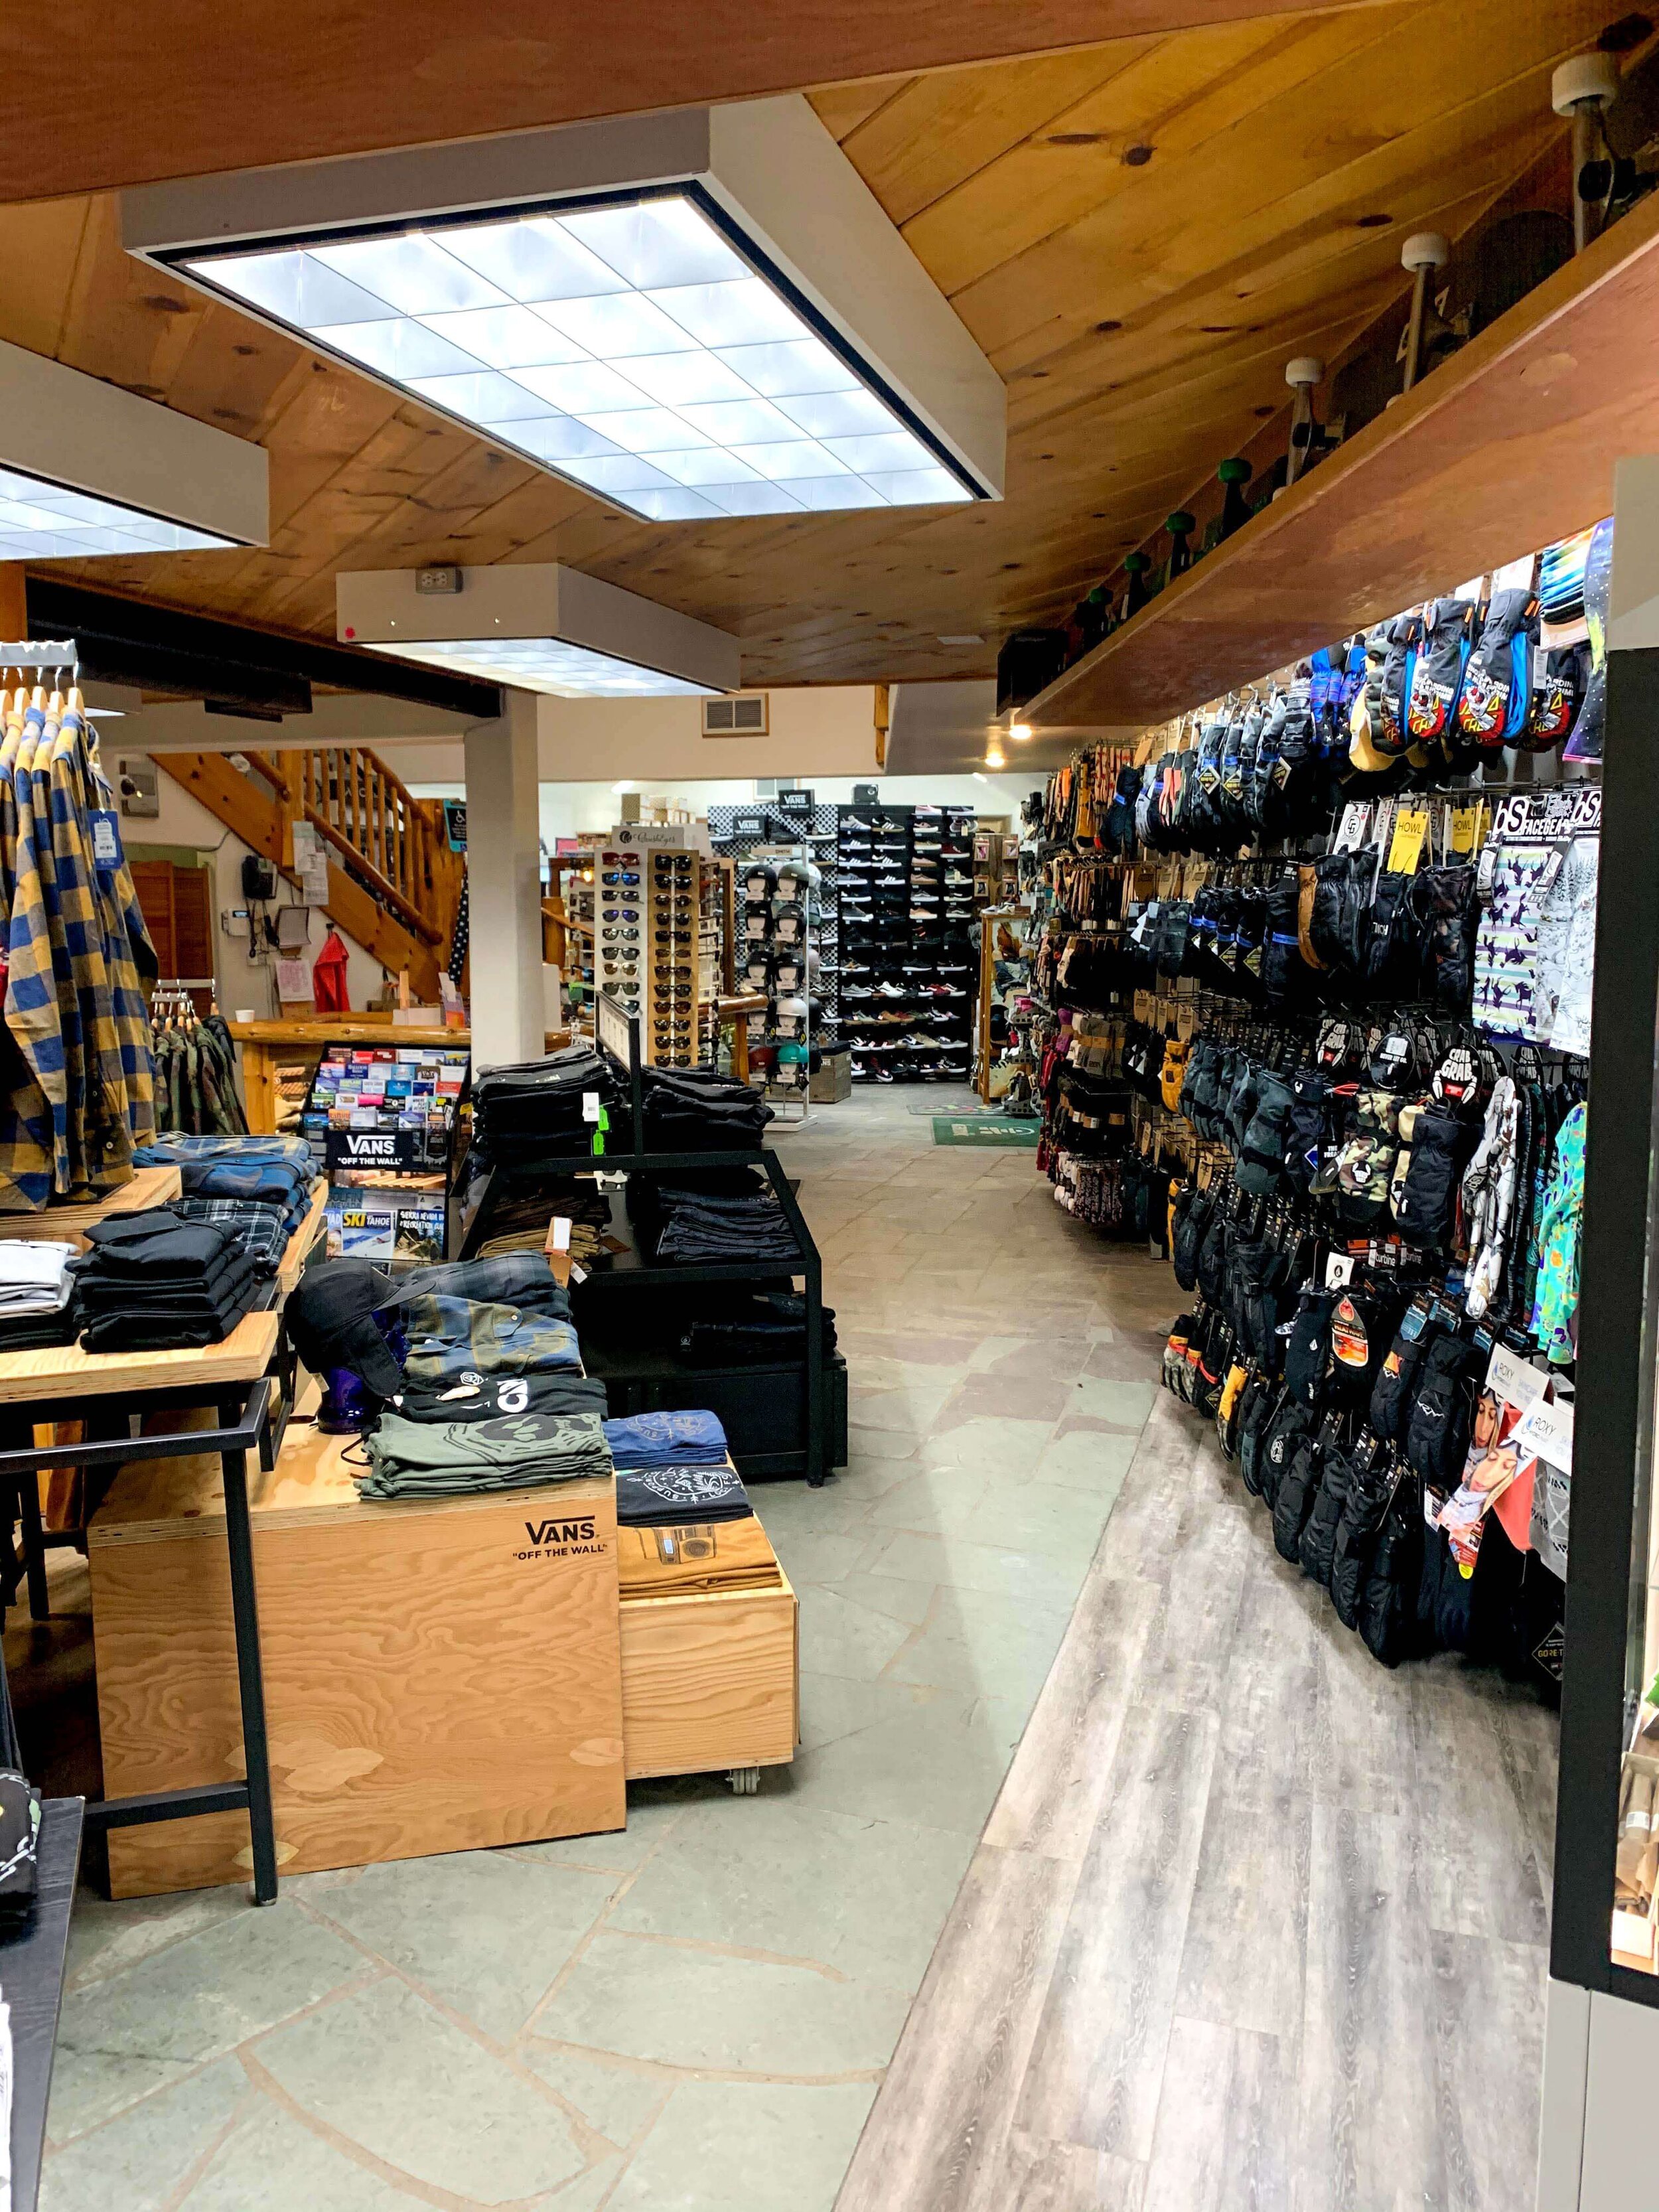
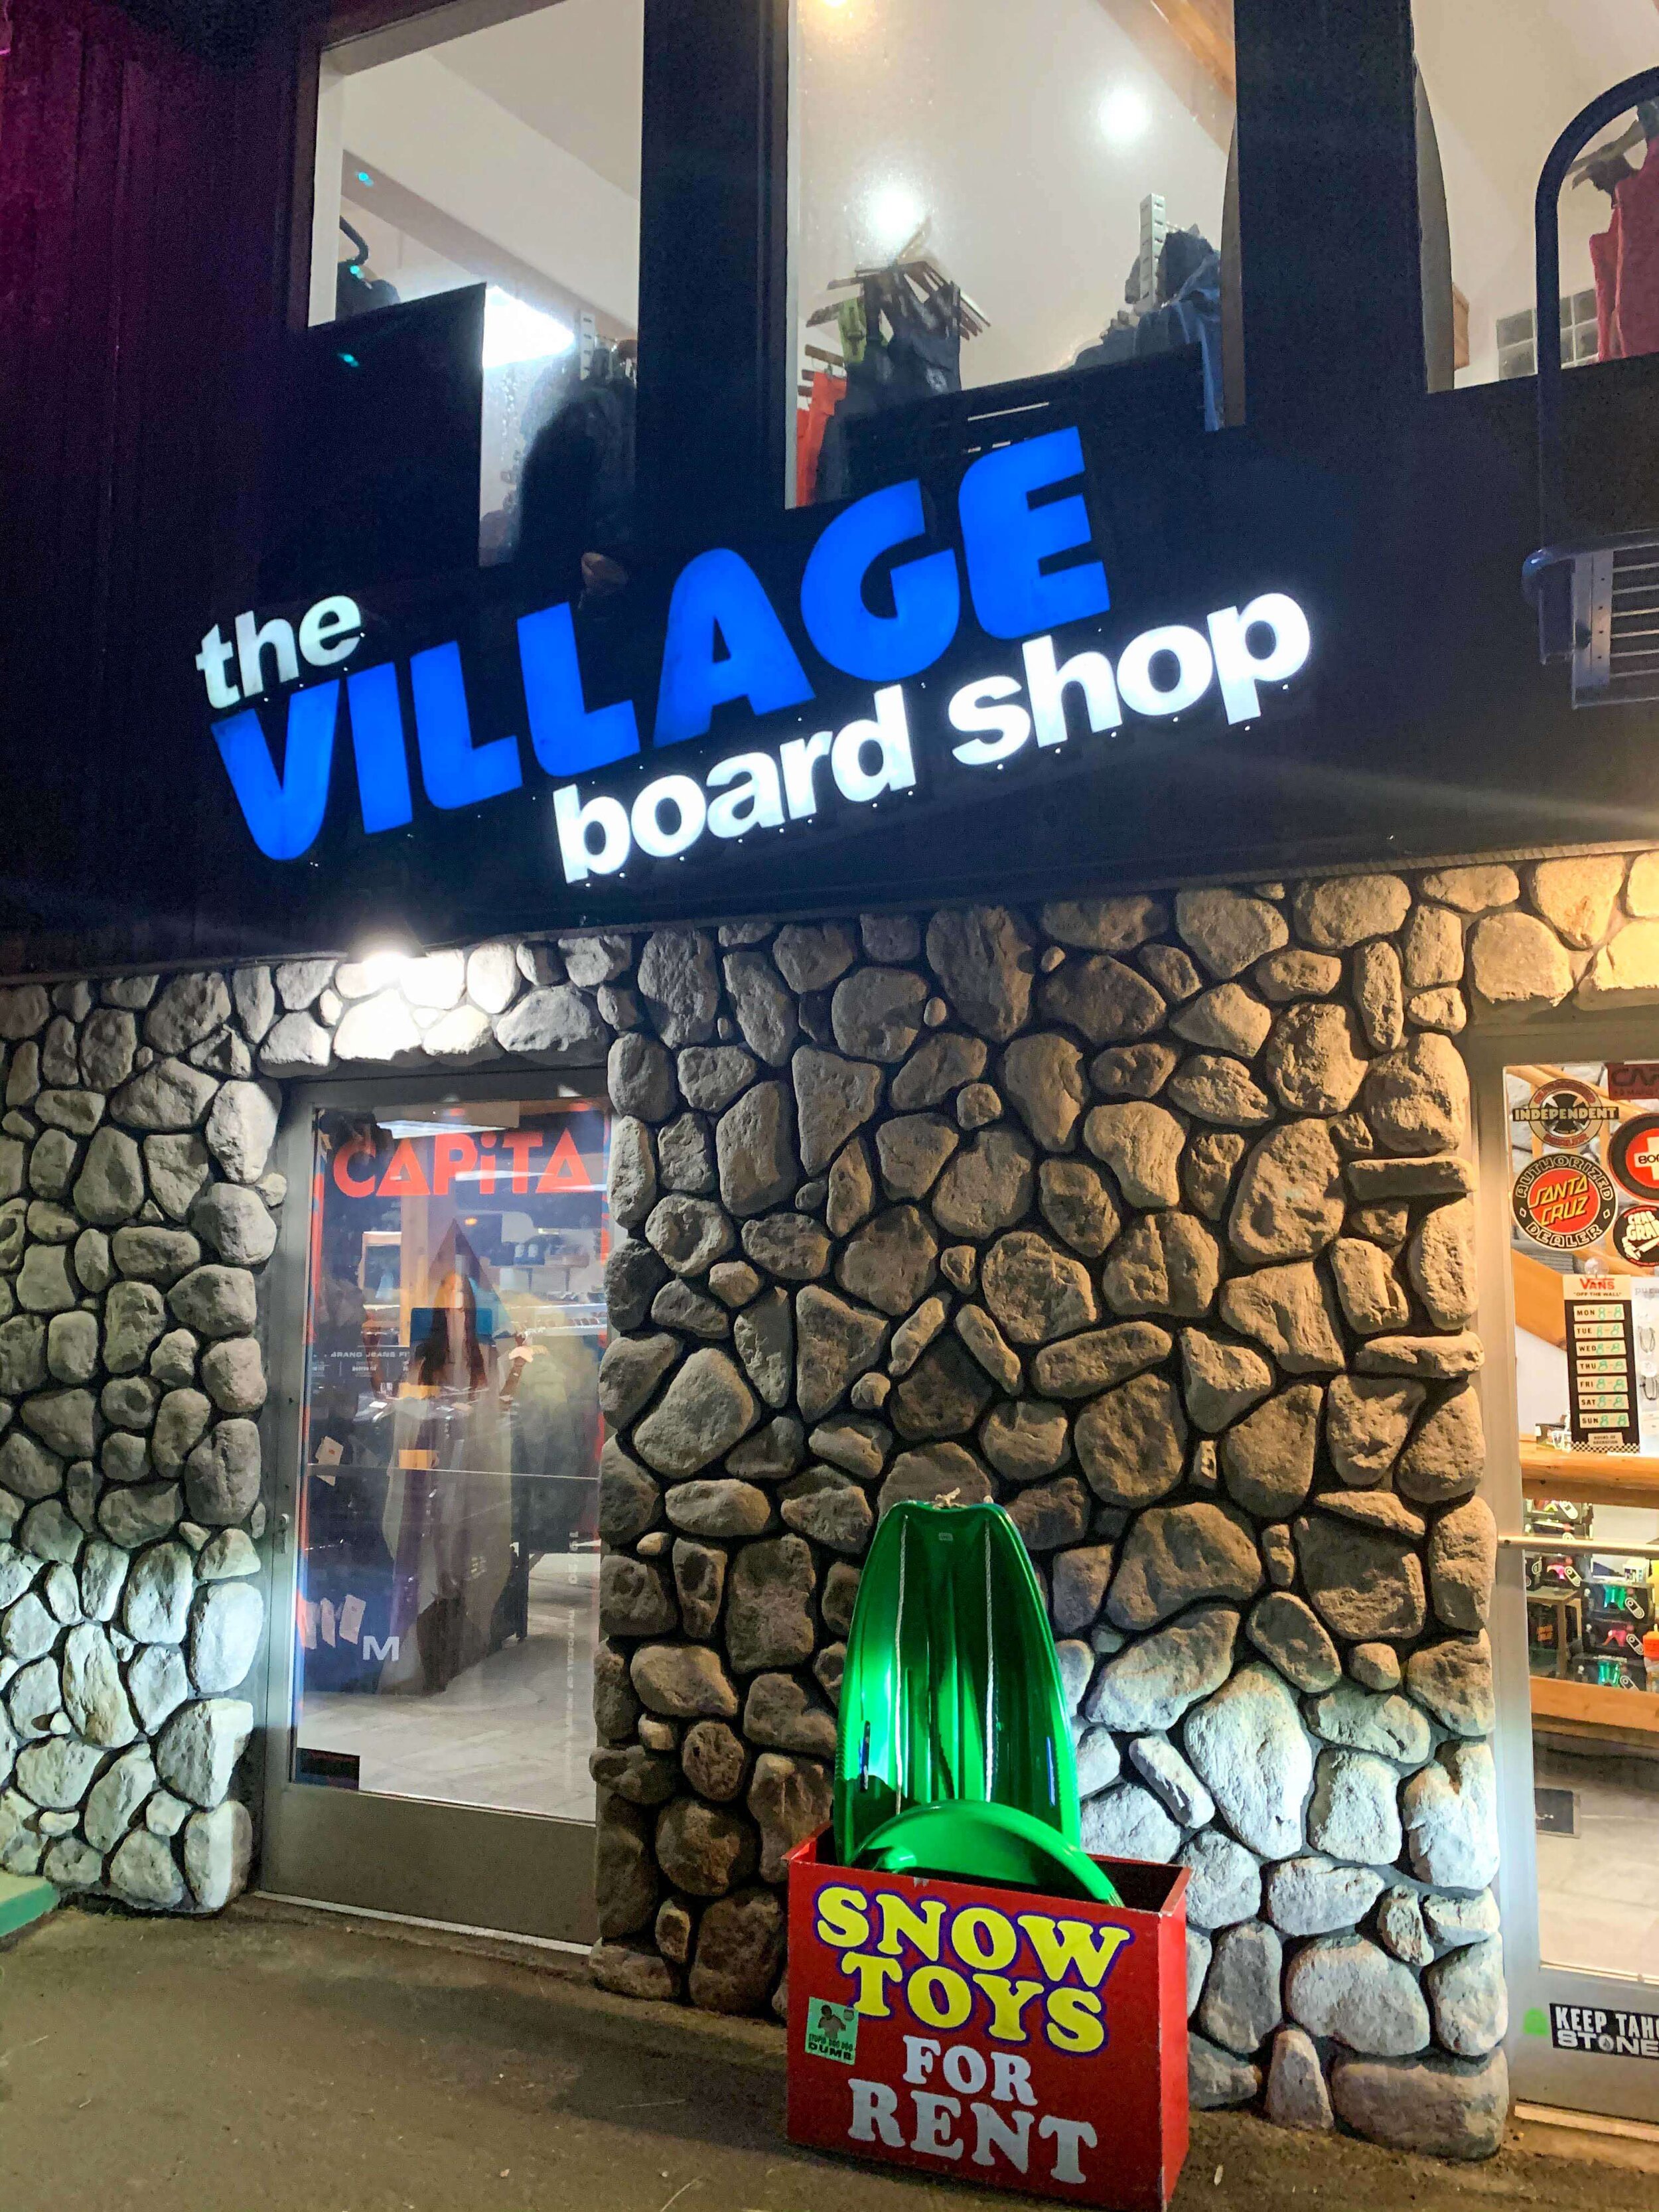
THE VILLAGE BOARD SHOP
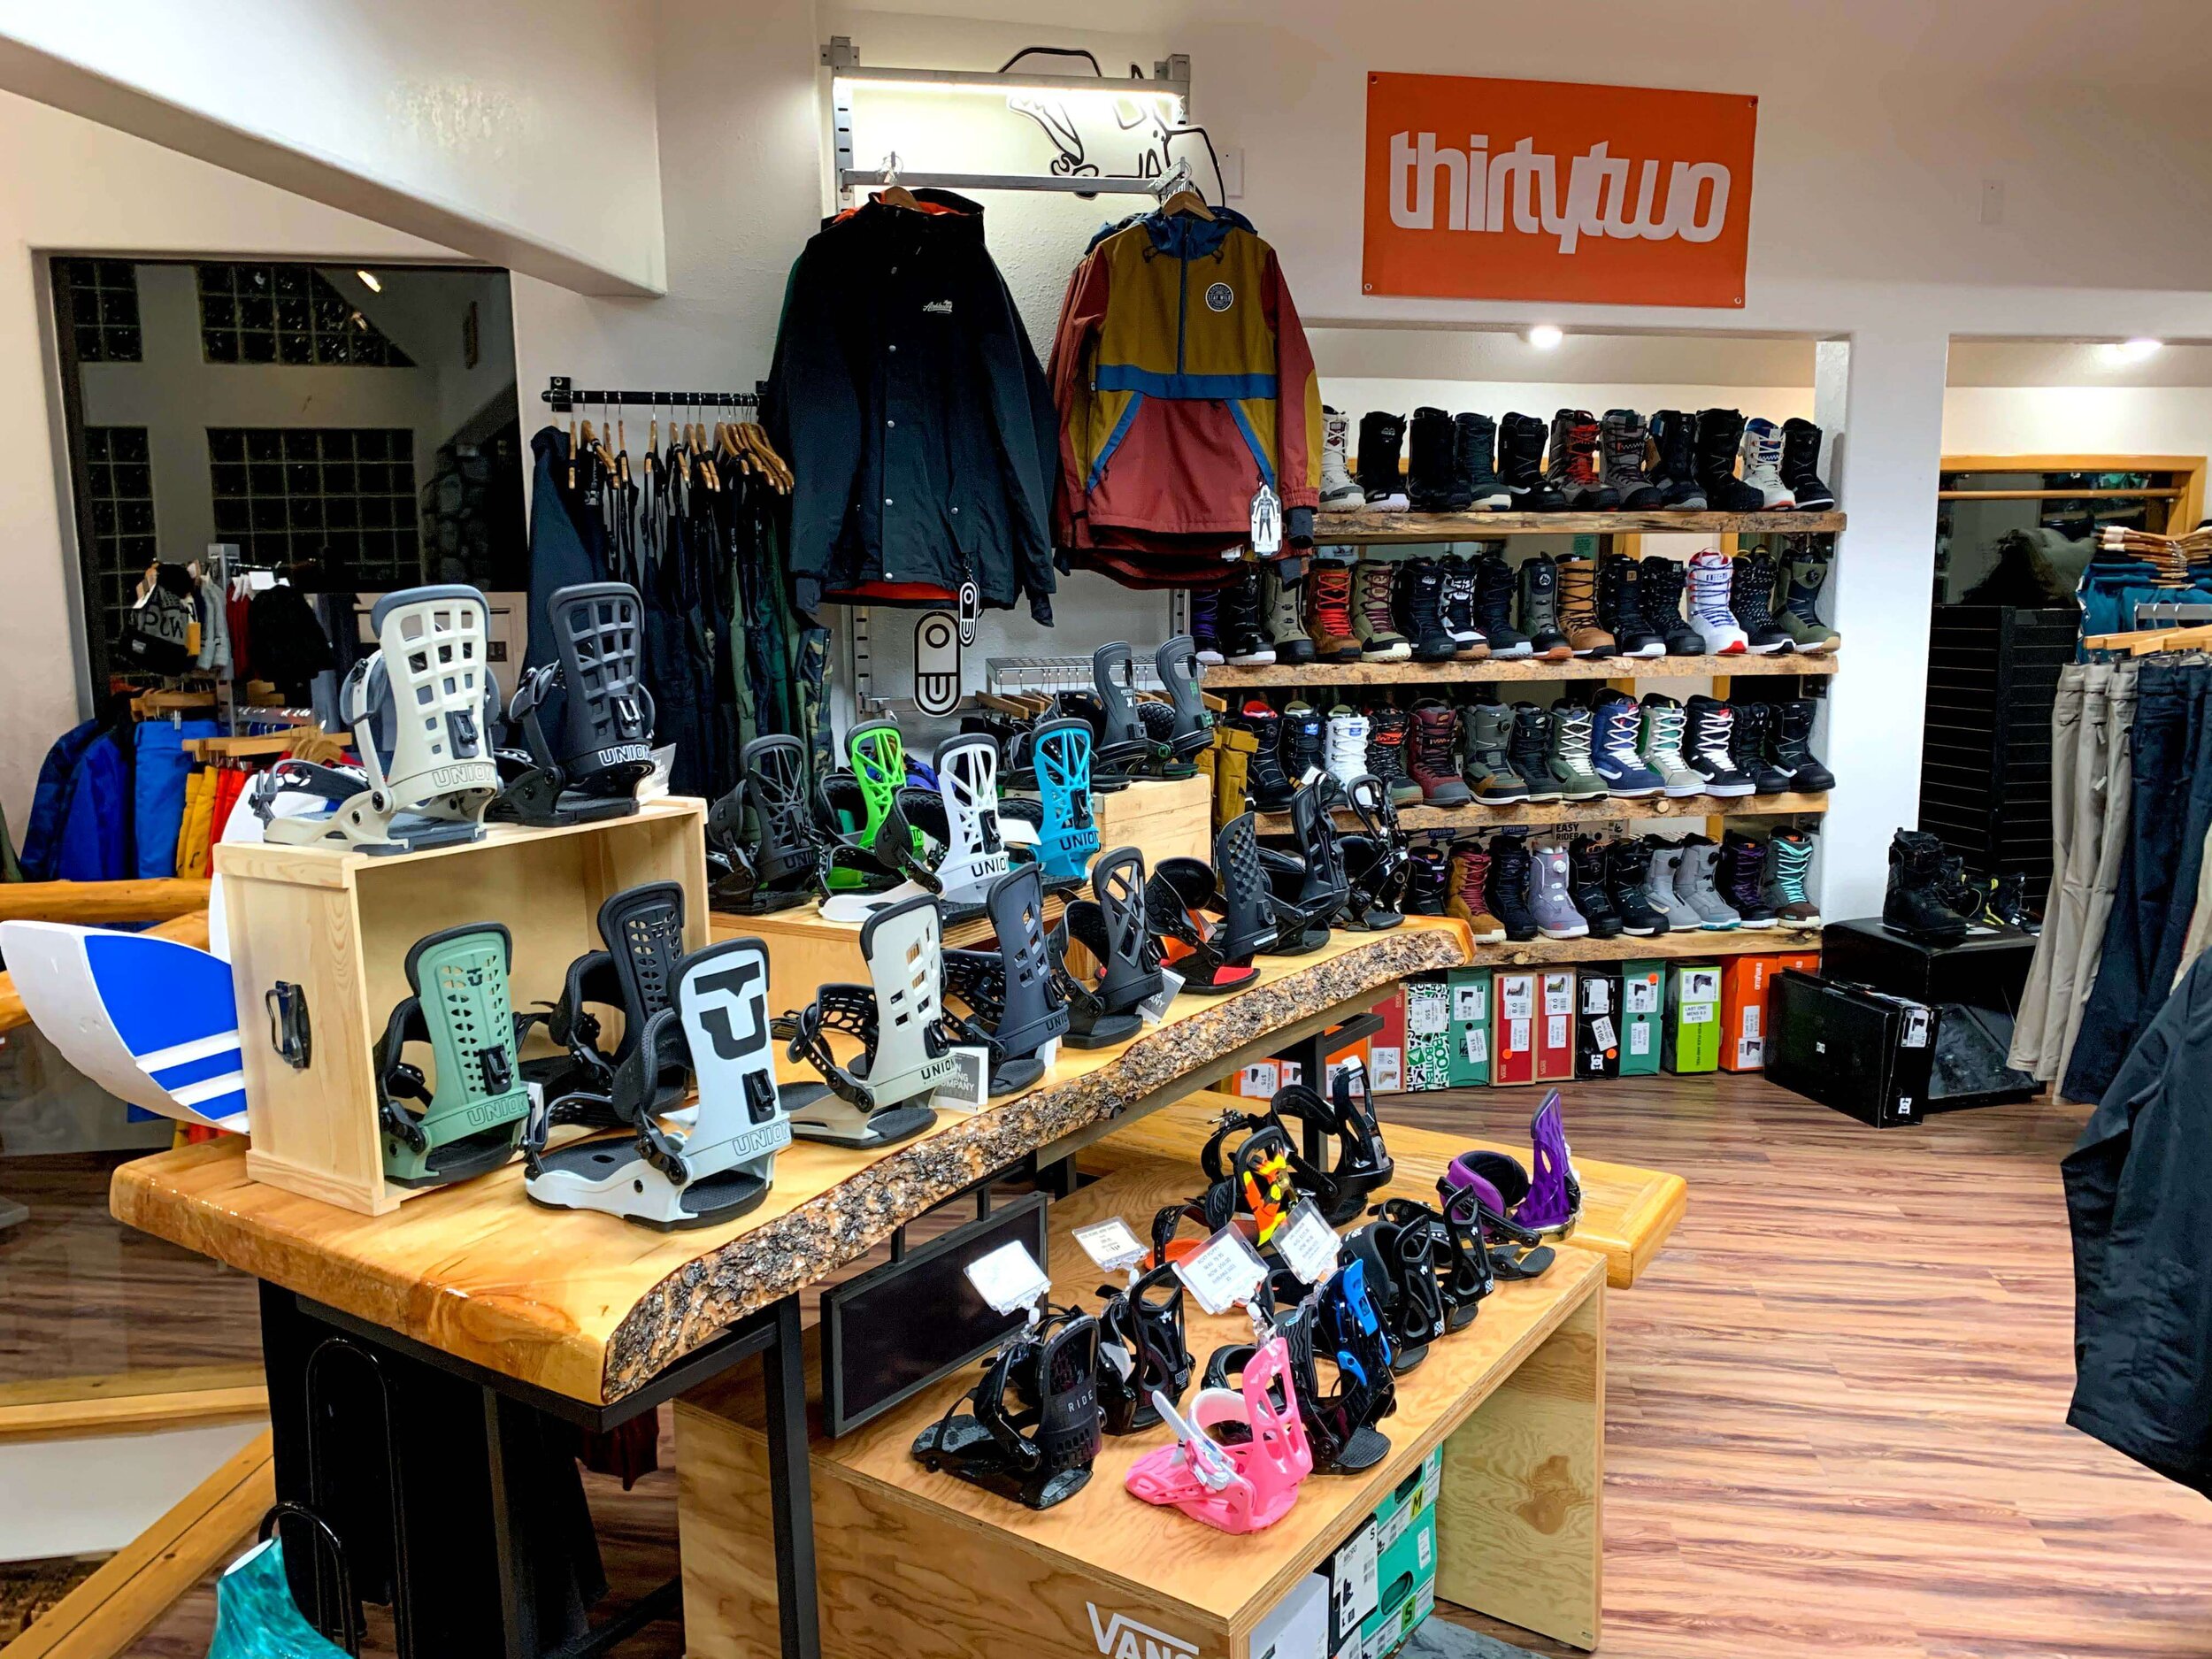
Hands down the best service I received whilst in Heavenly was at The Village Board Shop. The team at VBS was incredibly knowledgeable and helpful but not in a pushy kind of way. VBS is split across two floors with the downstairs being the location for their rental gear. You will also find your accessories downstairs with displays for; goggles, gloves, socks etc. Upstairs is where it gets interesting for me as this is where the hard goods are found. VBS had a good selection of snowboards with brands like; Jones, Salomon, and Nitro available. Even better they had a couple of last year’s boards available at pretty decent prices. When it comes to bindings and boots VBS had a decent selection of beginner through advanced gear with Union Bindings and a good selection of boot brands including; Thirty Two and Vans.
VBS can also take care of your tuning needs and I used their workshop for a full tune on my board. I was pretty happy with the finish and would use them again.
Probably worth mentioning if you are looking for ski gear then VBS isn’t going to be the store for you.
The Village Board Shop is a short drive from Heavenly Village and the main hub of accommodations but it is worth it. At VBS they do get less foot traffic due to their location but this means you get a better service as there are fewer customers in the store at one time.
FINDING VBS
If you are driving there is space for one car in front of the store, but there is parking around the back. To get to the store you will need to head along Route 50 towards the Bijou golf course. You should see the big VBS sign from the road.
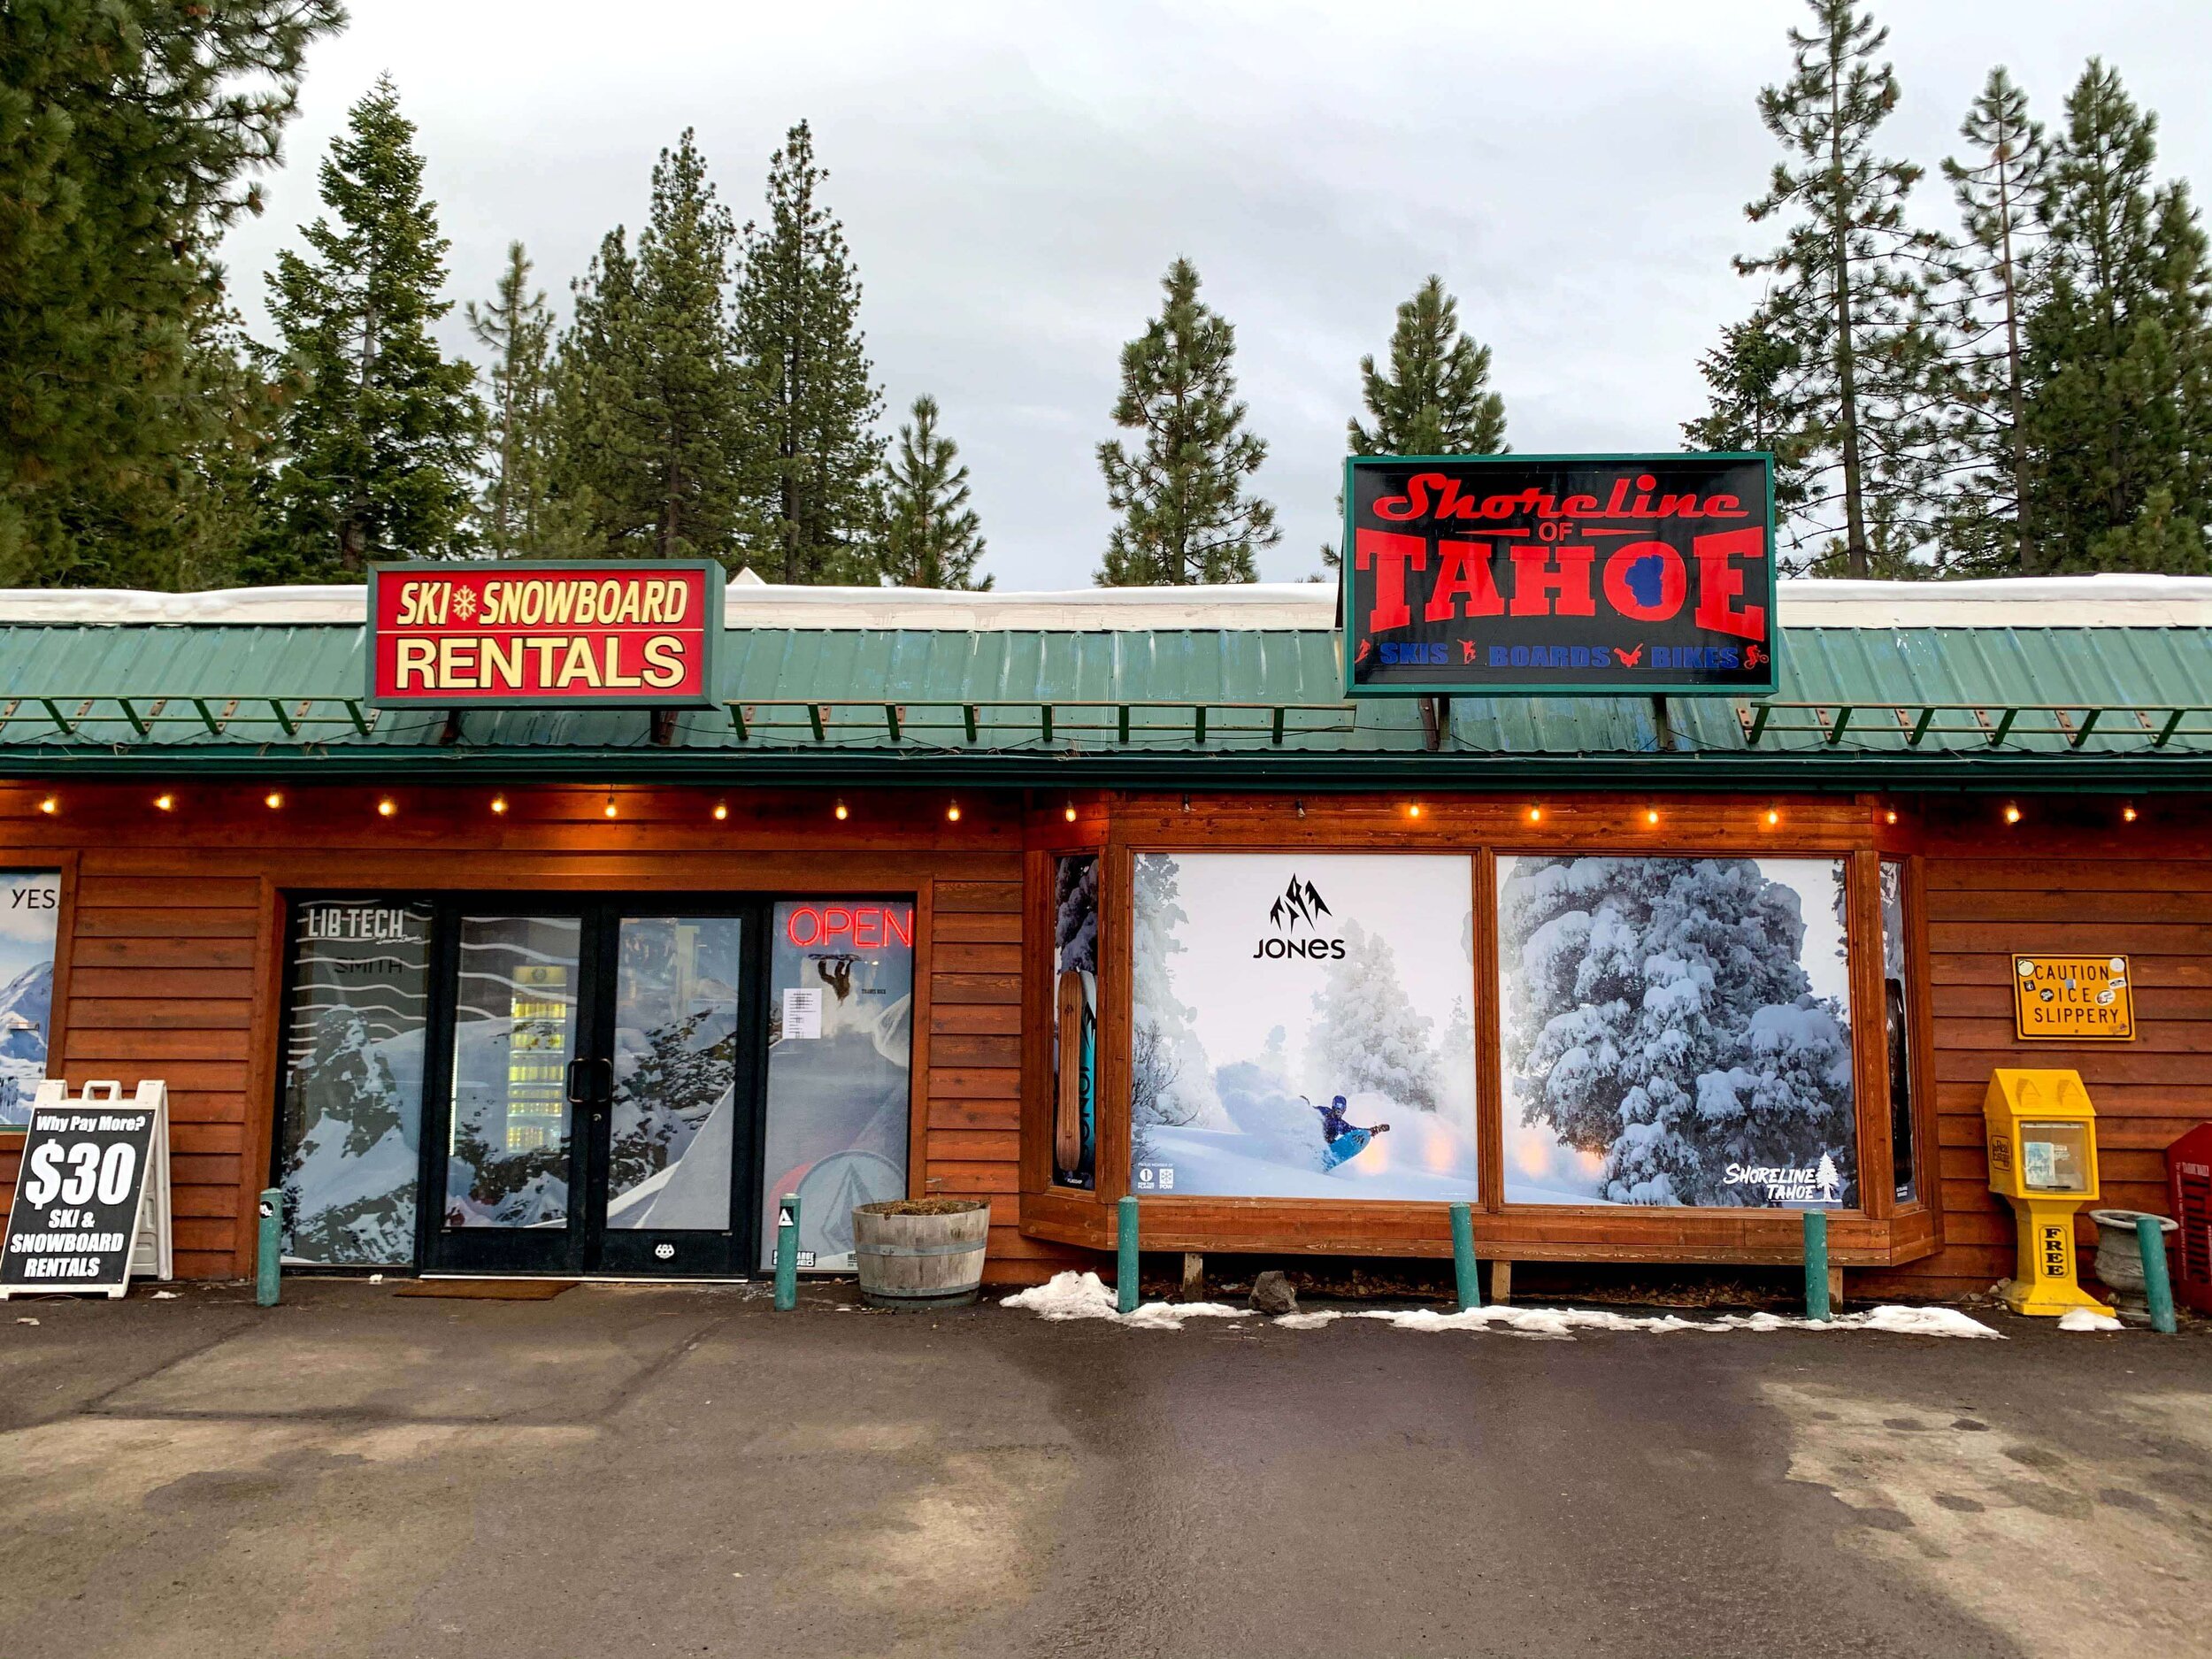
SHORELINE OF TAHOE
If you are looking for a ski shop on the Nevada side then look no further than Shoreline. Shoreline probably had the best selection of equipment and outerwear out of all the ski stores at Heavenly. The vibe at Shoreline was pretty relaxed which is really nice for an American shopping experience with staff giving you the time to browse without being hassled.
Shoreline had a good selection of snowboards and splitboards, as well as probably one of the larger boot collections out of the various South Lake Tahoe stores. Shoreline does have a rental department and a tuning workshop so you can ensure your gear is in perfect condition.
I visited Shoreline in search of snowboard boots and I was really impressed with the knowledge of the staff and how un-pushy they were when it came to making a sale. I was a much more relaxed shopper in this environment and it made for a really nice experience.
Check out the shoreline website
FINDING SHORELINE
Getting to Shoreline is fairly simple although you will have to leave the Heavenly village area and cross the Stateline. There is ample parking outside the store and if you are hungry after all that shopping you can grab a decent burger next door.
SPORTS LTD
Possibly the biggest shop for outdoor gear at Heavenly is Tahoe Sports Ltd. Sports Ltd is basically a one-stop-shop for; skiers, snowboarders, mountain bikers, walkers, campers, and fishermen. In terms of ski and snowboard gear Sports Ltd has a good selection of hardware and soft-goods from big-name brands; Salomon, Jones, Armada, Black Diamond, and Capita but also makes room in its line up for the likes of Academy.
Sports LTD South Lake Tahoe
Sports Ltd is ideally located for those based in Heavenly Village and is one of the stores accessible without the need for a car. Because of its location, it gets a lot of custom and you can spend time waiting to be served at the peak periods. I was pretty happy with the service I received in Sports Ltd who helped me to deal with a warranty replacement, although it did seem like they didn’t really want to help initially.
If you are looking for one store that has all your needs covered then Tahoe Sports Ltd could be the best option for you. Check out their website here.
FINDING SPORTS LTD
Head towards the Heavenly gondola and in the retail park next door, you will find two Sports Ltd stores. One store is specifically for rentals and the main store has all the gear that’s for sale.
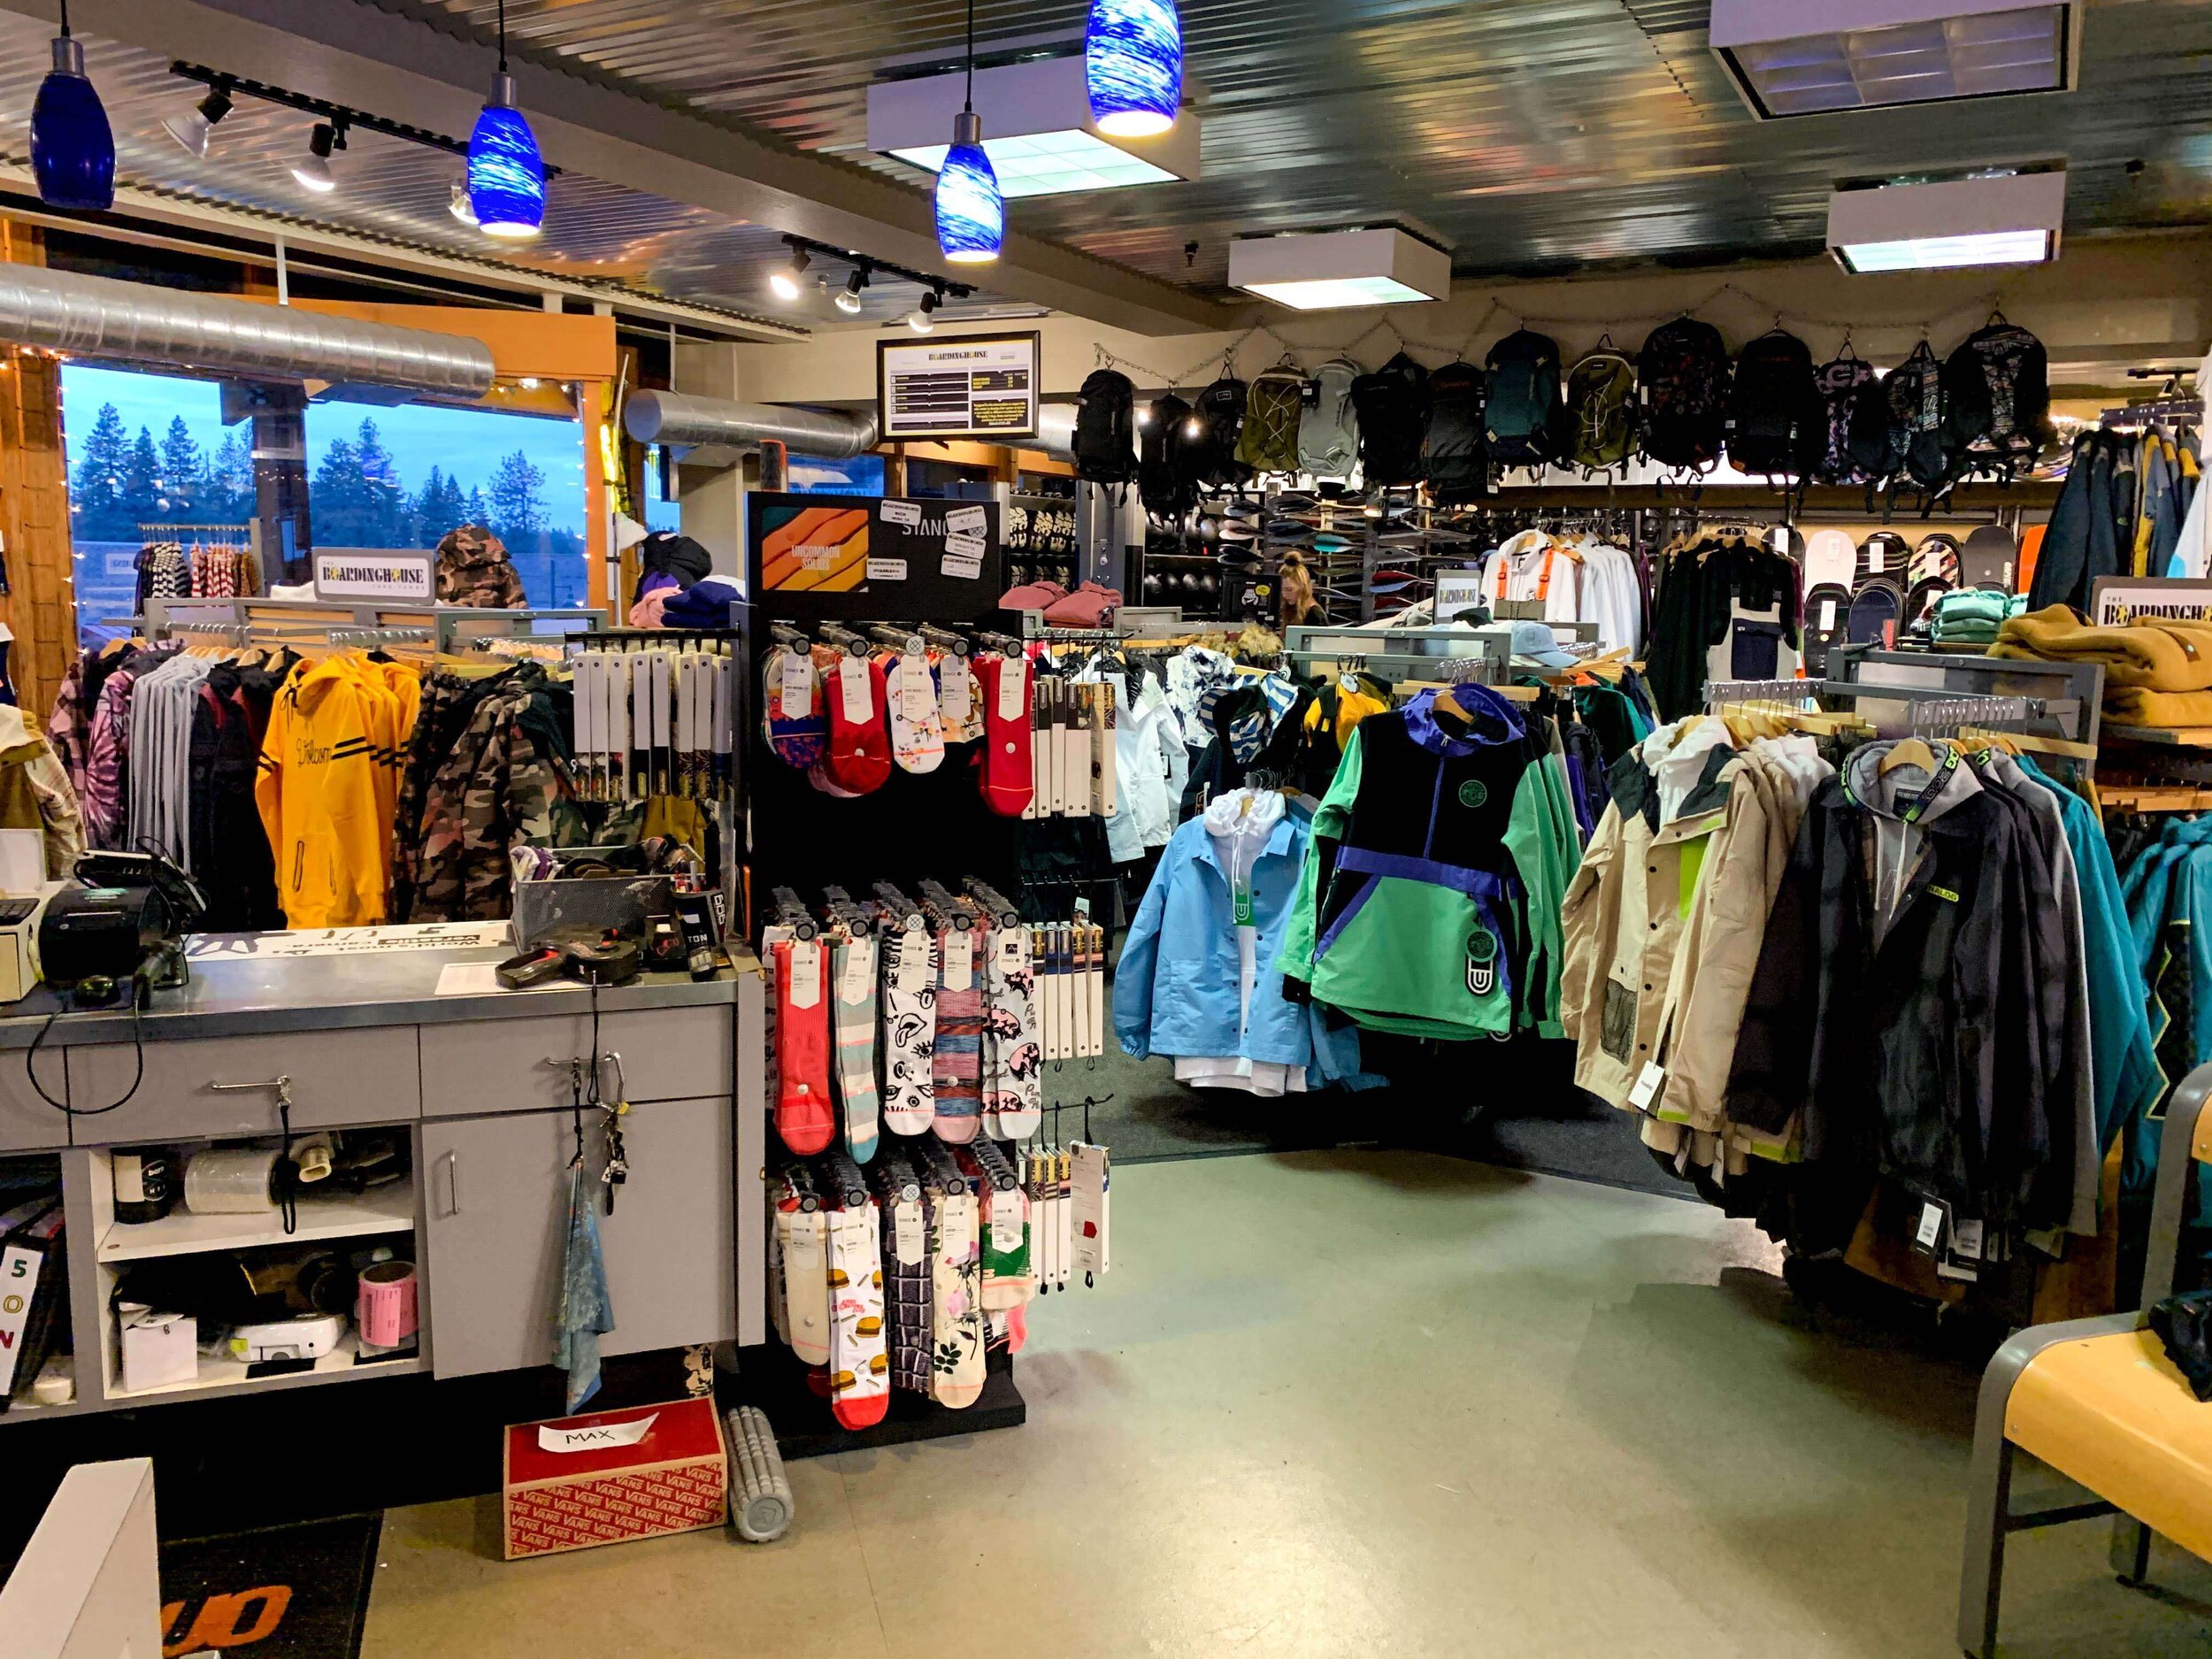
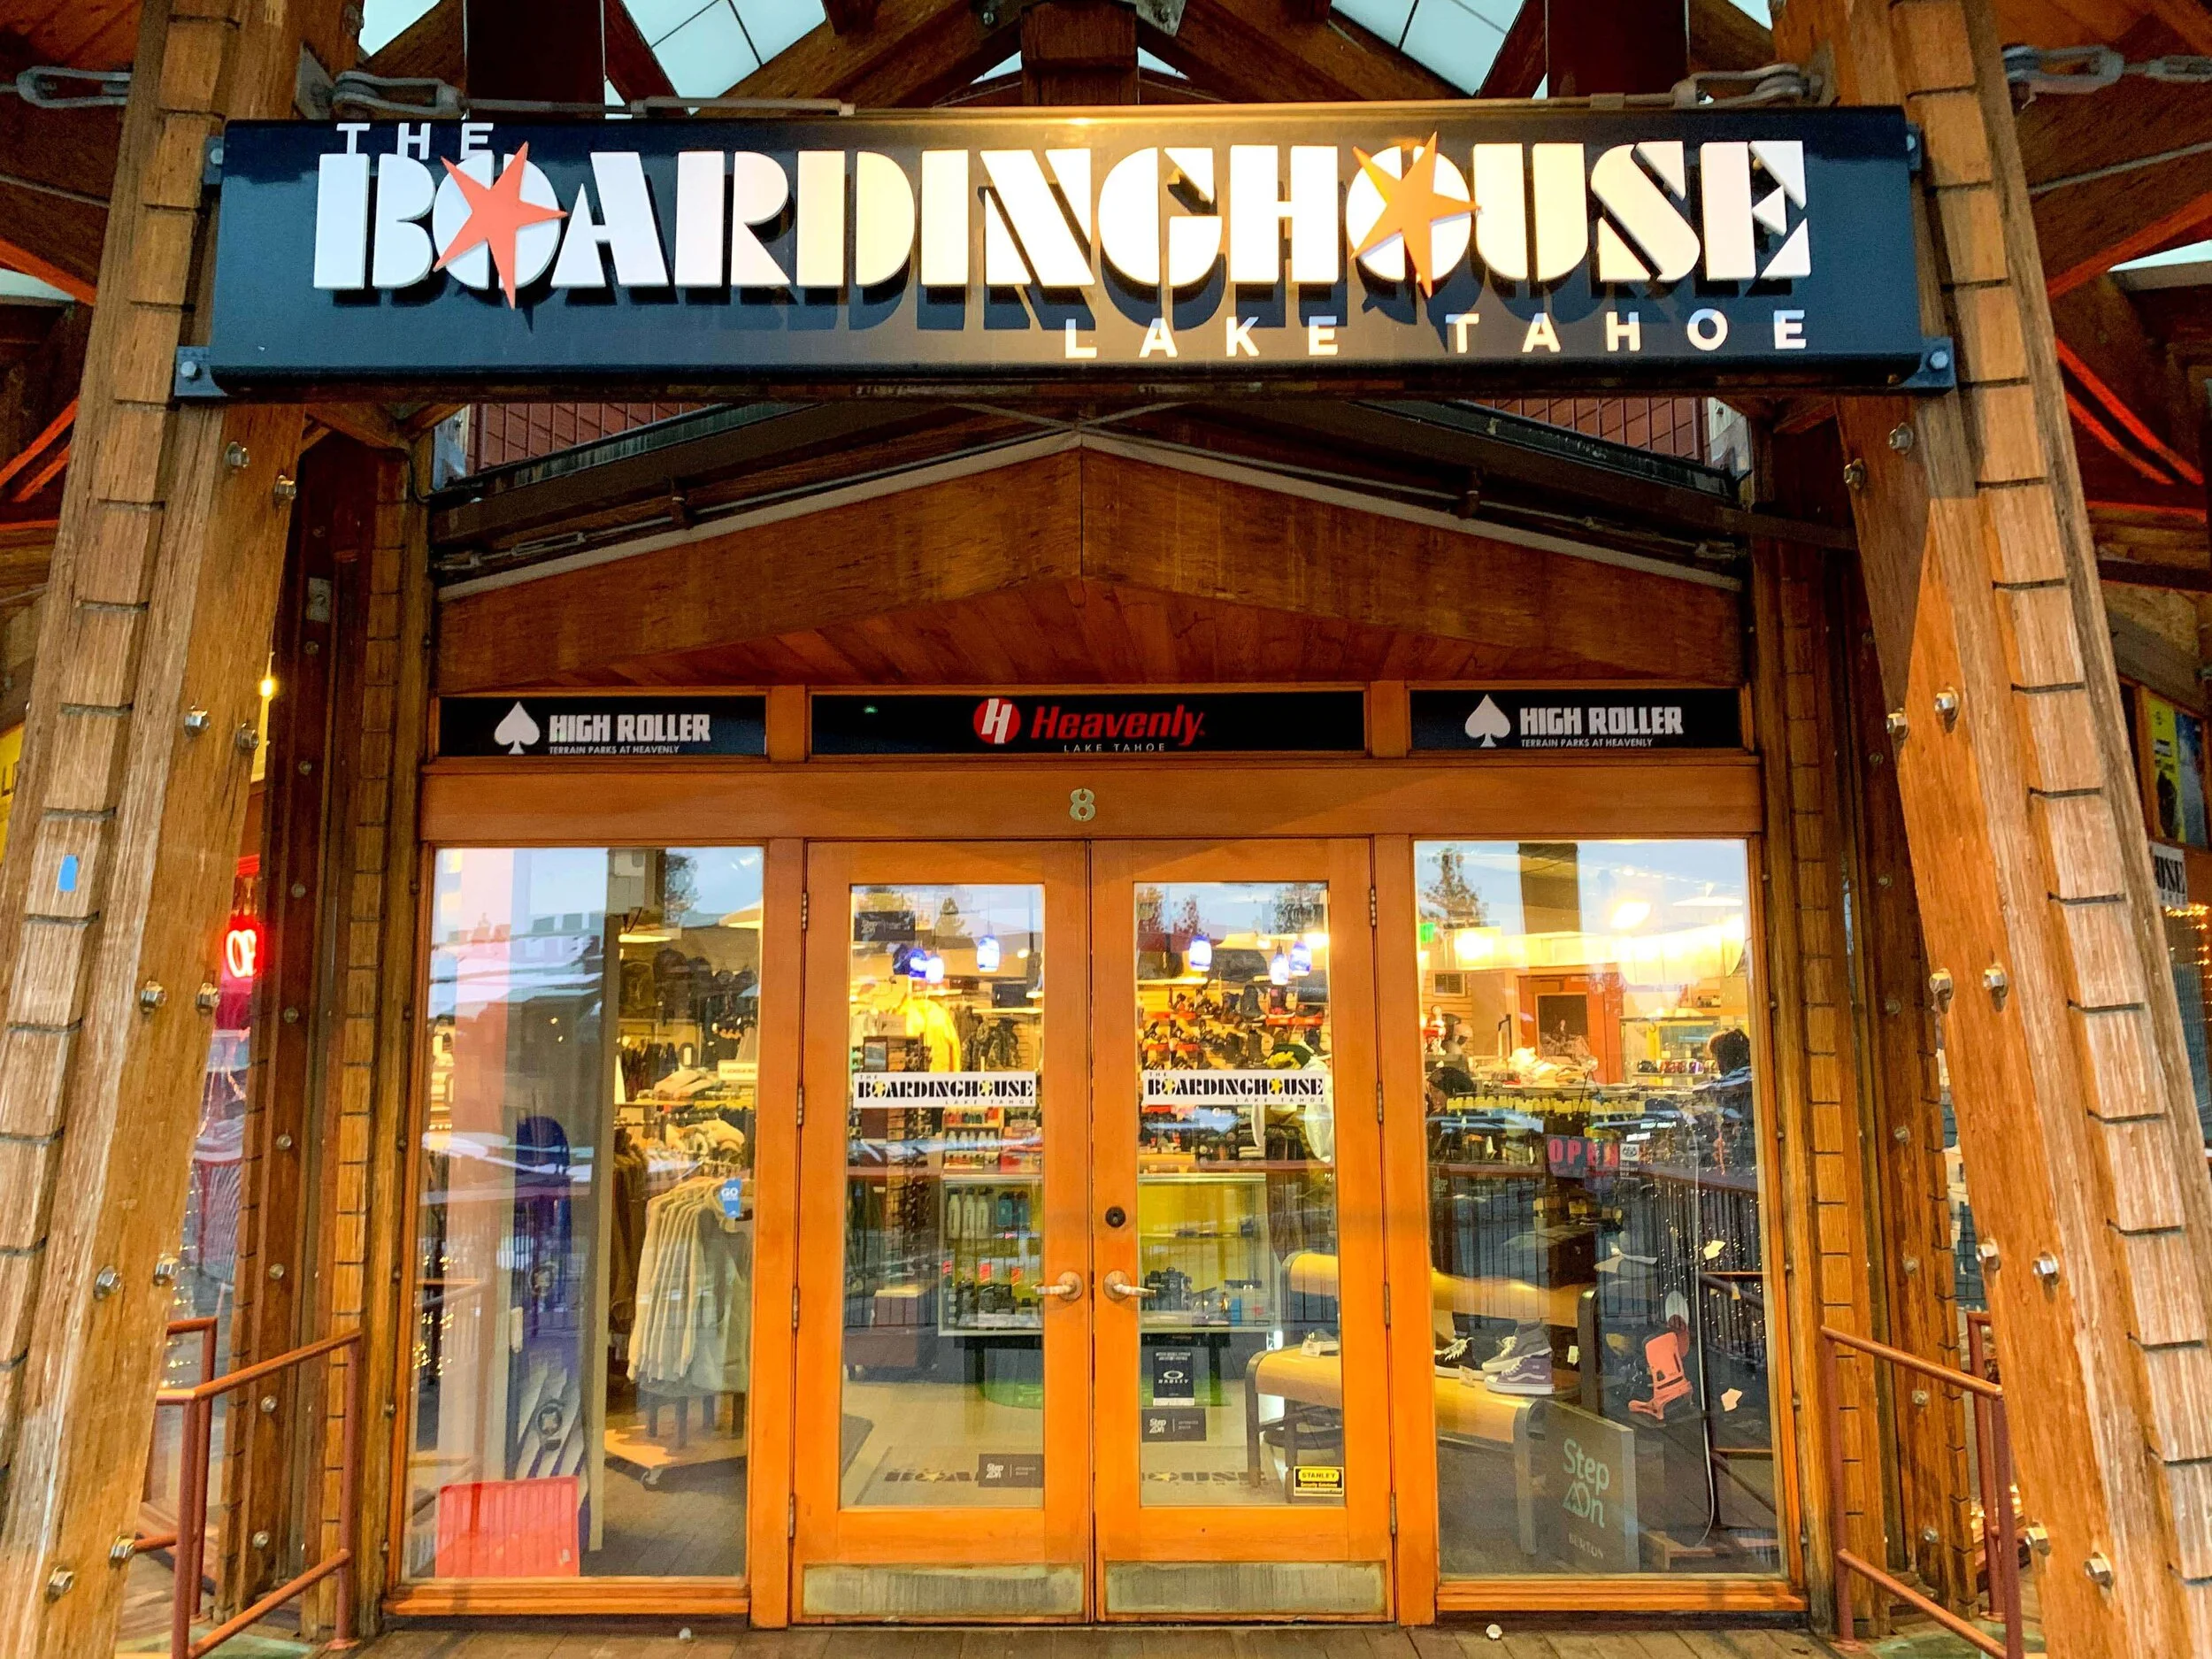
THE BOARDINGHOUSE LAKE TAHOE
The Boardinghouse Lake Tahoe gets an honorable mention on this list. The boardinghouse isn’t the largest store in Tahoe and it doesn’t have the greatest range of equipment but it is a great snowboard store. There is a refined list of brands and equipment for retail at The Boardinghouse and they have narrowed their offering to the brands they clearly trust. The friendly retail staff is on hand to assist with any questions and they are clearly knowledgeable about the products they sell. If you are not looking for a massive collection but instead want to find the most trusted brands in snowboarding, head to The Boardinghouse.
The BoardingHouse South Lake Tahoe
GET IN TOUCH
I have had my say, now it’s time to have yours… What is your favourite ski shop at Heavenly ski resort? Where has the best deals? And who provides the best service? Let me know in the comments or via the socials.
CARE TO SHARE?
IF YOU FOUND THIS POST USEFUL AND YOU THINK IT MAY ALSO HELP OTHERS, PLEASE LIKE, SHARE AND COMMENT TO PROMOTE IT TO OTHERS
PIN IT FOR LATER
Tips For Skiing and Snowboarding In Early Season
SKIING AND SNOWBOARDING IN EARLY SEASON CONDITIONS ISN’T ALWAYS EASY OR NICE. WHETHER THERE IS POOR SNOW COVERAGE OR ICY RUNS, THE FOLLOWING TIPS SHOULD HELP YOU HAVE FUN AND STAY SAFE WHILST OUT ON THE SLOPES.
SNOWBOARD TO YOUR ABILITY
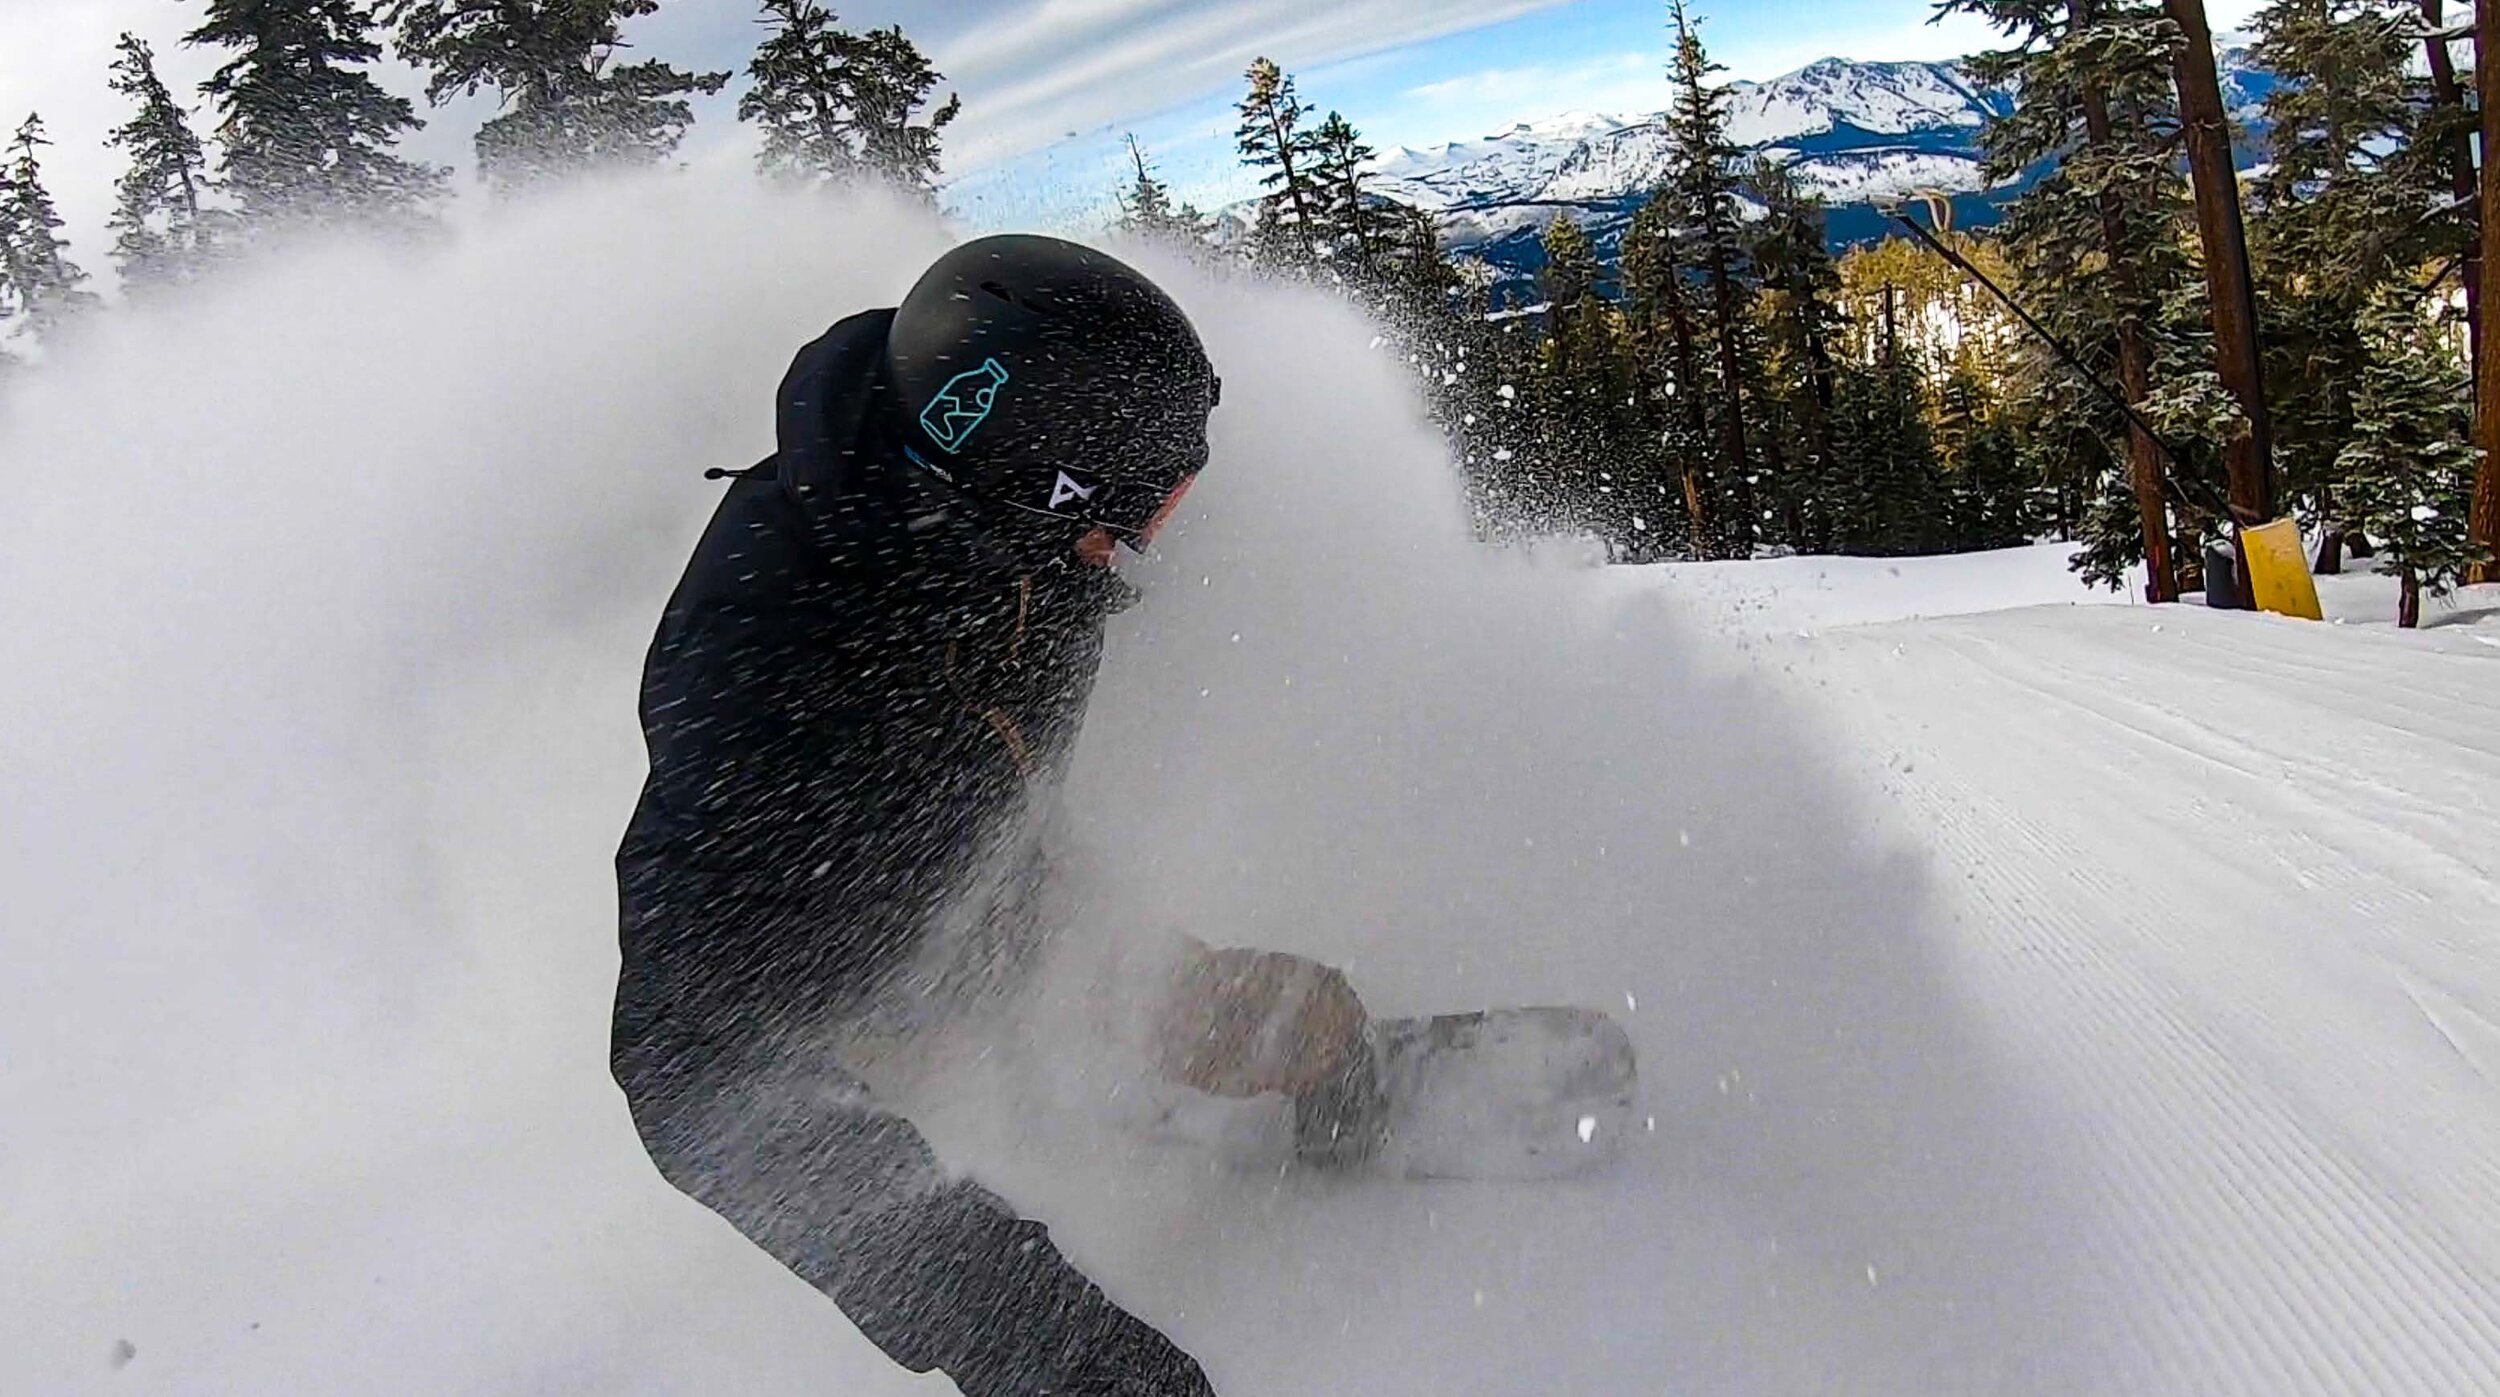
The early season is not the time to be pushing yourself. For most of us, early ski season is exciting as it will represent our first laps on snow for a period of months. These early days are a great opportunity to get on snow and get your body warmed up for the months ahead. So during this time keep to trails that you feel comfortable on and make sure to warm up before hitting the hill.
MAKE CONTROLLED TURNS
When adding together your first turns in months with the potential for poor snow conditions, accidents could happen. With this in mind, it’s better to slow things down and make controlled turns. By slowing down your riding in the early season you will better understand what is happening beneath your feet and prevent unwanted early-season injuries.
Photo Credit: @koudy1
LOOK AHEAD DOWN THE PISTES
Looking ahead and down the piste will help you spot any dangers or obstacles in your way. Early season snow is prone to rocks or icy patches and by keeping your eyes on your path you will be able to see them sooner meaning you can avoid them or react accordingly.
Photo Credit: @fr3nks
BEND THOSE KNEES
Flexibility at the knees is important for your stability on your skis or snowboard. By having some movement and less rigidity in your lower body you will be able to absorb any bumps in the snow and ride it out over those icy patches. Your knees will act to absorb the impact caused by bumpy snow or those pesky rocks peaking through the early season coverage.
Photo Credit: @maarten_jpg
STICK TO THE SIDES OF THE RUNS
In the early season with limited open terrain, ski resorts can get busy! Most people will ride down the centre of the runs meaning the snow quality can become sketchy with poor coverage. Try snowboarding at the side of the run where theoretically there is less traffic. At the sides, you should find better snow which will help give you confidence in your edge hold.
SCOPE YOUR RUN FROM THE CHAIRLIFT
Chairlifts are not just for a chat. Riding the chair is a great chance to see the pistes from a new perspective allowing you to make out any runs with poor conditions so they can be avoided. Scoping pistes from the chair will also help you avoid those runs that are overcrowded.
Photo Credit: @pamsaunders
FIND YOUR SPACE
There are not many things more annoying than setting yourself up for a turn only to realise your about to get cut up by someone who has snaked your run. In the early season when the pistes can become overcrowded, take your time and wait until you have enough clear space to make the turns you want. Anyway, its the perfect time to stop and enjoy the view!
I hope the above tips help you to start the season in a positive way and make the most of your days on snow. Avoiding injury early and building up your ‘ski legs’ will hopefully help you have a longer and more enjoyable season.
GET IN TOUCH
I’d love to hear from you in the comments or via socials... How do you look after yourself during the early season? Do you take any precautions or do you just do your normal thing?
PIN IT FOR LATER

CARE TO SHARE?
If you enjoy the content on this site, please like, share and comment to promote it to others.

Salomon Speedway Split Overview
Salomon makes some of the best-value snowboards on the market and this has transferred into their splitboard range. The Speedway has shown itself to be a top performer in solid form winning awards and accolades from various snowboarding publications. As a Splitboard, the Speedway gives you a ride that will love charging on the way down. Its elongated nose and taper allow the Speedway Split to float easily in powder and the backseat camber puts the control under your back binding. Salomon has made the Speedway Split from their top-end materials producing a board that is both durable and lightweight.
ABOUT THE SALOMON SPEEDWAY SPLITBOARD
Board Profile
The Salomon Speedway Splitboard has a backseat camber profile. This is a design where the camber is placed under the back binding and leads into a flat section at the nose. There is rocker added on the nose and tail to help with turn initiation and float in deeper snow. The backseat camber design has been used successfully on Salomon Speedway and Super 8 solids which both ride well on and off-piste.
Flex
The Speedway Split has a stiff flex that helps it to remain responsive and reliable. The Speedway’s responsive flex allows the board to be incredibly stable at higher speeds and aids turn initiation.
Board Shape
The Speedway Splitboard has a tapered directional design. The nose of the Speedway is around 10-15mm wider than the tail allowing the front of the board to stay above the snow as the tail drops back to prevent leg burn. A tapered design improves powder performance without sacrificing edge hold on the piste. The Tapered design is coupled with a Quadratic Sidecut. This is a progressive sidecut which allows for easy turn initiation.
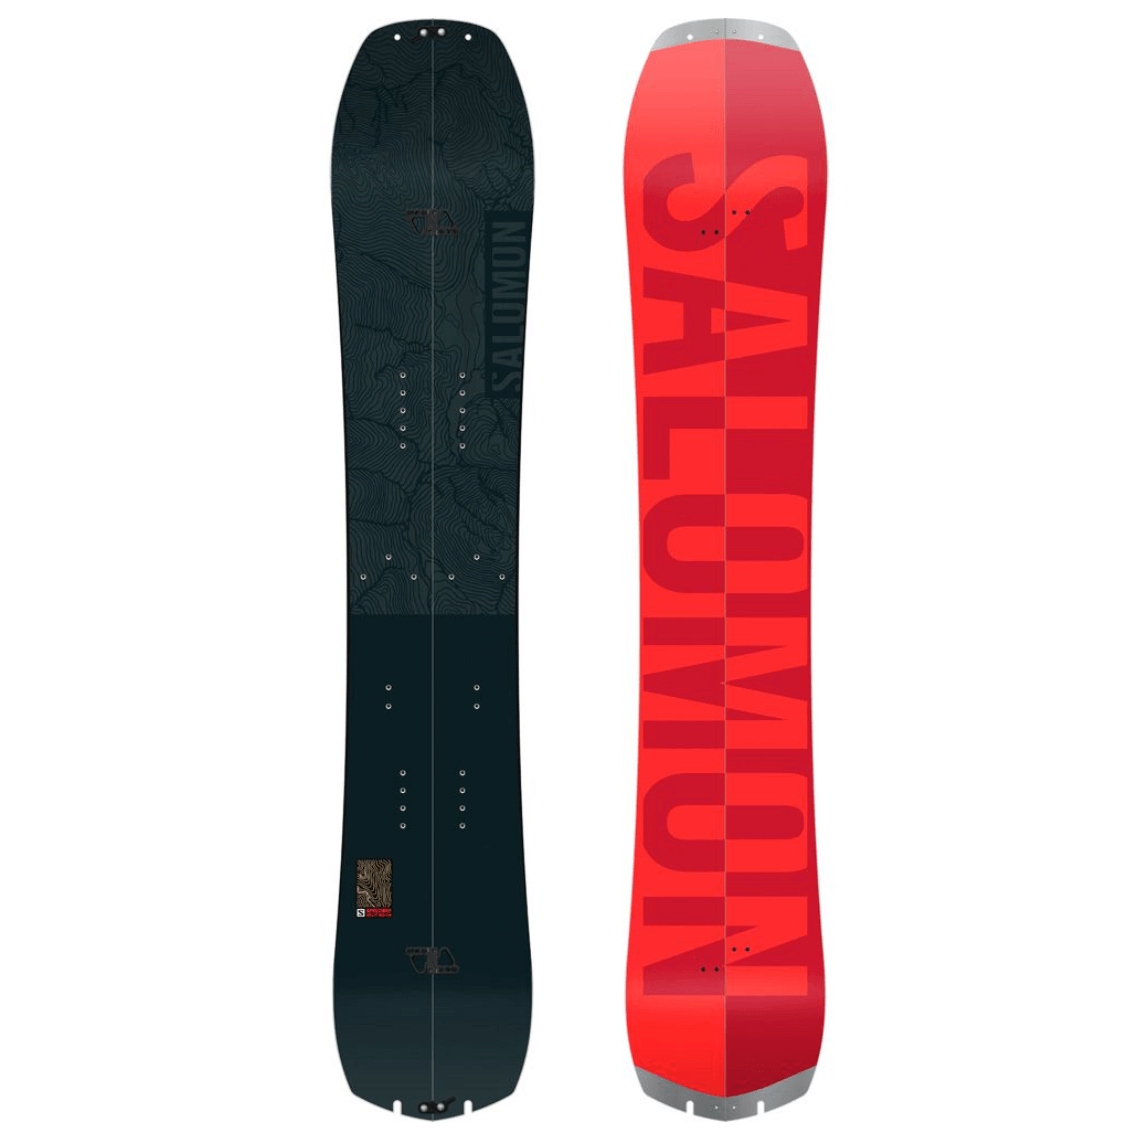
The Insides
Salomon spared no expense when assembling the core of the Salomon Speedway. The Ghost Green Core is utilised in the Speedway Split as a way to drop the weight whilst optimising performance. The Ghost Green Core uses paulownia wood which is extremely light and is found in Salomon’s top-end boards.
In addition to the Ghost Green Core, Salomon have added Damplifier to the Speedway Splitboard. Damplifier is a honeycomb effect used in the nose and tail to drop weight. Using Damplifier means that the Speedway Splitboard is lighter for the way up without negatively effecting performance on the way down.
The Base
A Salomon Sintered EG base is used on the Speedway Splitboard. Sintered bases require more TLC with regular waxing but they run much faster than extruded bases. The Sintered EG is designed for a fast ride, but also strengthens the base by utilising Gallium.
The Edges
Salomon wanted to optimise edge hold without causing those nasty edge catches that are common with camber snowboards. To achieve this the used a 1° bevel at the initiation and exit of the edge with a 2° bevel between the bindings.
The Sidewalls
Salomon uses ABS sidewalls which is the short way to say Acrylonitrile Butadiene Styrene. Basically, these are solid and I have had them on a number of boards. The ABS sidewall dampens vibrations through the board and absorbs impacts on jumps.
Additional Features
The Salomon Speedway Splitboard comes complete with custom cut Pomoca Skins which will save you money and time. This is a really nice addition from Salomon.
The Terrain
The Salomon Speedway Splitboard is designed for use outside of the resort boundary’s where exploration is leading the way. The board can be used in the resort and will perform great on groomers. You are unlikely to find the Speedway Split anywhere near the terrain park.
The Rider
The rider of the Speedway Splitboard should be confident riding a stiffer deck. The Speedway is directional and although it can be ridden switch this is not where it excels so it would suit an omnidirectional rider.
Sizing
The Salomon Speedway is available in three sizes; 155, 160, and 165. Because of the damplifier in the nose and tail Salomon say that you can size up from your regular board length by 3-5cm so consider this when choosing your size.