


How To Make The Most Of Night Skiing
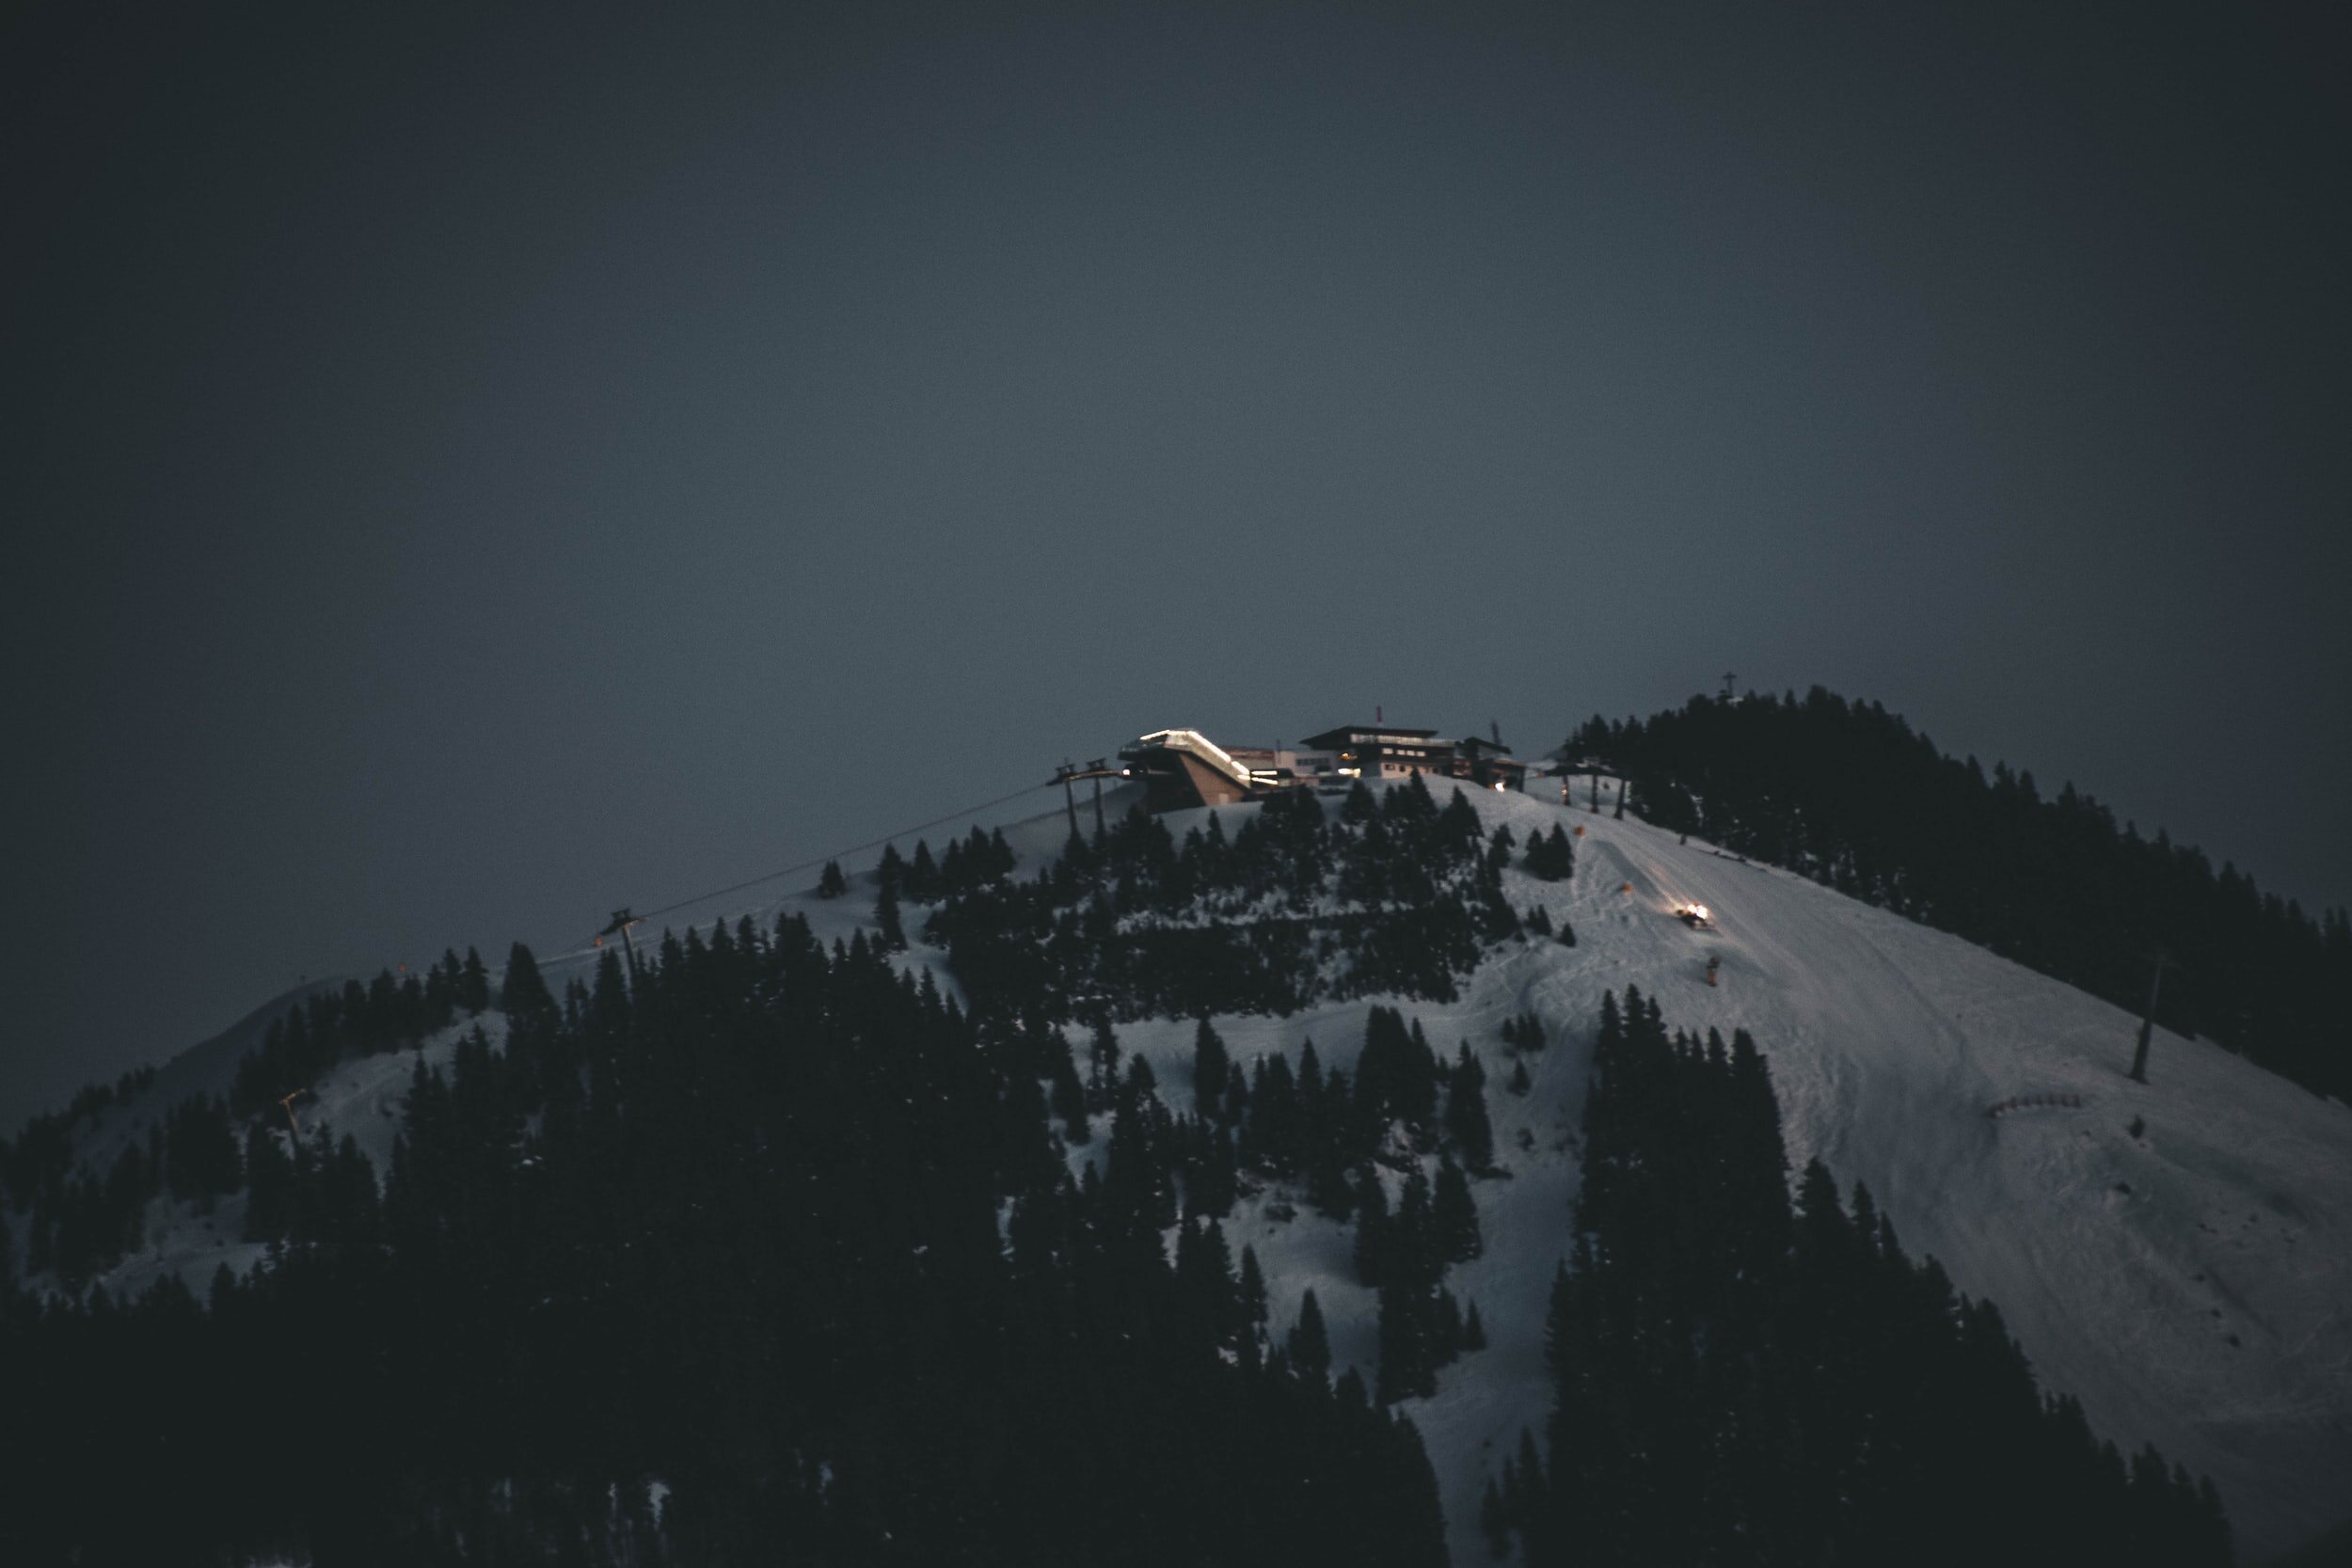
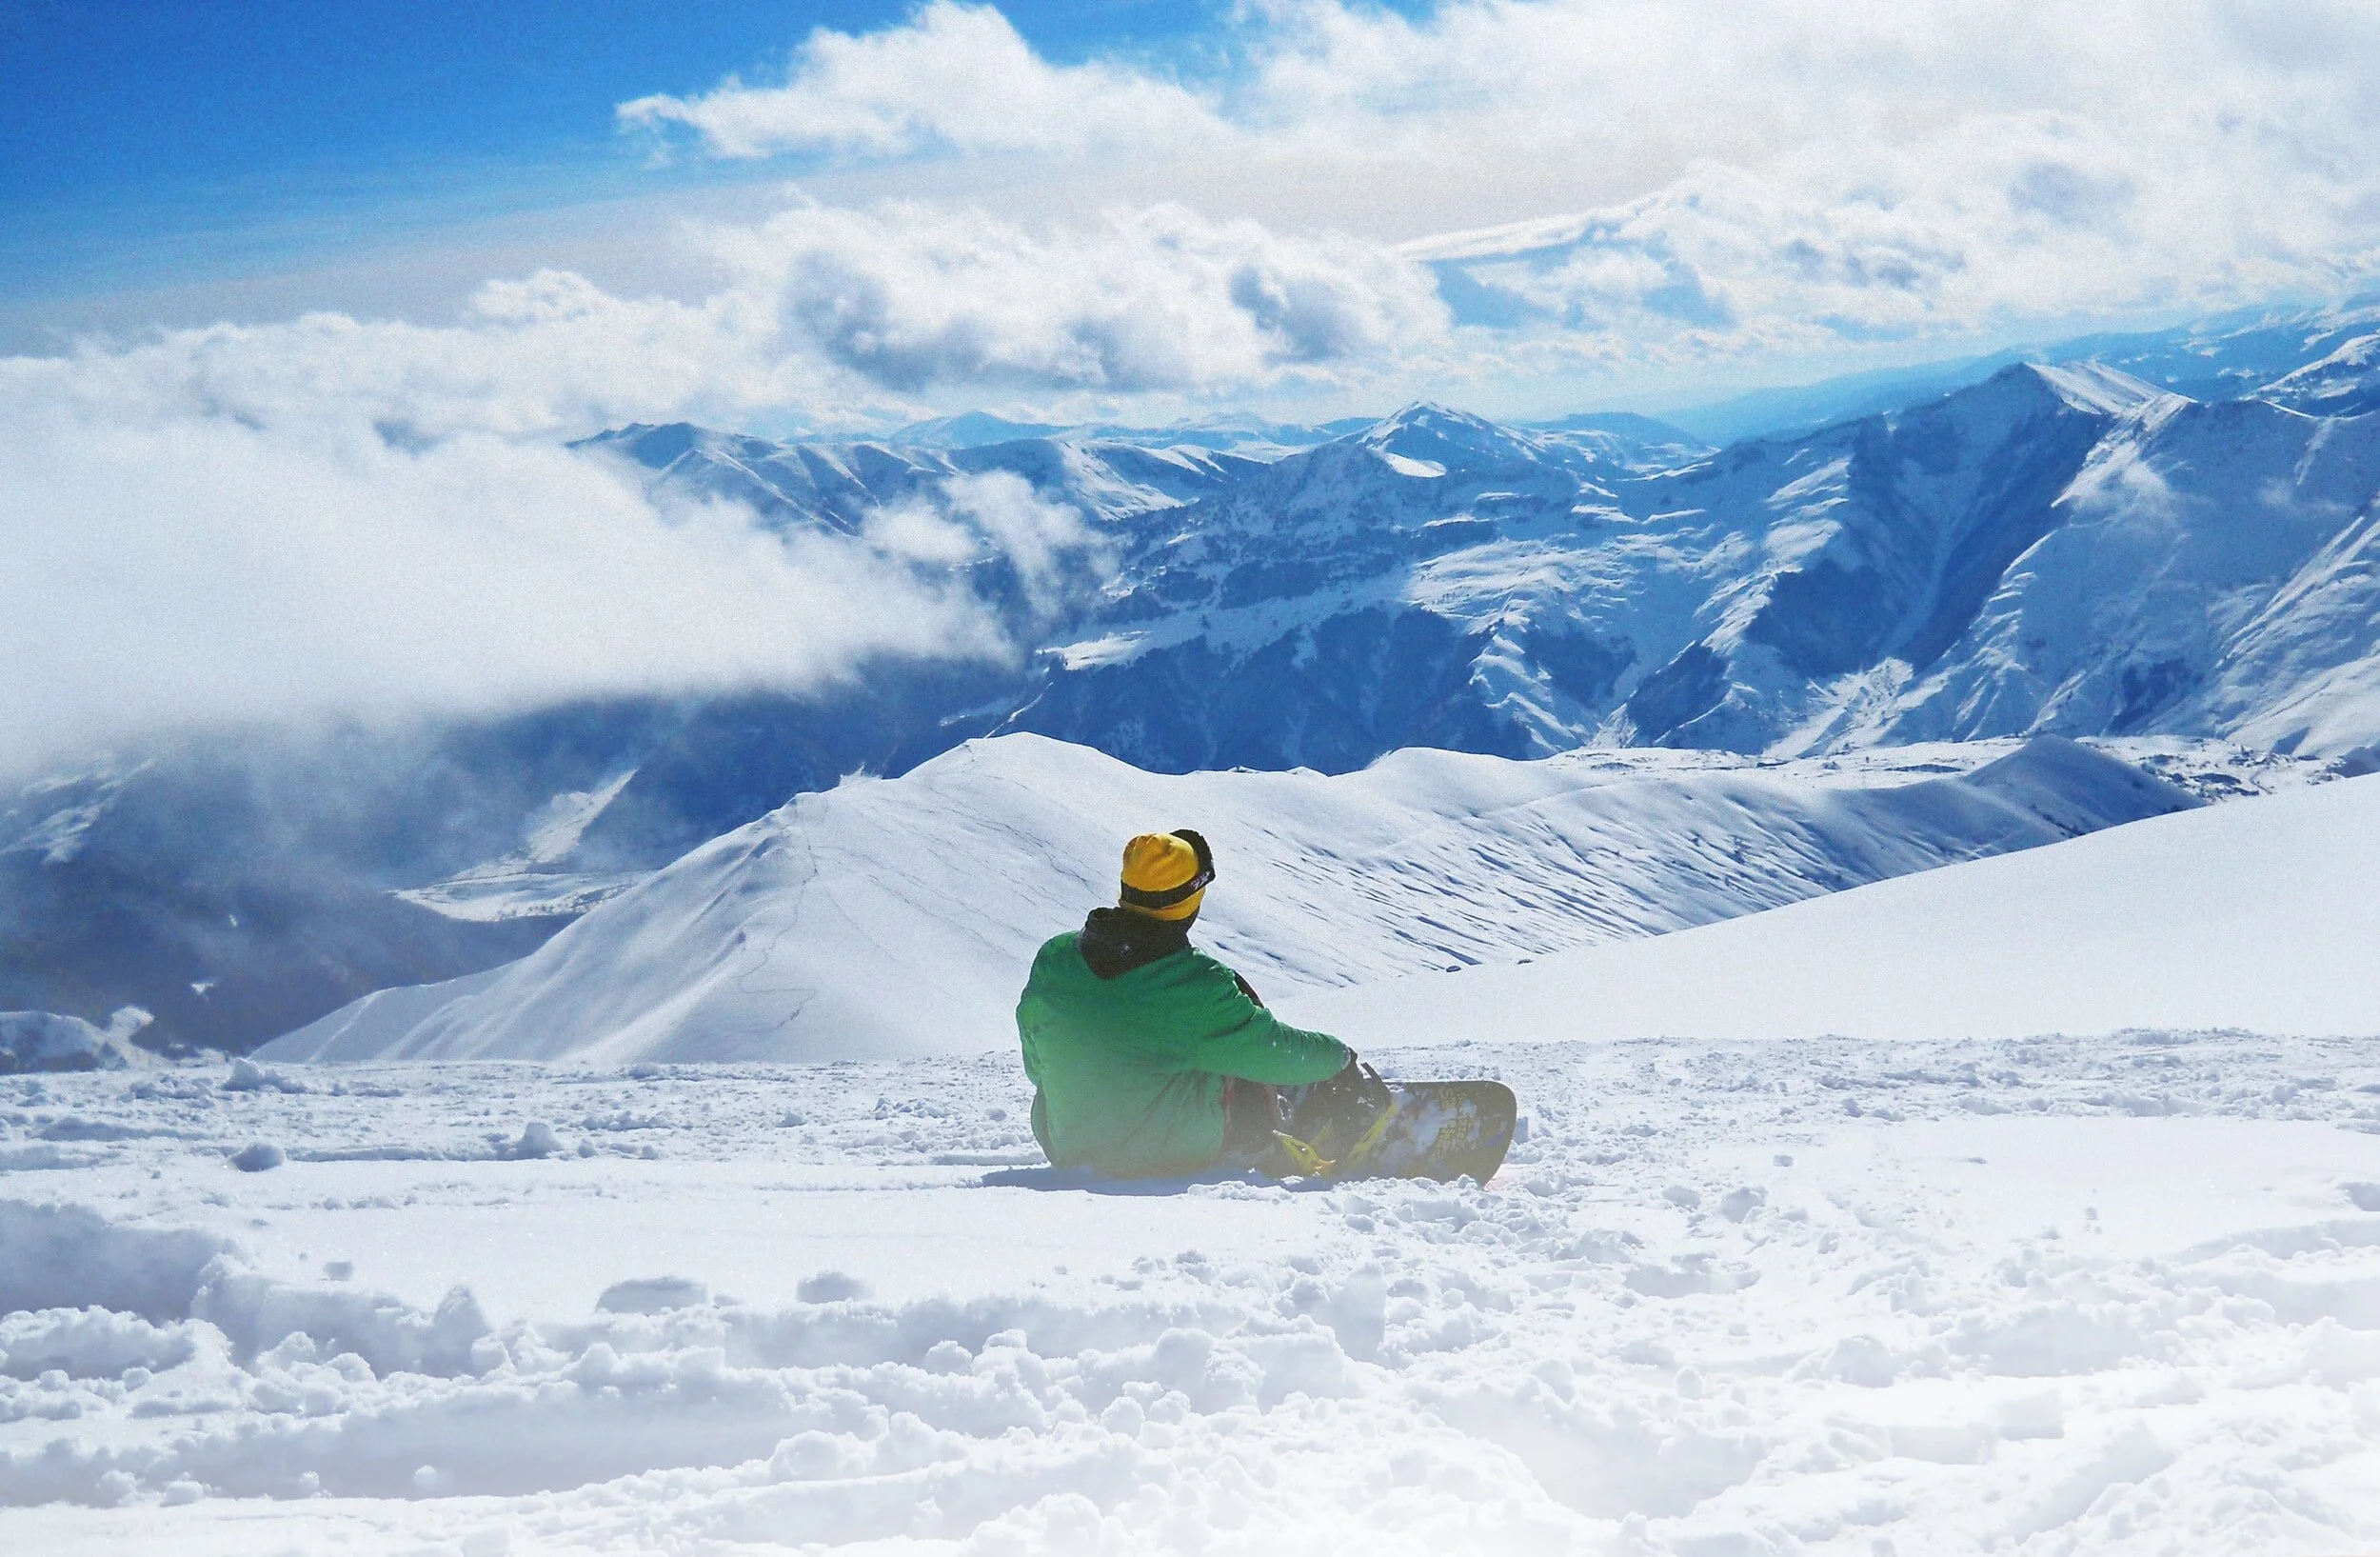
For a long time, Night Skiing had been near the top of my bucket list. Although I have been snowboarding for a while now, I had never made it to a resort that offered some after-hour laps! When looking to visit the Hakuba Valley in Japan it became evident that this was going to be my opportunity. With Night Skiing available at Happo One, Tsugaike Kogen and Hakuba Goryu I was spoilt for choice and was bound to make this finally happen. More recently I was able to back up that experience by night skiing at Coronet Peak in New Zealand. Both experiences were really cool and helped me to realise some key tips to make the most out of night skiing.
CHECK OUT THE VIDEOS BELOW FROM MY NIGHT SKIING EXPERIENCES
Considering Night Skiing? Take a look at my tips below
Wrap-Up Warm - It should go without saying but when the sun goes down it gets colder outside. Adding an extra warm layer will help you stay comfortable during your nighttime session, especially when sitting on those nighttime chair lift rides.

Lens Choice - Wearing goggles with a high VLT (visible light transmission) will really help clarity when night skiing. Try to avoid dark lenses or those designed for sunny conditions. A clear lens would be perfect but any storm lens should provide enough visibility.
Take It Easy - When the sun goes down the ground hardens up. It can be better to ride at lower speeds until you are familiar and confident with the conditions.
Focus On A skill - Depending on where you are night skiing you may have more options. At Happo we were limited to one slope which can make it quite a repetitive process. I chose to focus on a skill, this helped me to get the most out of being restricted to a small area and made the experience useful and enjoyable.
Get There Early - Most night skiing will open when the sun is still shining. This a great opportunity to get some laps in whilst the snow is still a little softer.
Pay Attention To Daytime Temps - If it has been warm during the day it is likely the top layer of snow will have melted and will refreeze as the sun goes down. This will make the surface for night skiing more prone to icy spots and you should ensure your board or ski’s have had a recent edge tune.

Check The Forecast - If there is a storm incoming, Night Skiing could just be your chance to get some fresh turns before everyone else in the morning. Night Skiing tends to be quieter so offers less competitions for those powder turns.
YOUR TURN
Are you a night skiing regular? Or is it something that is on your ski bucket list? Let me know below in the comments.
What To Take On A Snowboard Holiday | Beginner Snowboard Tips
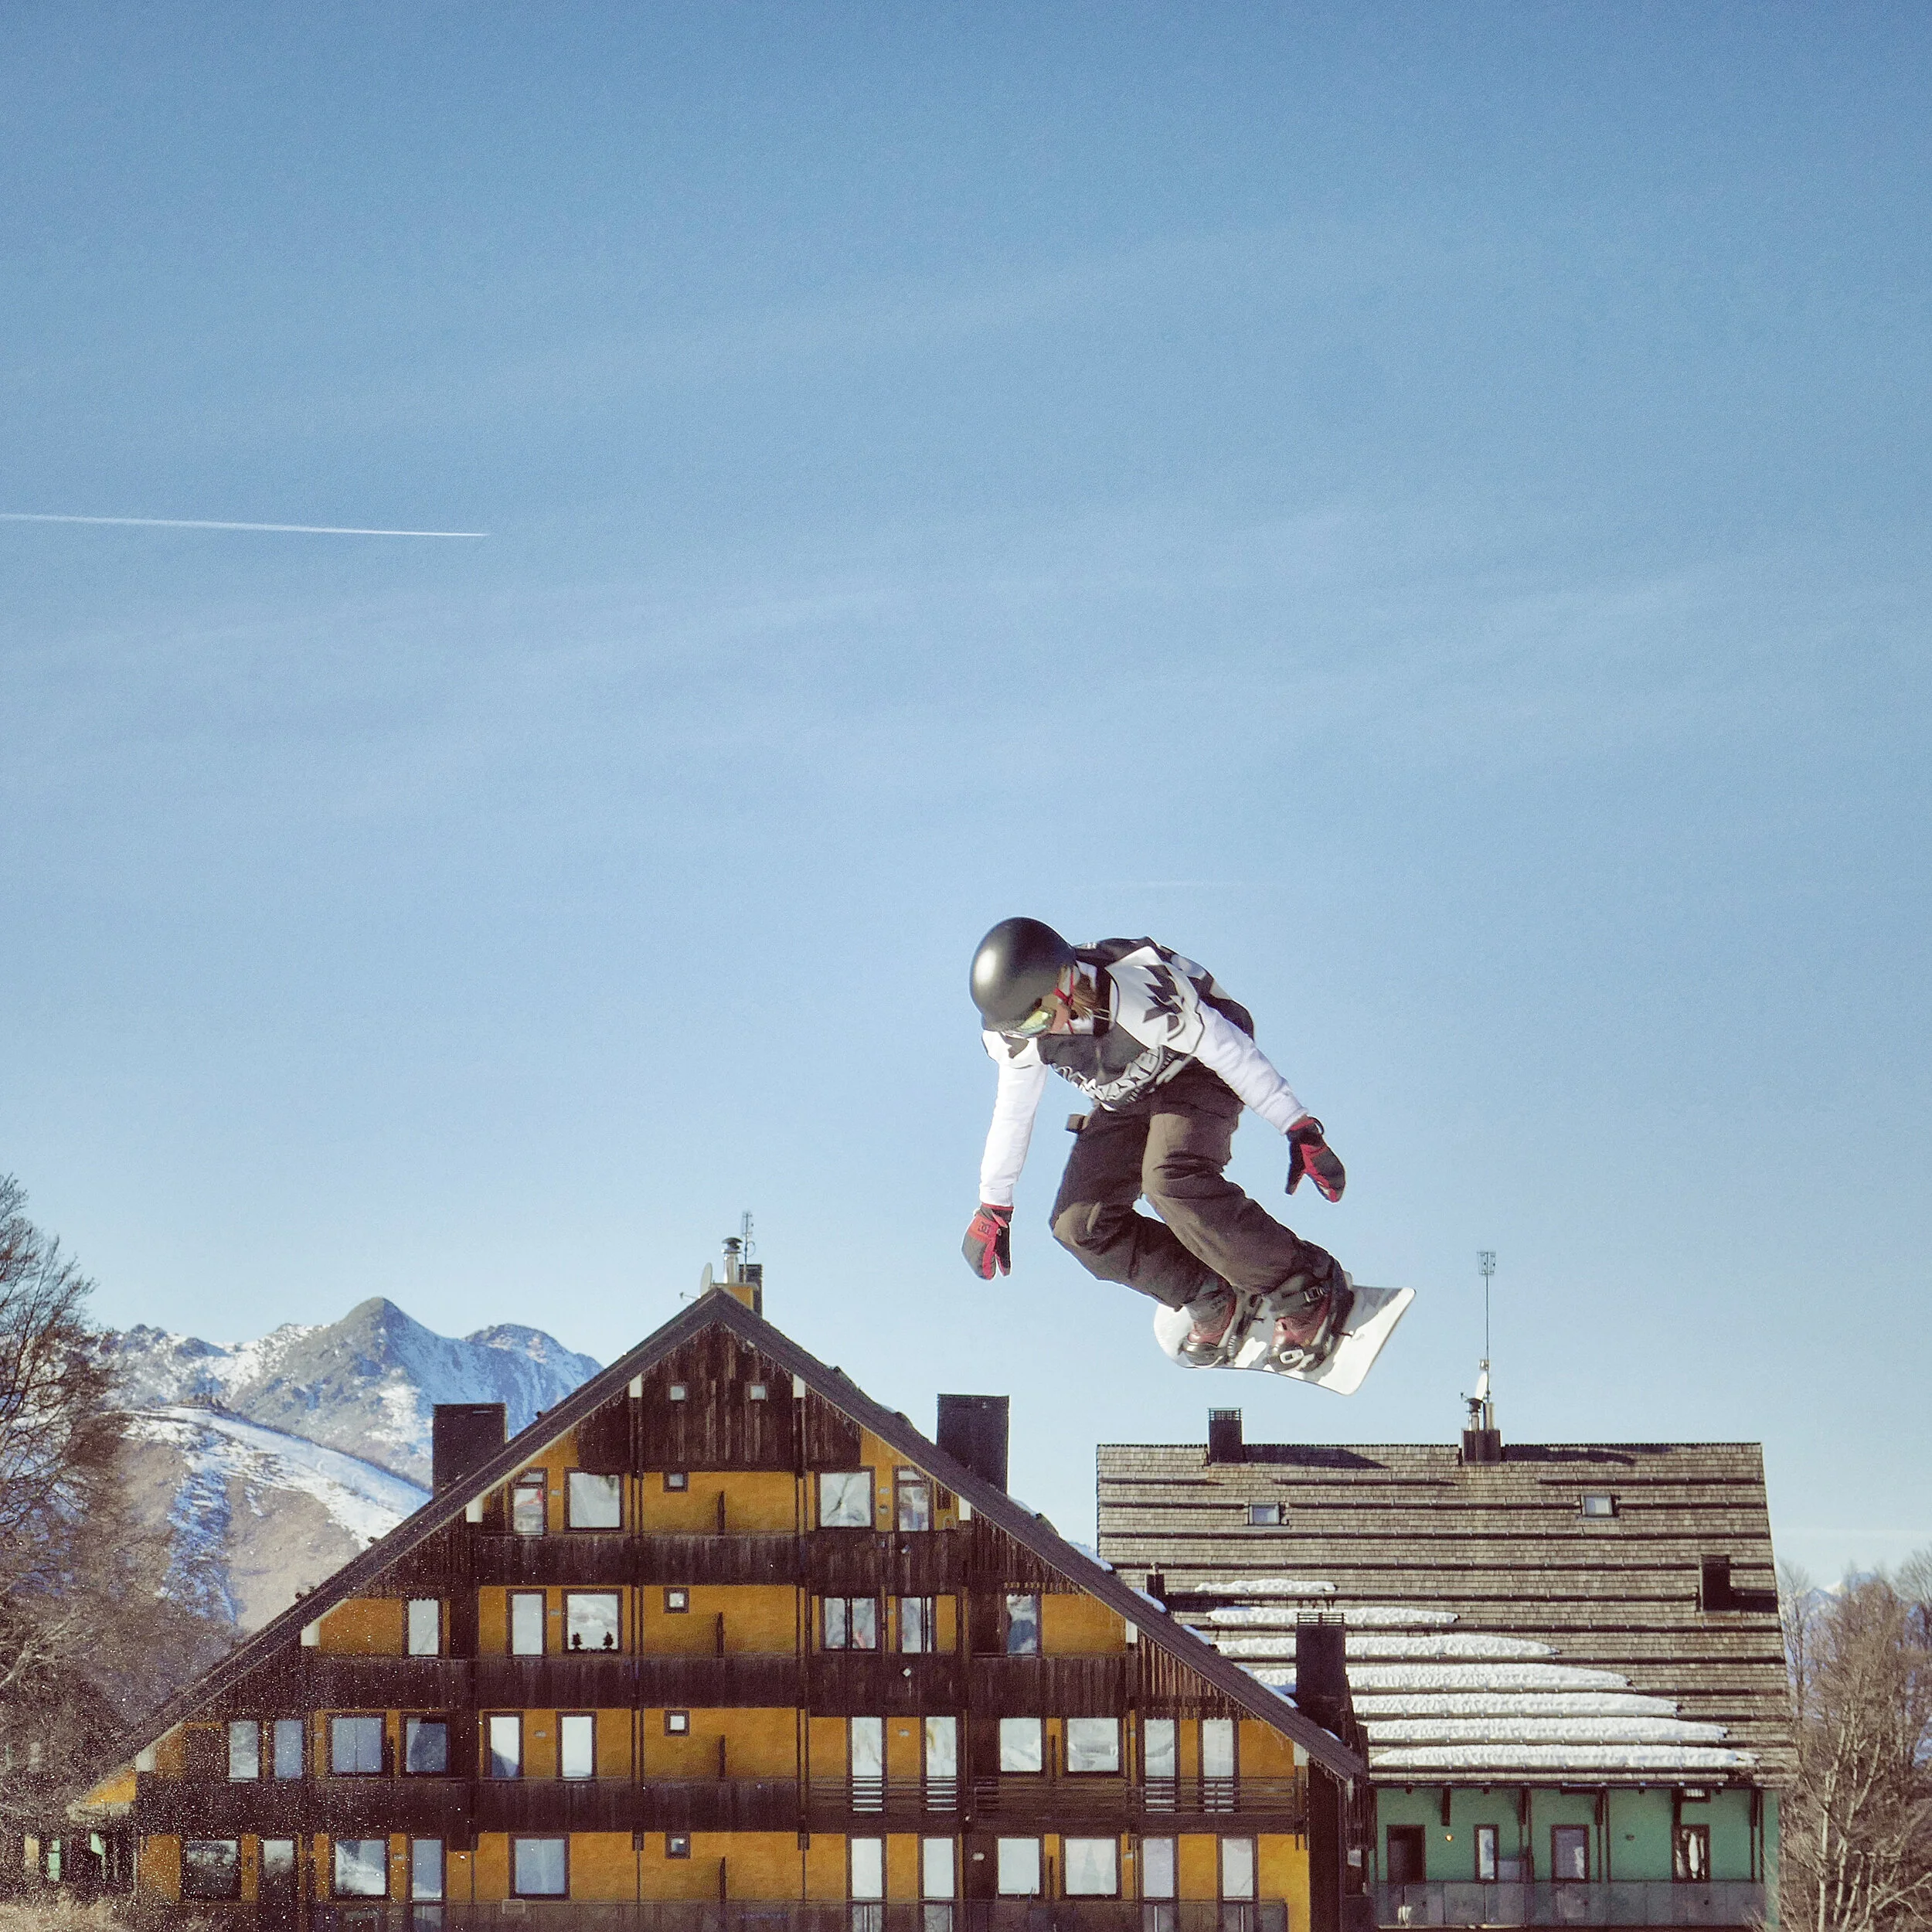
For a lot of people, the first time you go snowboarding can seem quite daunting, especially if you have grown up in a country where snow is not very common. This post is all about the things I wish I had known before my first trip that would have made my life easier and the trip more enjoyable.

STAYING WARM ON A SKI TRIP
Ensuring you are feeling warm throughout the day can be make or break for your enjoyment levels. Nobody wants to sit shivering on a chairlift. Luckily, being on snow doesn’t mean you have to be cold and by following one or a combination of these tips you will be able to stay out for hours.
KEEPING YOUR CORE WARM
Keeping your core warm is super important when in a winter environment. If you can maintain a warm core you are less likely to feel the cold at your extremities. Using a layering system is the most effective way to ensure you can maintain a warm core.
USE A LAYERING SYSTEM
Your layering system is the layers that you wear all the way from your skin to your outer layer. By wearing more thin layers rather than one thick layer you can trap the air and heat between each layer. Warm trapped air means a warm you. Another benefit of a layering system is that if you get too cold or too warm you can add/remove a layer to regulate your temperature more effectively.
Start with a base layer - this goes next to the skin and will wick your sweat away from your skin to prevent you from getting damp and cold from the moisture. Merino base layers are great but can be expensive, so if it’s your first time you will be fine with a synthetic base layer. Avoid wearing cotton next to your skin as these will hold the moisture and you will get colder quicker and they take longer to dry.
Mid-Layer - Wear a mid-layer in between your base layer and your outer layer. This can be a fleece or an insulated jacket. This layer will provide further insulation from the cold and another barrier to the elements should water/snow pass your outer layer.
Outer Layer - Your outer layers should be waterproof. As a first-timer, it is likely you will spend some time sitting or falling in the snow. The worst thing I have seen people wear to their snowboard lessons is denim. Jeans are not going to be a good barrier to the elements. I’ll talk more about the outer layers in Staying Dry.
If you are going on your first trip, there is no need to spend loads of money.. consider brands such as Dare2B who offer effective gear at reduced prices.
KEEP YOUR FEET WARM
Keeping your feet warm is going to have a major impact on your enjoyment! Wearing snowboard-specific socks will help you keep your feet warm and comfortable. When we snowboard our bodies sweat as we are active and it is this moisture that makes our feet cold. Snowboard socks are made from materials that wick this sweat away from our skin helping to keep us warm. If you can, spring for merino wool socks as these will wick moisture efficiently, dry quickly, and prevent odor.
WARM HANDS
For me this one is simple… Mitts over gloves. The only time I have had cold hands on the snow is when wearing gloves. By wearing mitts your fingers are combined together in the same area sharing heat and maintaining a more comfortable temperature. If you find yourself in a situation where you are getting cold hands consider using hand warmers which are cheap and effective.
PROTECT YOUR HEAD
It is a well-known fact that we lose the majority of our heat through our head so maintaining a warm head is going to keep the rest of us warm. Helmets are important for safety but they can also keep you feeling warm. Most helmets come with nice protective ear pads to keep the wind from getting in. If a helmet is not your thing you will want a beanie or headband.
PROTECT YOUR FACE
Keeping your face warm and protected from the wind feels great. I ride with a face mask pretty much all day every day even when the sun is shining. A face mask will keep you warm and protected from both the wind and the sun. Pro Tip - Carry a spare and change them over at lunchtime as the area around your mouth can get wet.
STAYING DRY
Staying dry is equally important and you will want to have an effective barrier to the elements. A waterproof jacket and pants are a must but also consider the breathability. You will find a waterproof and breathability rating on all snowboard clothing and anything above 10k/10k should serve you well. Goretex is the industry standard and will be found in the more expensive outerlayers but there are many great alternatives. Patagonia use H2No and The North Face use Futurelight so be sure to check what’s available.
If you don’t own any waterproof or snowboard-specific outerwear most resorts or local shops rent these at a reasonable price.
PROTECT YOUR FACE
Out in the elements, your face can take a battering from the wind and the snow so it is important to keep it protected. Here are some of the steps you can take to protect your face.

GOGGLES
Wearing goggles is an important barrier between your face and the elements but they will also protect your eyes from the sun. Obviously, goggles are going to form a barrier from the wind and snow to help improve your visibility in tough conditions but they can also prevent snow blindness. Snow blindness is caused when the sun’s UV light reflects off the snow into your eyes essentially causing a sunburn on your corneas.
SUN PROTECTION
You may not think it but as discussed above protection from the sun is very important in snowy climates. Pack some sun cream for those bluebird days as the snow will reflect the sun onto your skin. If you want to avoid that panda eyes goggle tan look this is a must.
Similarly, it is important to carry a lip balm or chapstick. Riding in the wind and the freezing conditions can make your lips go hard and dry. Lip balm should keep your lips protected and moisturised.
STAY SAFE
WEAR A HELMET
Becoming more and more popular as people begin to realise the importance for protection are helmets. Helmets are there first to protect your head but also keep you warm and can be personalised to add to your unique style. If you are looking for the ultimate in protection search for a helmet with MIPS technology that will reduce the chances of concussion.
KEEP YOUR PHONE HANDY
You will probably want your phone with you anyway to document your day and get some awesome photos but a phone is equally important for safety. Most resorts now have dedicated apps where you can access the piste map on the go and also contact ski patrol if needed. Pro tip… make sure your phone is on an inside pocket to keep it warm, you can also place it inside a spare sock to keep it insulated. The cold can seriously affect battery’s so if you want it to work wrap it up.
PROTECTIVE PADS
If it is your first day on snow it is likely that you will fall over at some point. That’s ok, it is all part of learning. Consider bum pads and knee/elbow pads as these will limit the impact of these falls. There is some debate as to whether or not you should use wrist guards as the research is conflicting… I wouldn’t recommend it but you can do your own research on that.
LIFT PASSES
So it’s your first day and you’ve spent the whole morning waiting in line to get a lift pass… that sucks! It makes a lot of sense to order your passes online. Not only can you get them posted out or head to the fast collection points but you can also save money this way. When buying a lift pass look into the different options at your ski resort. Some resorts offer discounted passes to just access the beginners lift or throw in bundles with lessons. Shop around. There are also resorts like Flaine that let beginners access the beginner’s magic carpet area for free!
FINAL THOUGHTS
Now you are prepared to head on your first snowboard trip it’s time to have fun. Most of all, throw yourself into the experience and I am sure you will love it. Be sure to let me know how you got on in the comment section and maybe we will cross paths on snow someday!

Budget Friendly European Ski Resorts
Skiing and snowboarding are awesome activities that should be accessible to everyone. The beautiful mountain scenery coupled with the adrenaline of turning down a pristine ski slope is hard to beat. That is why millions of people enjoy a European ski trip on a yearly basis.
Sadly one of the major barriers preventing potential skiers from trying a ski holiday is the price. Many people assume that skiing and snowboarding can only be enjoyed by the wealthy, but this is not the case. However, if extravagance and luxury are what you are after there are also plenty of European ski resorts that will fit the bill.
With this in mind, I have used my experience to handpick a selection of great-value ski resorts that won’t hurt your budget but still have great facilities. Could these be the best-value European ski destinations?
1. BULGARIA
Bulgaria is a great option as a budget-friendly ski and snowboard destination. With three main resorts; Bansko, Borovets & Pamporovo, not to mention a number of smaller resorts, there is plenty to choose from. Bulgaria is also a great option for those looking for a holiday with no stress.
Most accommodation options in Bulgaria offer attractive prices on half-board accommodation close to the slopes. The ski schools are fantastic and have English-speaking instructors. Your lessons will be much more affordable than learning in France.
A quick google search found a one-week ski holiday to Bansko on a half-board basis for £500pp. That’s; flights, transfers, accommodation and food all taken care of, allowing you to make the most of your stay.
To learn more about Bulgaria as a ski holiday destination click here

2. SLOVENIA
The secret is out and Slovenia is now a mainstream destination. Luckily for you, a lot of the focus on Slovenia surrounds summer travel to the famous Lake Bled. Therefore people neglect winter trips ensuring that Slovenia remains one of the cheapest European ski destinations.

Photo @grotandthemob Krvavec Slovenia
The location of the Julian alps is a beautiful setting for a ski resort and Vogel doesn’t disappoint. Close to the shores of Lake Bohinji and a short drive from Lake Bled, Vogel is a small ski area offering 22km of uncrowded, unspoilt slopes.
Vogel is a perfect resort to learn at with a number of gentle slopes .The more experienced will be able to take advantage of the off-piste and terrain park. The resort has a few places to eat at very reasonable prices with a large pizza costing around €7.
For those considering this idillic location expect to spend around €600 for a weeks half board accommodation, including flights and transfers. Cheaper options can be found by booking Airbnb stays and considering a self-drive transfer from the airport.
3. ITALY
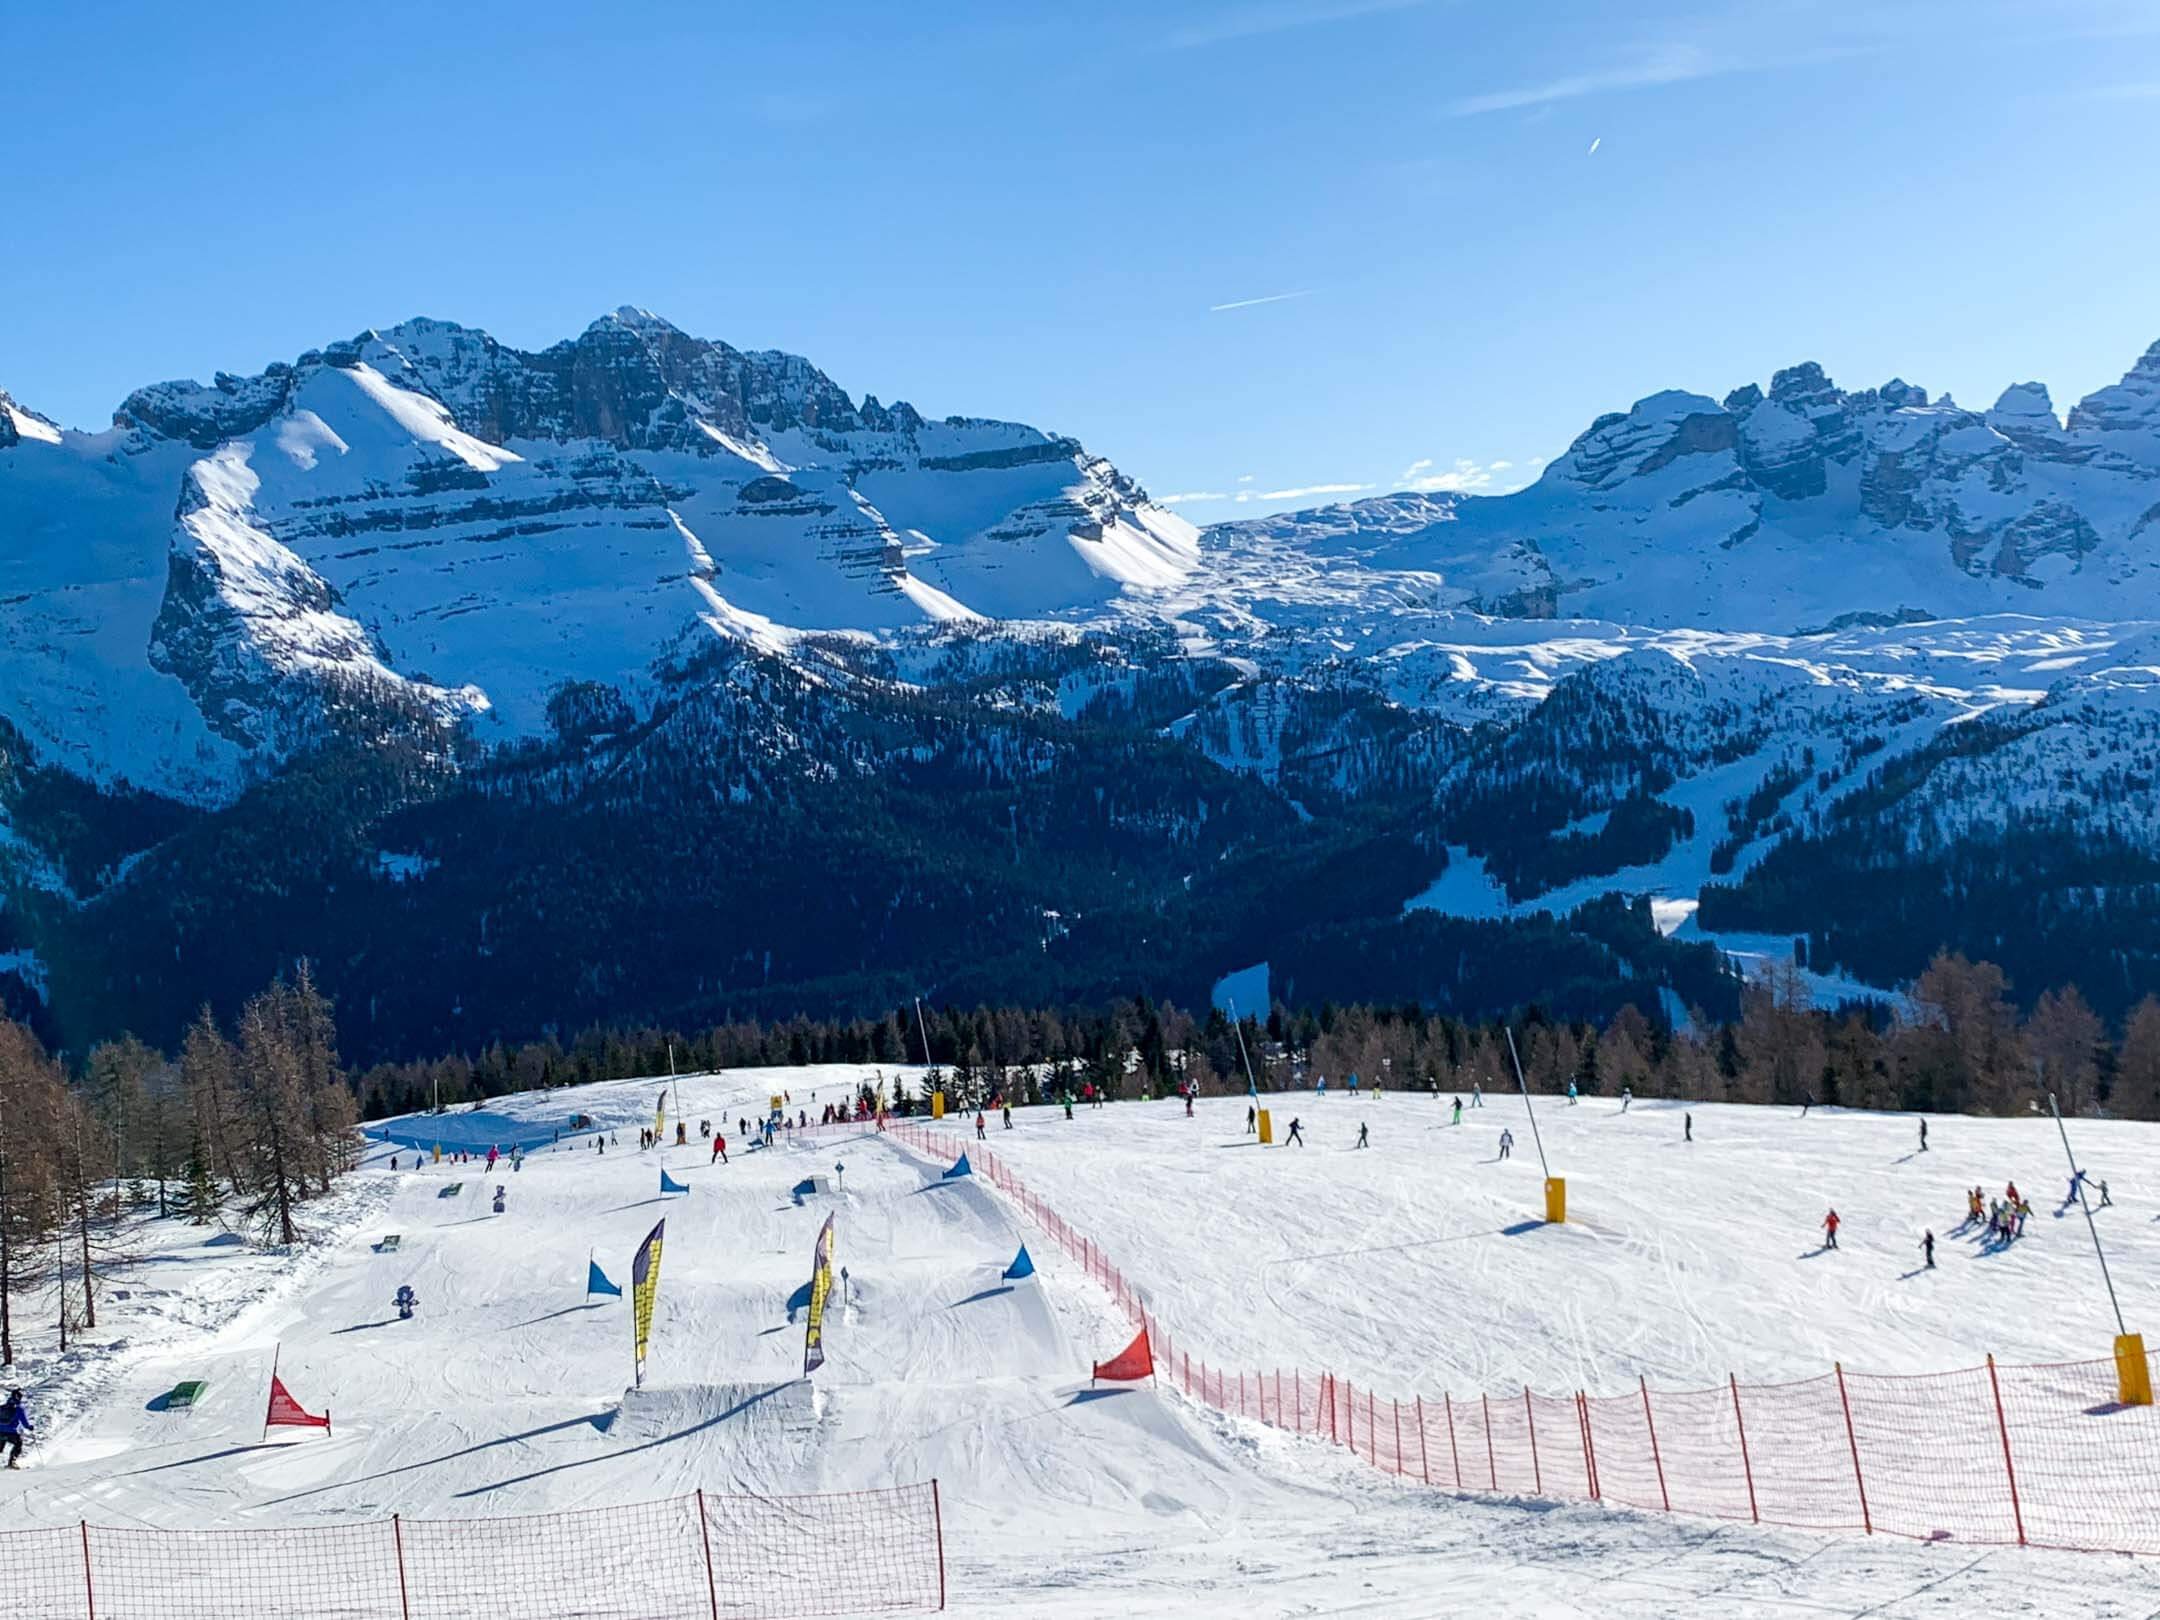
Italy is a big hitter on this list. It is home to some incredible ski resorts, some of which can be the opposite of budget-friendly! That being said I have dived into the archives to find some Italian ski resorts that offer exceptional experiences but remain affordable.
Recently I took a trip to the Skirama Dolomiti ski area where I was able to have a week’s holiday living on a very strict budget. Booking my accommodation via Airbnb I stayed in a self-catering apartment in the town of Castillo near Marilleva ski resort. Castello was perfectly suited to access 150km of pistes that allow skiing in the more pricey Madonna di Campiglio. You can find the apartment here
Similarly, there are a number of great Italian ski resorts that allow cross-border skiing. This means the budget-savvy can get their accommodation in Italy where the Euros go further but still ski in France as well. Consider La Thuile as a base to ski between Italy and Frances La Rosière ski resort.
A number of factors for your ski trip will be cheaper in Italy without sacrificing the quality. The food, ski school and lift passes are all generally cheaper than across the border in France.

4. FRANCE
Ok, I get it. I have just spent the last three suggestions stating how a trip to Bulgaria, Slovenia or Italy will be cheaper than France. For the most part, I stand by that statement however there are resorts and options in France that will allow you to stretch your budget.
In general, a ski trip to France will work out more expensive due to the ski-in ski-out accommodation and the cost of getting food in those purpose-made villages. However, there are destinations in France that will allow you to ski some incredible resorts but at a fraction of the cost.
Grand Massif
The Grand Massif is a combined ski area with snowsure skiing in the resort of Flaine. Linked to Flaine are the resorts of Les Carroz, Samoèns, Morillon and Sixt-Fer-à-Cheval which offer great value for a trip to the Grand Massif. The resorts of the Grand Massif are linked by lift and free bus meaning that it is really easy to base yourself in Sixt but ski in Flaine. Similarly, Samoèns and Les Carroz have some great accommodation options. For example, I stayed in a small but convenient apartment in Samoèns. The apartment Les Rhodos was adjacent to the main gondola and above a brilliant French bakery.

The Three Valleys
Similarly to the Grand Massif, The 3 Valleys or Les Trois Vallees is a combined ski area. This world-renowned ski area is home to the resorts of Val Thorens, Meribel and Courcheval. These are fantastic but not for the budget conscience. If you are looking to save some money opt for Orelle or Brides Les Bains as your entry point to The 3 Valleys. A stay in Orelle offers access to the three larger ski areas via a gondola and lift links to Val Thorens. Once in Val Thorens your options are unlimited and allow you to explore the whole area. Staying in Orelle is great and you can see what this great ski area has to offer on a powder day here. Alternatively, a stay in Brides-Les-Bains means you are more central to the Three Valleys ski centres. A journey up the Télécabine De L’Olympe takes you into Meribel but at a much more affordable price.
5. ANDORRA
Andorra has favourable tax laws that bring down the cost of any trip to this beautiful mountainous region. There is no sales tax so consider the impact that will have on the cost of your lift passes, lessons, rentals and consumables.
A trip to Andorra still means modern resorts with fantastic facilities in an easy-to-reach location. Grandvalira offers 200km of pistes with a range of slopes to suit everyone. Set amongst the backdrop of the Pyrenees the views are stunning.
A real money saver for your trip to Andorra can be found in the cost of flights with the most popular access coming via Barcelona. Barcelona is an International airport where many budget operators will run multiple daily flights through. The transfer to the resort can be considered a little arduous at around 3 hours but buses run for around €15.


6. CZECH REPUBLIC
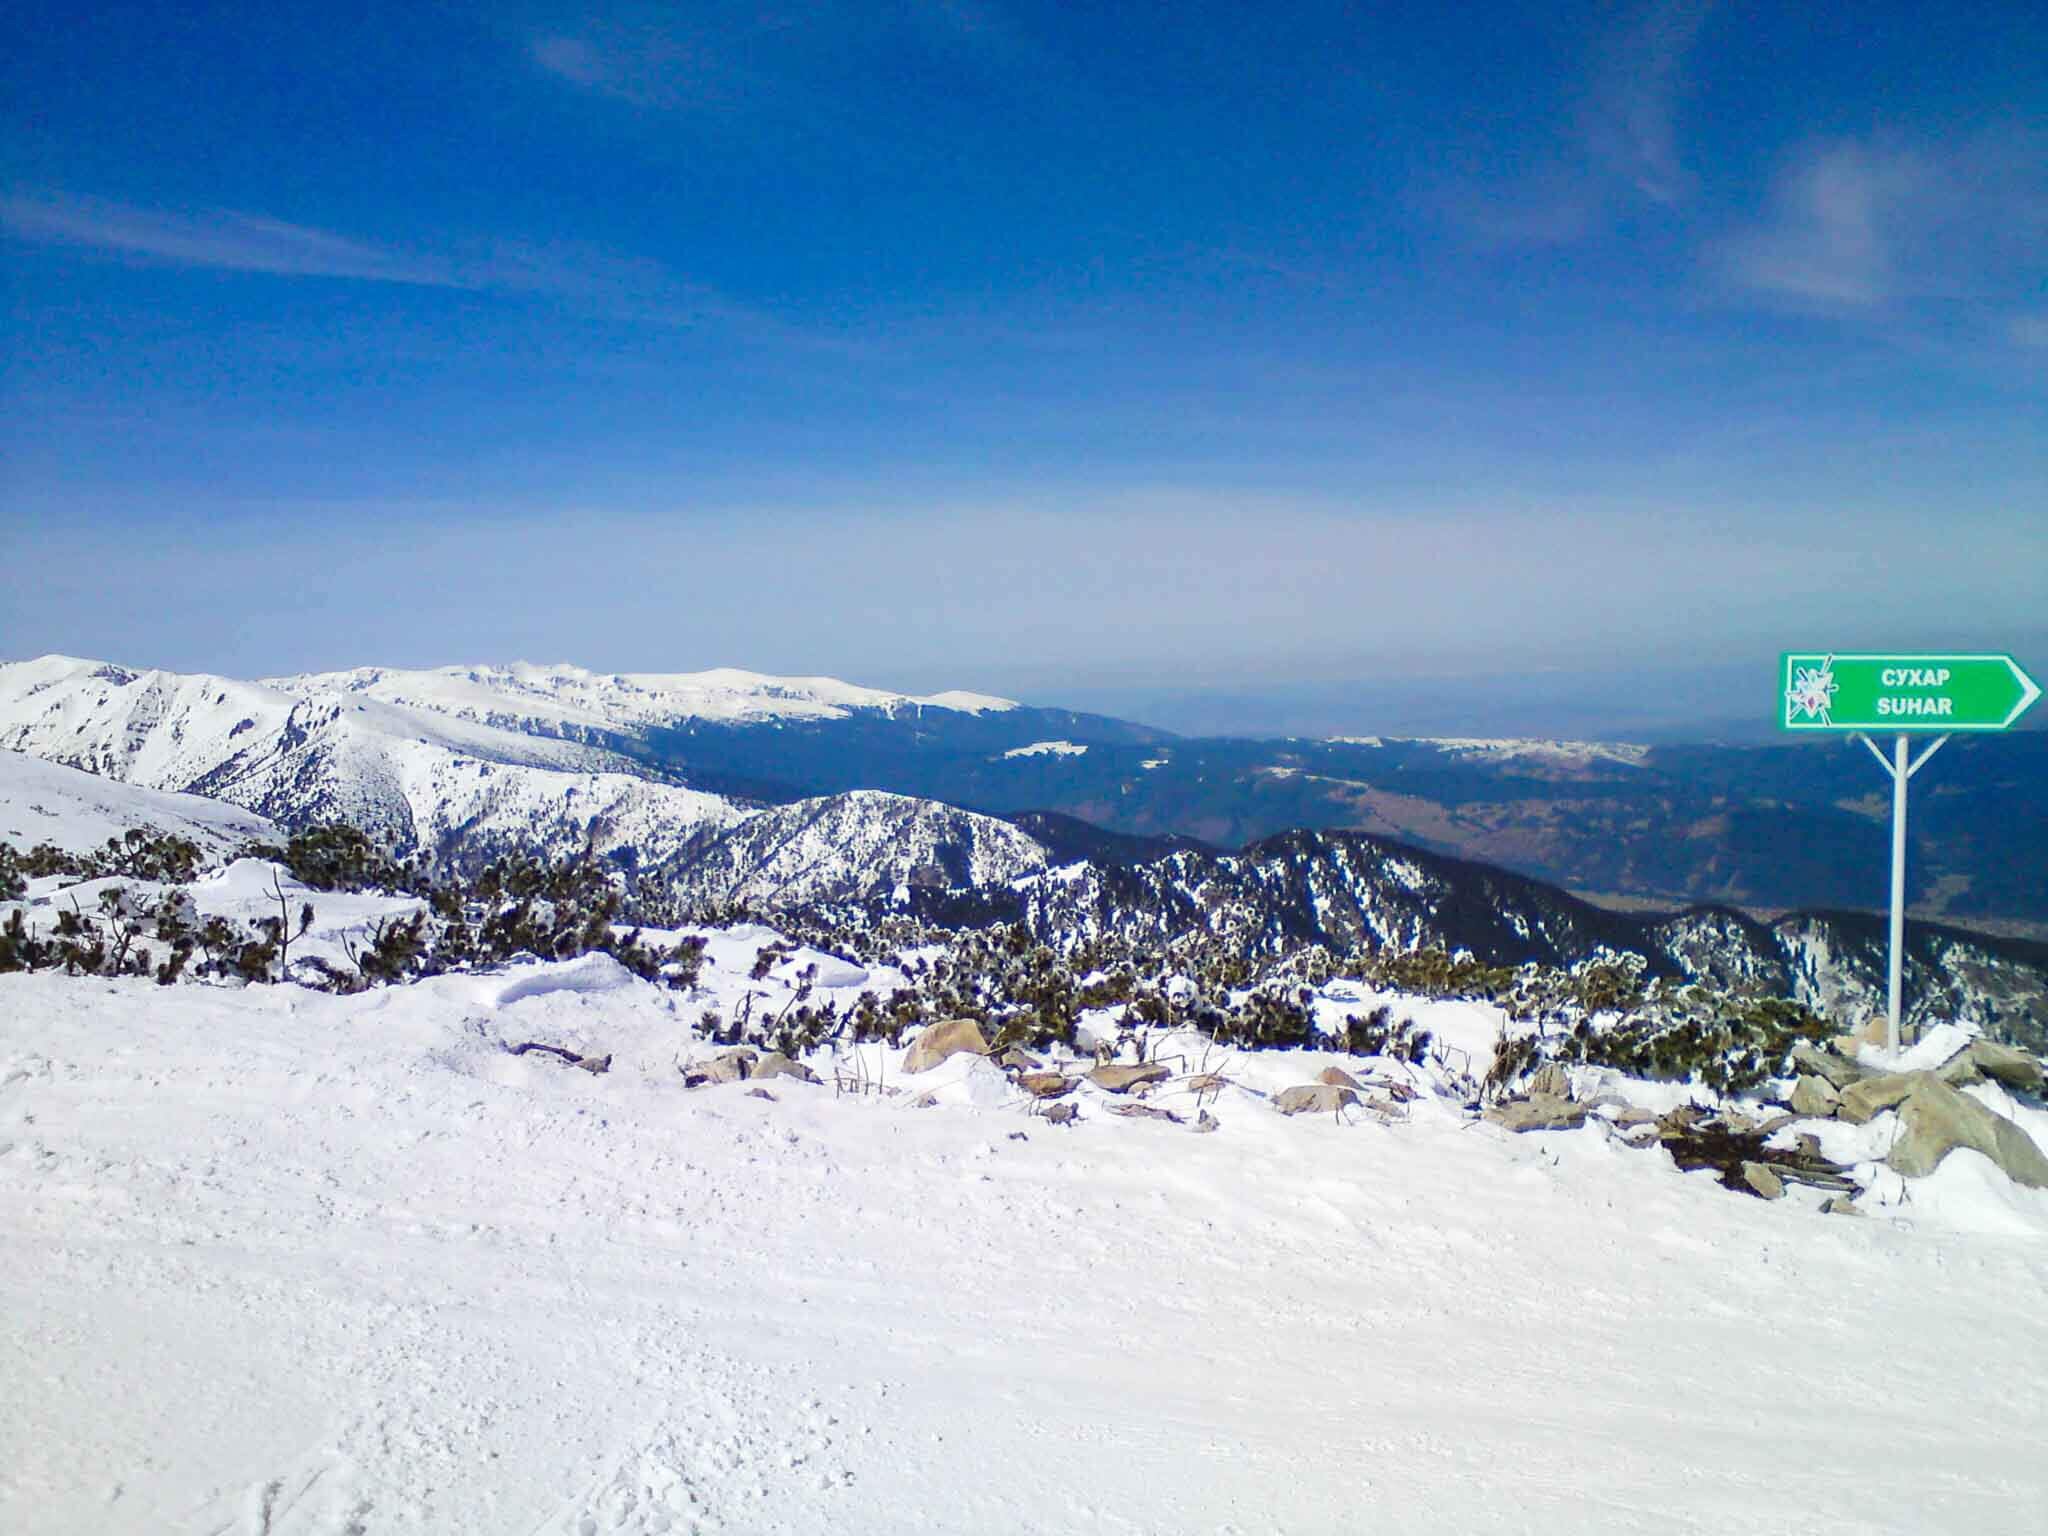
The Czech Republic is well known for cheap holidays with its capital city Prague a favourite amongst budget backpackers. Renowned for its nightlife and cheap beer, the Czech Republic should not be cast aside as a boozy city break destination but embraced as a winter treasure chest. There are a number of incredible mountain areas around the Czech Republic including; the Krkonoše Mountains, Šumava and the Jeseníky Mountains.
All offering something different, the resorts of; Špindlerův Mlýn, Kouty nad Desnou and Klínovec are amongst the most popular. The latter of which forms part of a linked ski area with 140km of pistes in the North West of the country.
Harrachov, another Czech resort even offers lift passes for €10 per day with Rokytnice and Jizero offering 6-day passes for £75. Throw in the costs of accommodation and cheap flights into Prague and the Czech Republic might be a great option for a European ski trip.
There are some suggestions for places to ski on a budget but i’d love to hear from you! Have you ever had a bargain ski holiday? What is your favourite budget ski destination? Let me know by commenting below.
How To Choose Your Snowboard Stance
Ensuring that you have the perfect snowboard set up for you will be a determining factor on how much fun you have on the mountain. Snowboard stance is a huge part of your snowboard set up and will help you dial feel comfortable and balanced on your snowboard. There is not a one size fits all approach to determining your snowboard stance so this post aims to provide you with advice that will help you decide the best snowboard stance set up for you.
WHAT IS MEANT BY SNOWBOARD STANCE?
Let’s start by defining what is meant by snowboard stance. Your snowboard stance refers to your bindings position on the snowboard. This can include; where to position your snowboard bindings, the angles your bindings are set to, the width of your snowboard stance, and whether you set up regular or goofy.
WHAT DETERMINES YOUR SNOWBOARD STANCE?
Your snowboard stance will be influenced by a number of factors with perhaps your riding style and what you want to do on your snowboard being the most influential. You may choose to adjust your stance depending on the conditions and where you intend to ride that day. For example, It is unlikely that you will ride with the same stance in powder as you would in the park. You may still ride with the same angles but it is likely that you will get better powder performance with a set-back stance. You should also consider your height and the type of snowboard you are using when choosing your snowboard stance.

REGULAR OR GOOFY?
One of the first decisions you will make when learning to snowboard is whether you ride regular or goofy. These terms refer to whether you ride with your left foot forward (regular) or right foot forward (goofy). This can be a hard decision to make if you have no context to refer to as its likely you will be making this decision before stepping onto your snowboard. Luckily there are some tests you can do that may provide some indication as to whether you will snowboard regular or goofy.
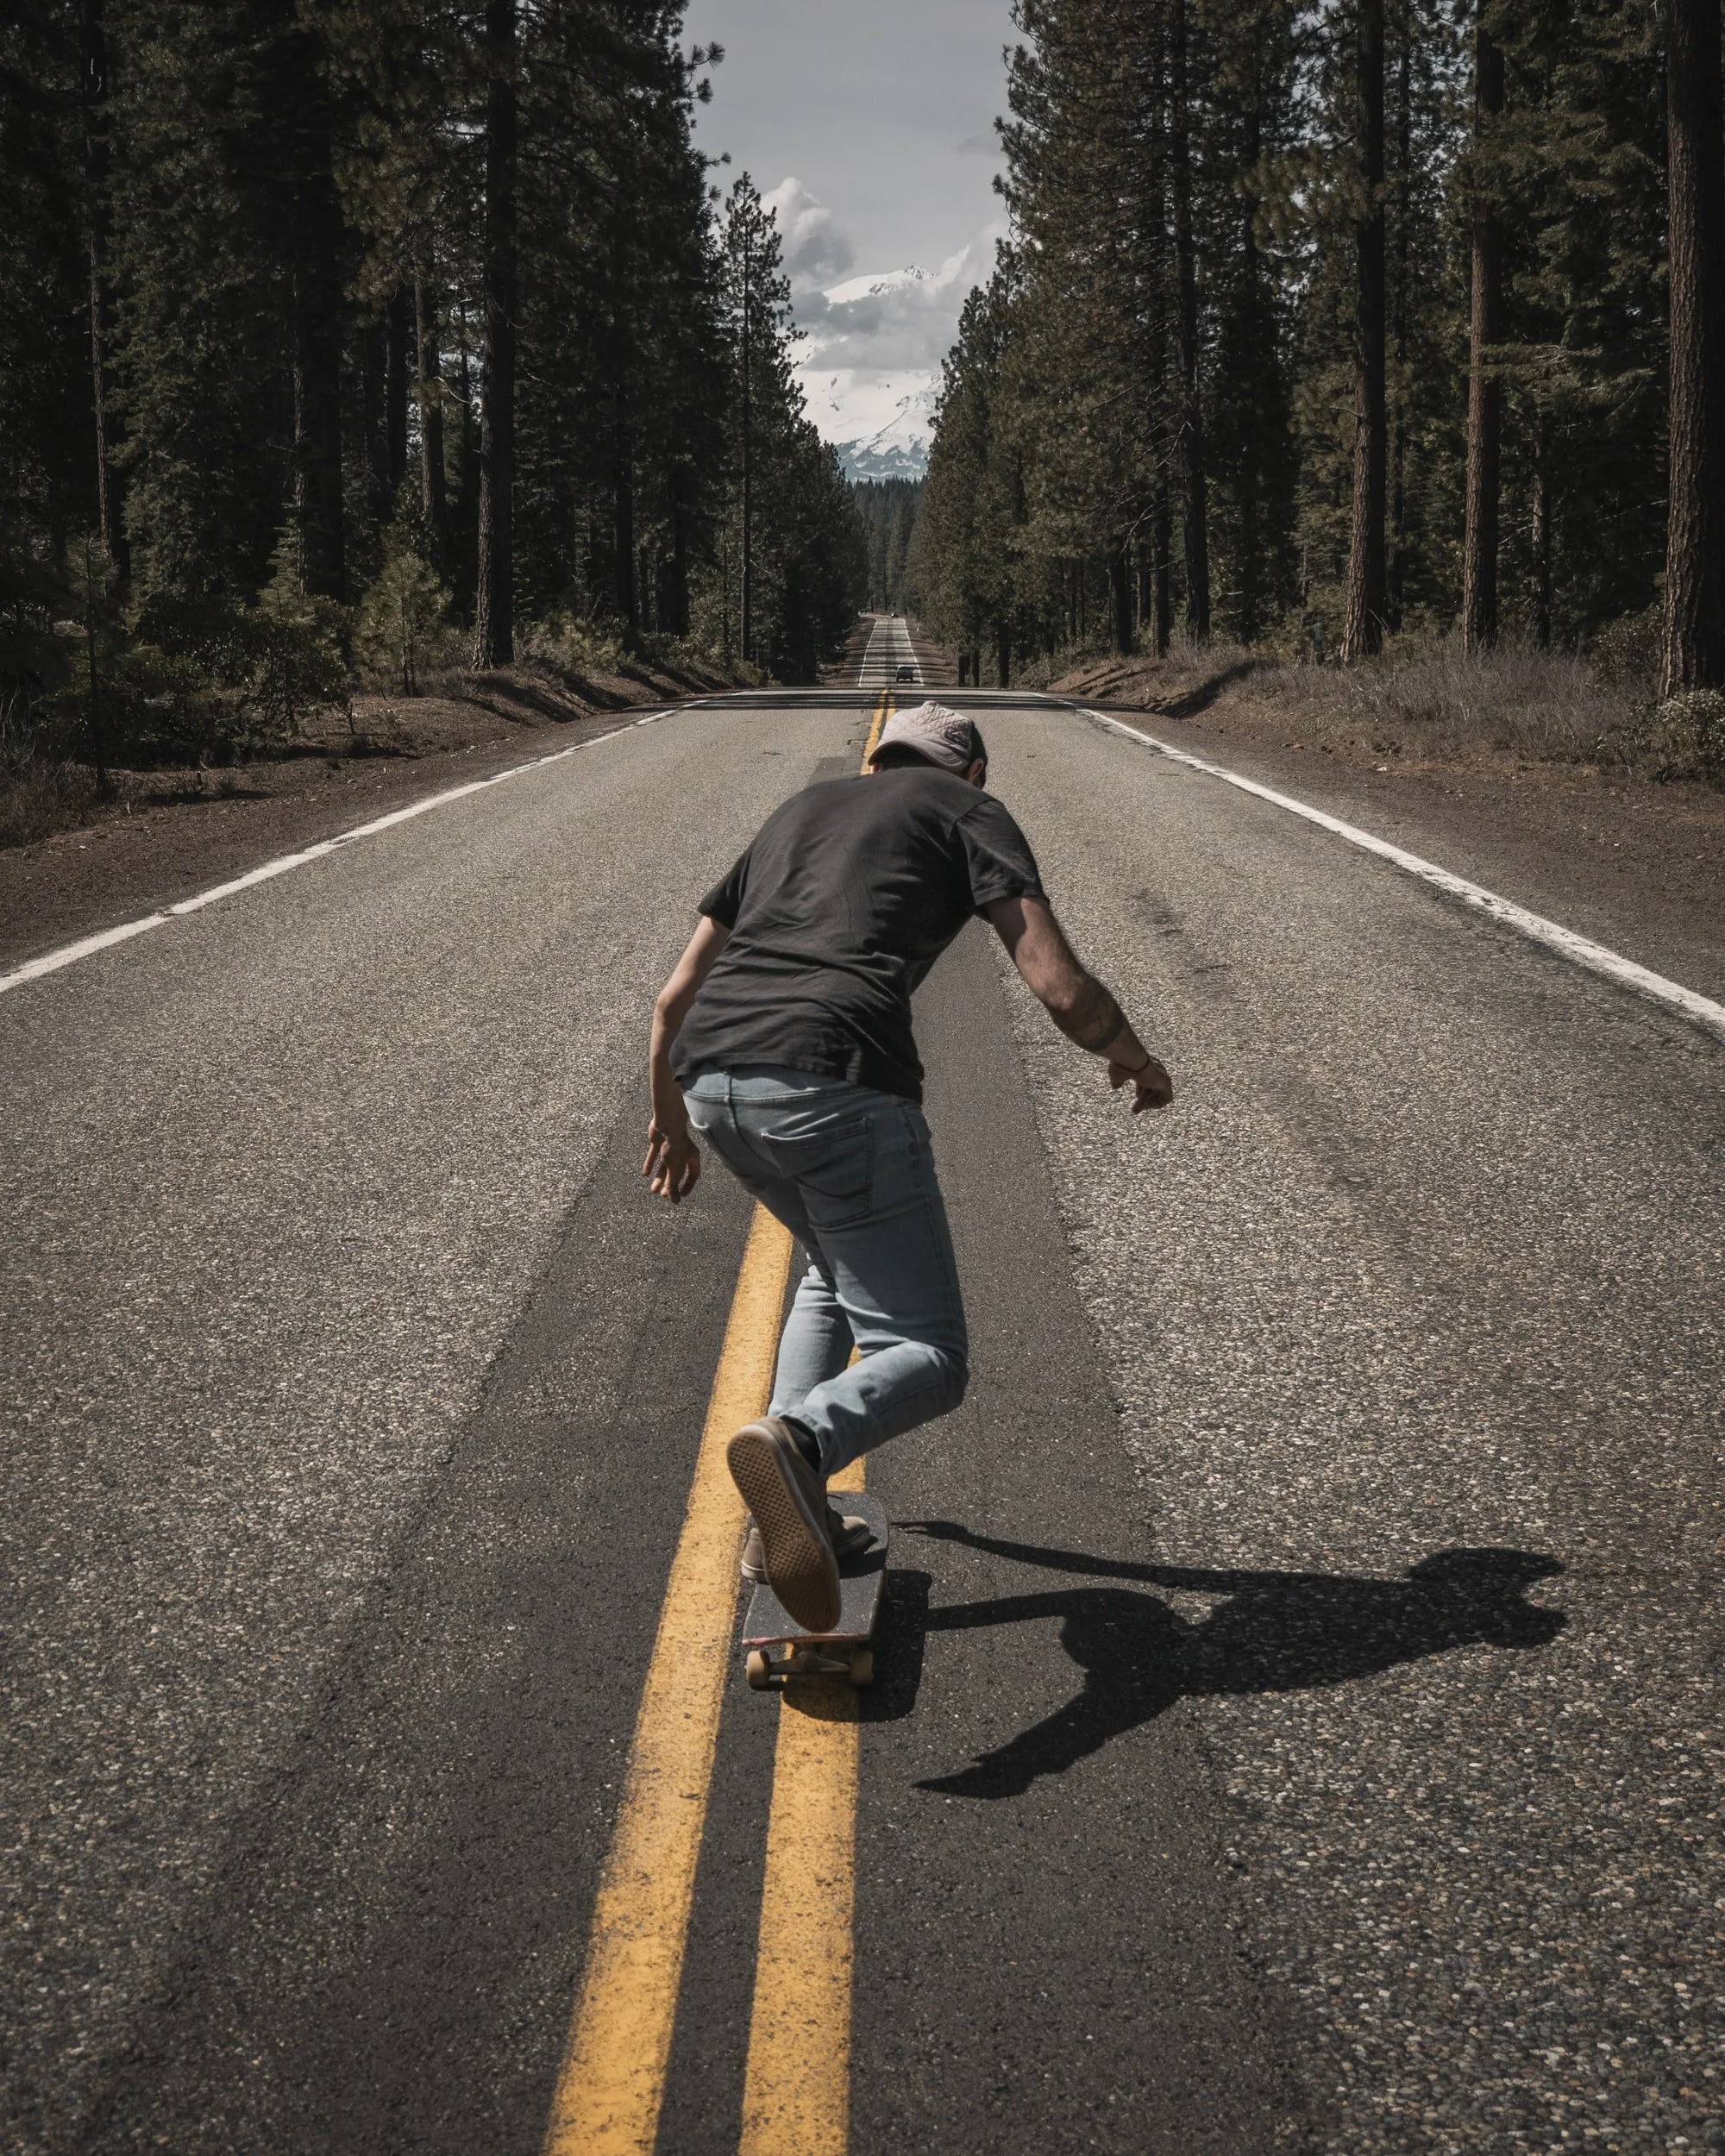
Do you have any previous board sport experience? Whether it is surfing, skating or wakeboarding your previous experience in board sports should help you decide whether you are regular or goofy. If you ride a skateboard with your left foot forward it is most likely you will be regular on a snowboard as well.
The Push Test
This doesn’t always work but can be a good indication of whether or you are a regular or goofy snowboarder. Close your eyes and have someone gently push you from behind. The foot that you step forward with is most likely going to be your front foot on your snowboard.
The Slide Test
Everyone loves a good slide along a hardwood floor and this test can help you determine whether you are goofy or regular. Set up with a pair of socks take a short run up and then slide across the floor. If you are already at the ski resort, you can do this on the snow in your snowboard boots. The foot that you place forward is the foot that you will use to lead your snowboard.
Dont Worry
If you are unsure then there is no need to panic. For beginners most boards are set up centred in duck stance (both bindings at the same angles) this means that the snowboard should ride the same in both directions. Take a couple of runs alternating the foot that was forward. This should help you determine whether you are regular or goofy stance.
Selecting The Correct Snowboard Stance Width
Often overlooked your snowboard stance width will affect your balance on your board therefore affecting how easy it is to manoeuvre the snowboard. Like with most aspects of snowboard stance there is going to be some trial and error involved in choosing the correct width for your snowboard stance and personal preferences.

Reference stance
Most snowboards come with recommended stance marked on the board. This is known as your reference stance. Although this is a good guide it is not a one size fits all approach and you should allow for some flexibility with your stance width. The reference stance is the stance that that board has been designed around but depending on whether you like to ride a slightly shorter or longer board this may need some adjustment.
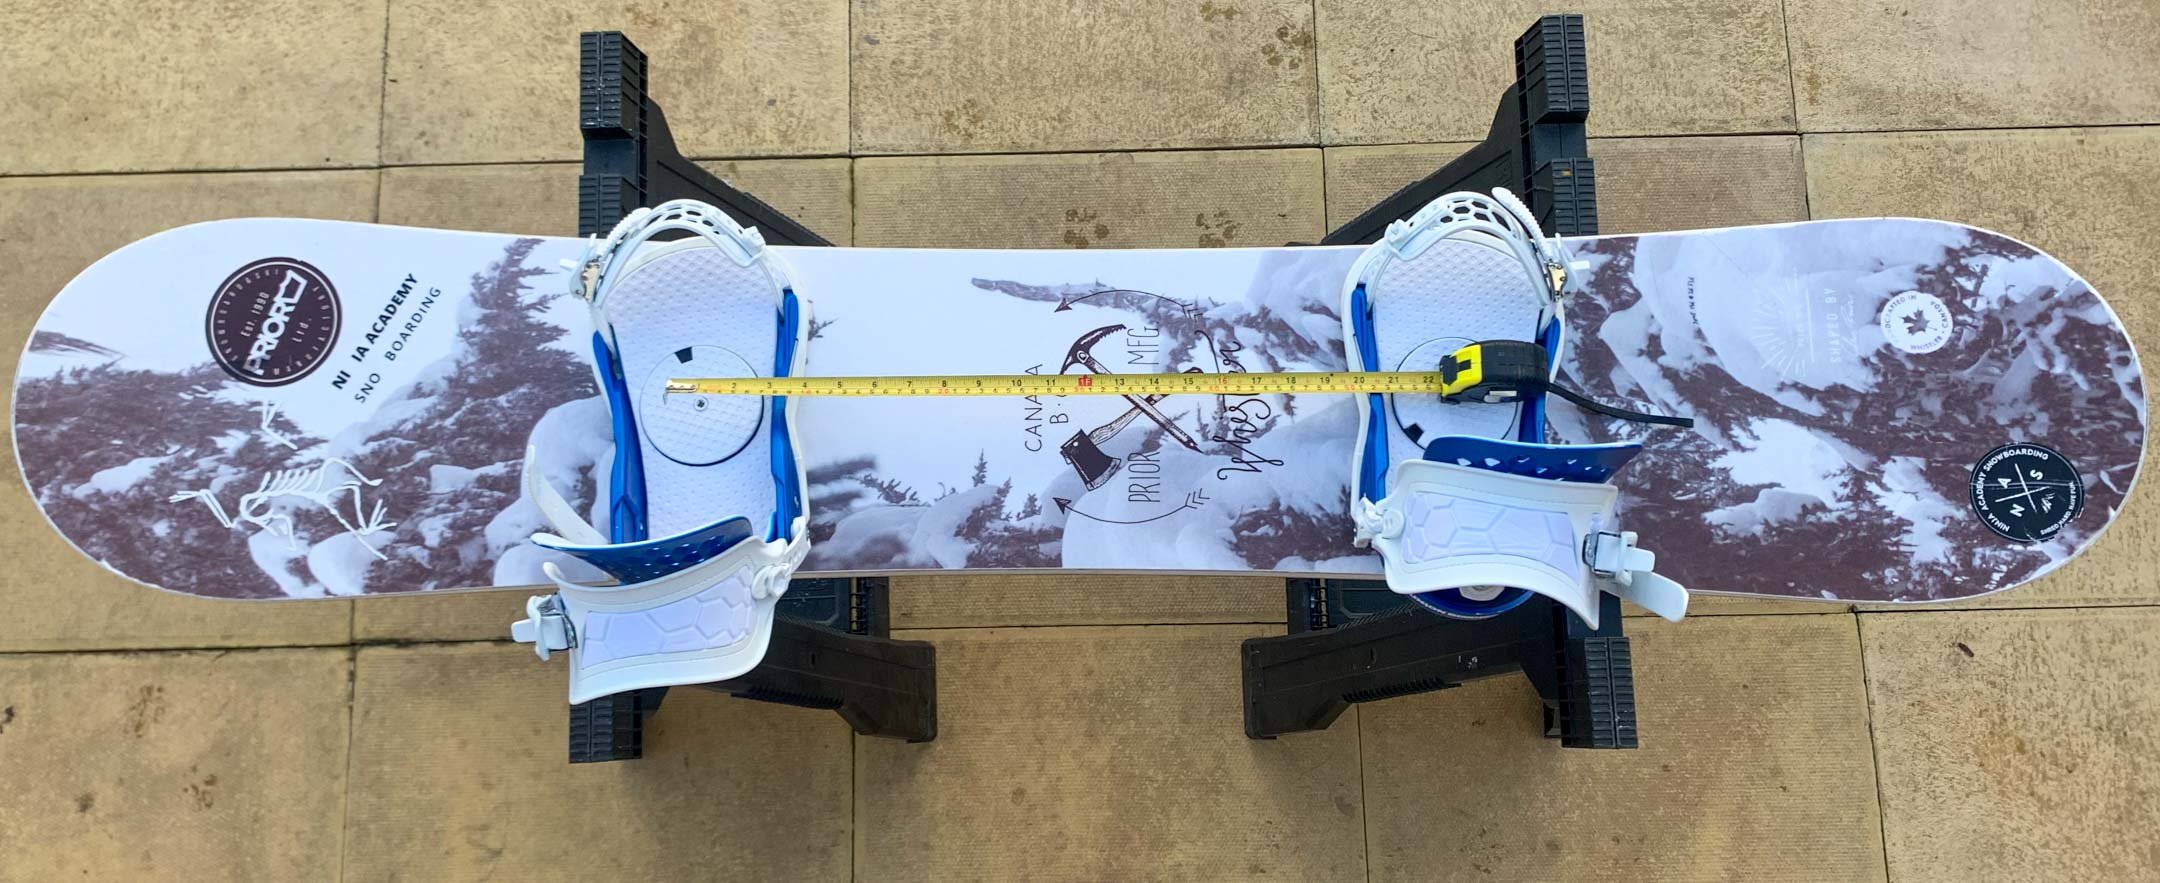
Measure your stance from the middle of both bindings
I am 6ft and ride with a 22.5inch stance width. This took some refining over time and is the width I feel most comfortable with. It is likely if you are shorter than me you will want a narrower stance width. Similarly a taller rider may want to increase the width of their stance in comparison to mine.
Using a snowboard stance calculator is a good place to start but you should refine this information over time to get your desired stance width.

SETBACK OR CENTRED STANCE
Whether you decide to ride with a setback or centred stance on your snowboard will likely depend on two things; where you are riding (piste, park or powder) and how much time you spend riding switch.
If you like to ride switch then having a centred stance is better for ensuring that your snowboard rides and feels the same both in your regular and switch stance. This can be useful for landings for 180’s, 560’s etc where you land facing the reverse of how you take off. A centred stance can help you feel balanced on the board whilst performing ground tricks and butters as well.
If you like to ride directionally whether on or off-piste then having a set-back stance may suit your riding style. Having a setback stance in powder reduces the amount of effort you need to put in to keep your boards nose elevated out of the snow. This means you are less likely to have that dreaded back leg burn on those powder days. Another benefit to riding with a setback stance is that your board has a shorter tail. This means the board can be easier to Ollie or drive through your turns using your back foot.

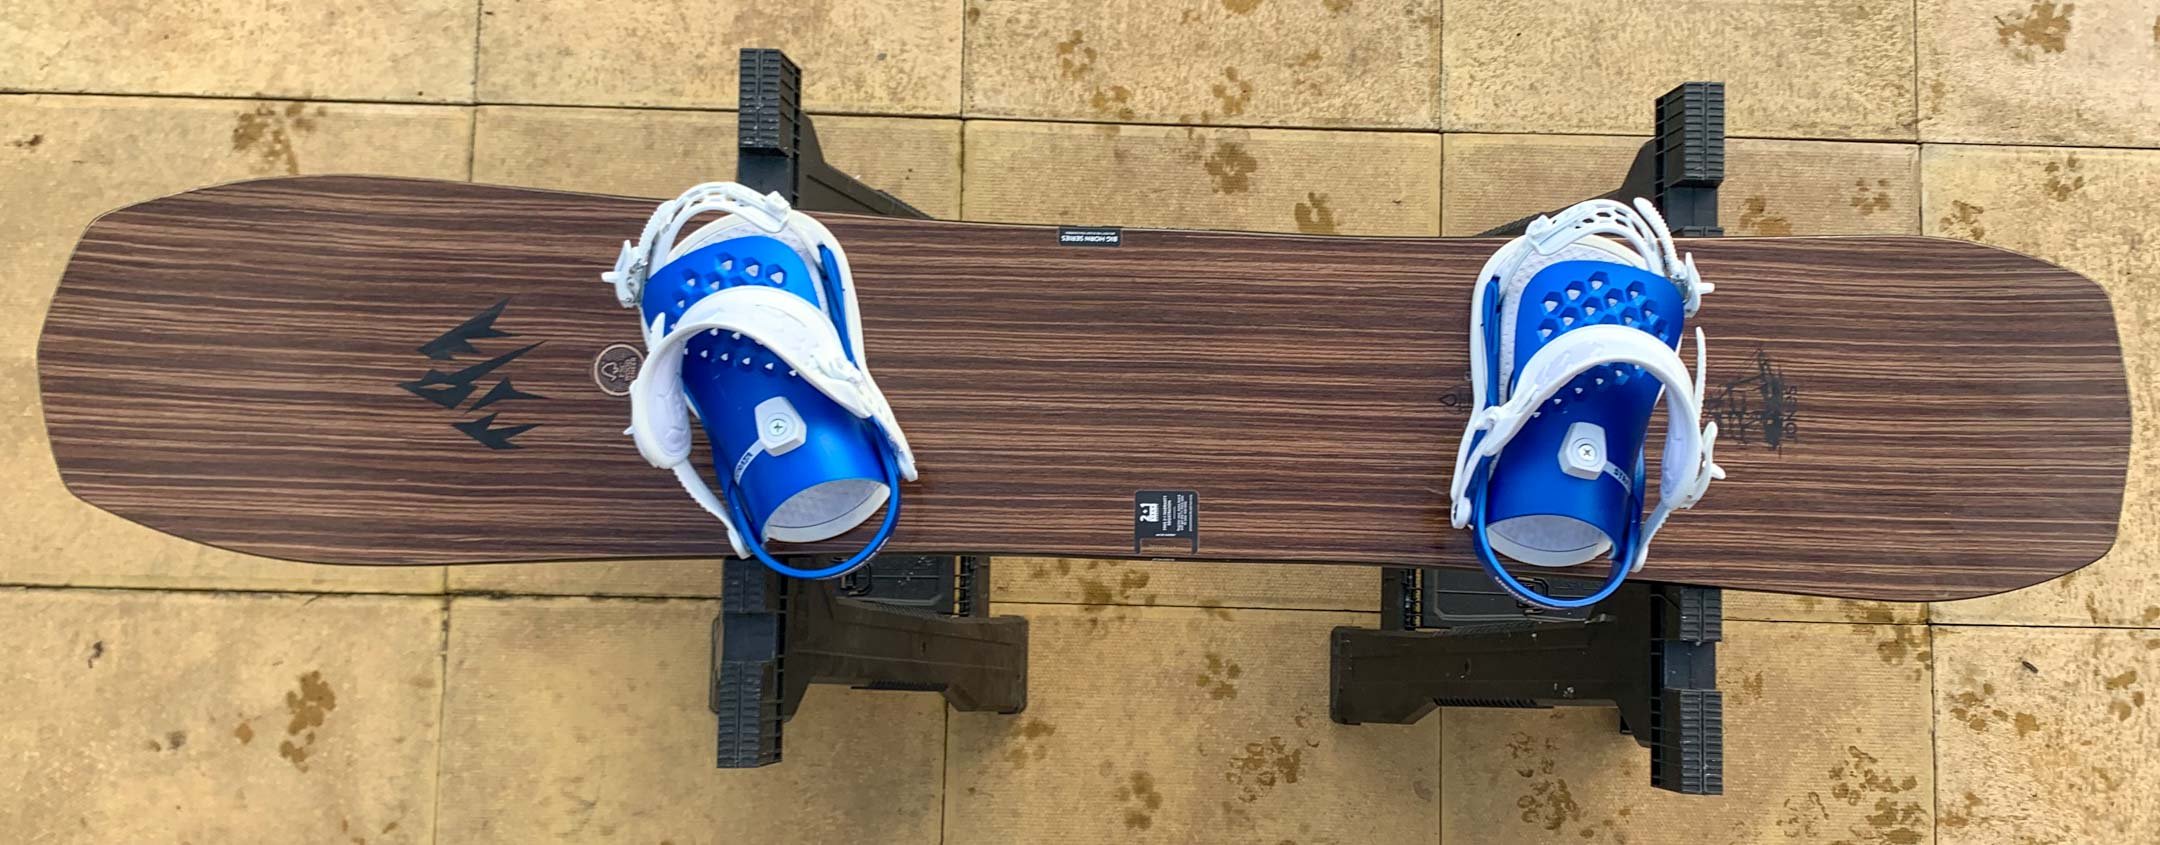
Twin snowboards are normally set up centred.

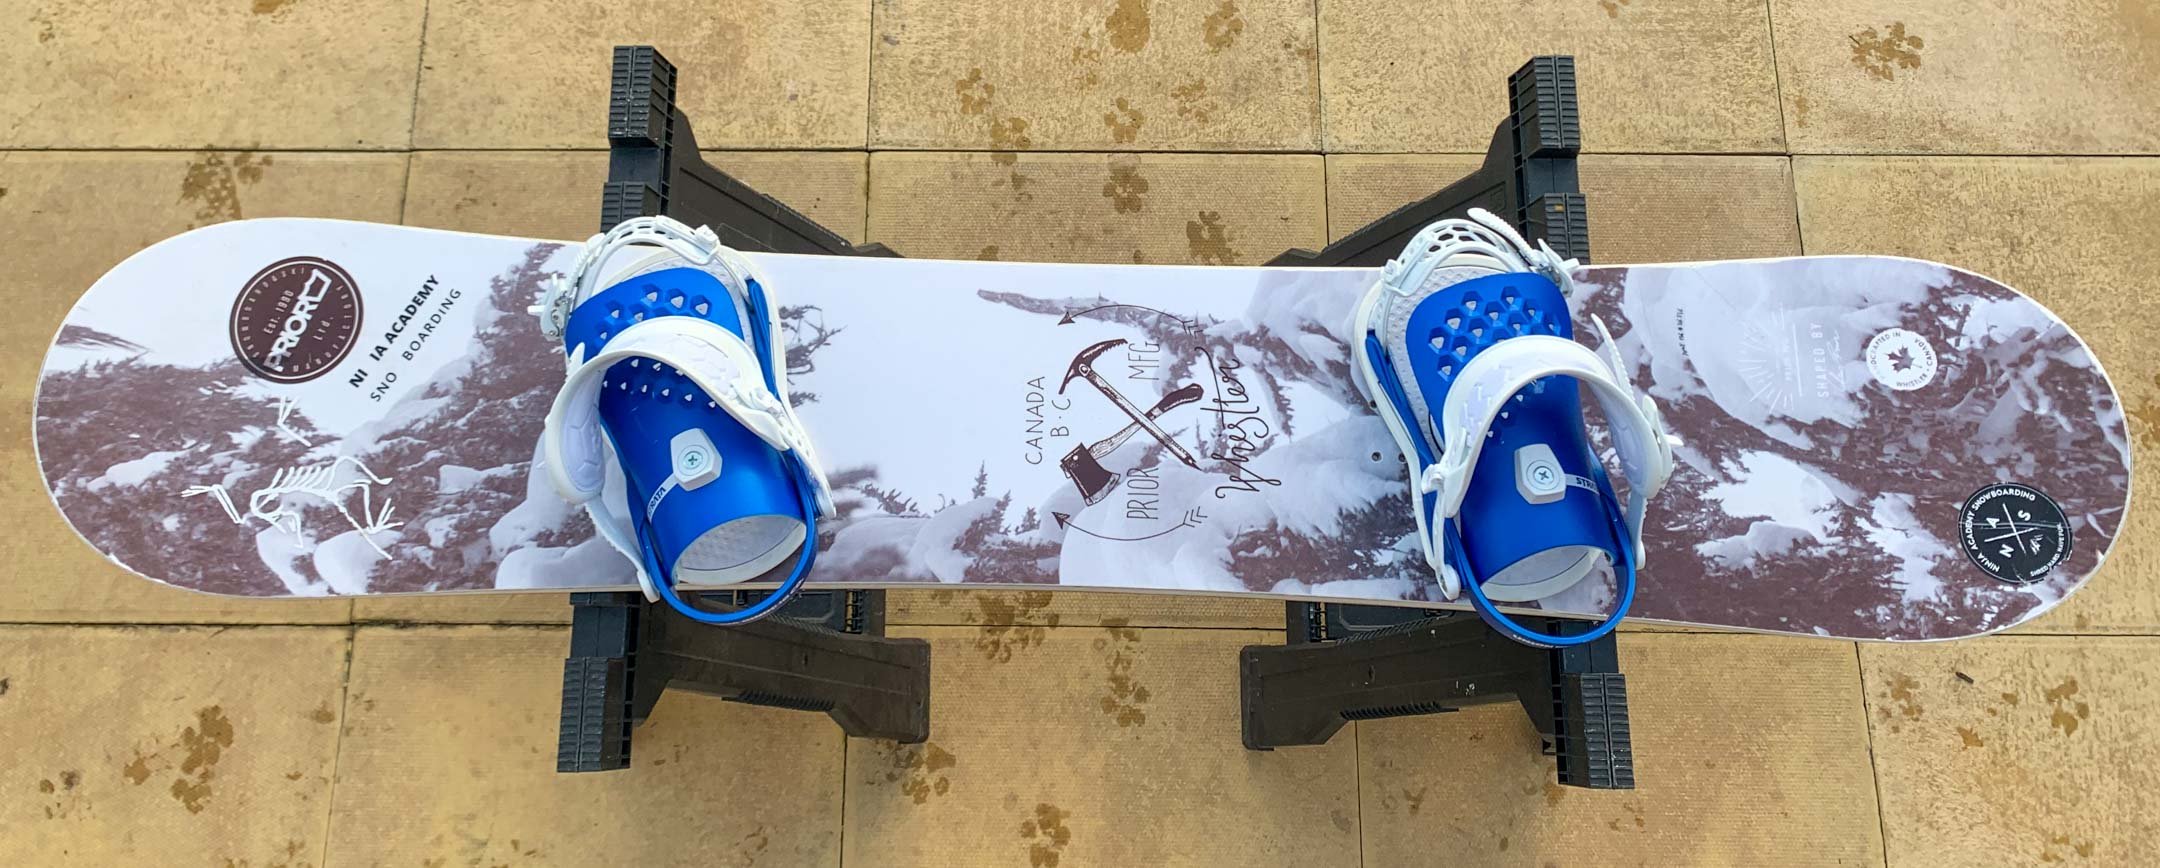
Freeride boards normally have some setback to improve carving and powder performance
HOW TO CHOOSE YOUR SNOWBOARD STANCE ANGLES
Setting your snowboard angles correctly is one of the most important aspects of your snowboard set up. Your binding angles will determine how efficient your body can be at driving the snowboard through a turn. You may wish to adjust your binding angles depending on the type of snowboarding you are doing. Let’s delve deeper into some of the snowboard binding angle options.
WHAT ARE SNOWBOARD STANCE ANGLES?
Setting binding angles refers to how the bindings are angled on the snowboard. Bindings come with a baseplate that allows you to set stance angles between +30 and - 30 degrees. We will delve into the nuts and bolts of binding angles below but it is most common for the front foot to be a + angle and the backfoot a - angle.
FRONT FOOT
I have never met a snowboarder that doesn’t have their front foot angled towards the nose of their snowboard. Furthermore I can’t think of any reason why you wouldn't. The extent to which you angle your front binding will depend on your style of riding and what you want to achieve. An angle of +15 degrees is popular and is in the middle of the possible options. Utilising a +15 to +18 front foot angle seems to be the sweet spot for most of those I have asked.
BACK FOOT
The back foot is where people tend to have more variation in their binding stance angles. This can be influenced by the style of riding that person likes to do the most. Let’s look into some of the popular options.
DUCK
Duck refers to having your front and back feet facing in opposite directions. True duck is where those angles are the same; for example +15 (front) -15 (back) degrees. A duck stance is popular with freestyle orientated riders that like to spend time riding switch as well as regular. Snowboard bindings angles for park do not need to be true duck stance but this may help you feel more balanced when riding switch.

BACK FOOT ZERO
Having a Zero angle on your back foot means that your backfoot runs perpendicular to the snowboard. Using a zero binding angle on your backfoot is where I started before playing around with other stance angle options. Having a zero angle can help you drop your back knee linearly towards the snow helping you lean into toe-edge carves.

BACKFOOT POSITIVE
This has never felt good for me but is popular especially amongst freeriders who like to carve. Running a backfoot positive binding angle can make it more tricky to ride switch, but this remains possible with practice.
CHANGING YOUR STANCE
Changing and adapting your stance over time is natural and is part of how you and your snowboarding evolves. Taking the time to adapt your stance will allow you to feel out your preferred stance with micro adjustments that will eventually land on your preferred stance. You may wish to adapt your stance differently depending on the board you are riding and where you plan to head that day. Personally my stance width tends to stay the same regardless of the snowboard I ride, however my angles and setback will change dependant on where I want to ride that day.